

Mixing Vocals: How to Mix Studio Vocals in 7 Steps
Mixing vocals is one of the most important tasks in music production.
Modern tracks demand vocals that sound big, bold and flawless.
Achieving this highly polished sound takes a lot of careful attention. From songwriting to mastering, every part of the process is important.
But mixing is where you’ll apply the processing that contributes most to your vocal sound.
Getting it right seems difficult. But you can get a great studio vocal if you understand the basic techniques used in vocal production.
In this article I’ll explain how to turn raw tracks into finished vocals in 7 steps.
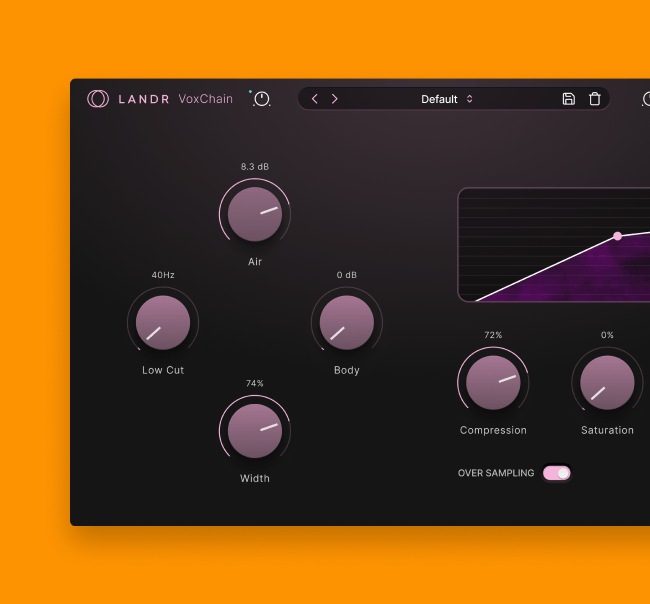
Hot tip: Looking for a single plugin solution for quick vocal mixing? LANDR FX Voice is built specifically to bundle several important components of a vocal mixing chain in one easy-to-use VST.
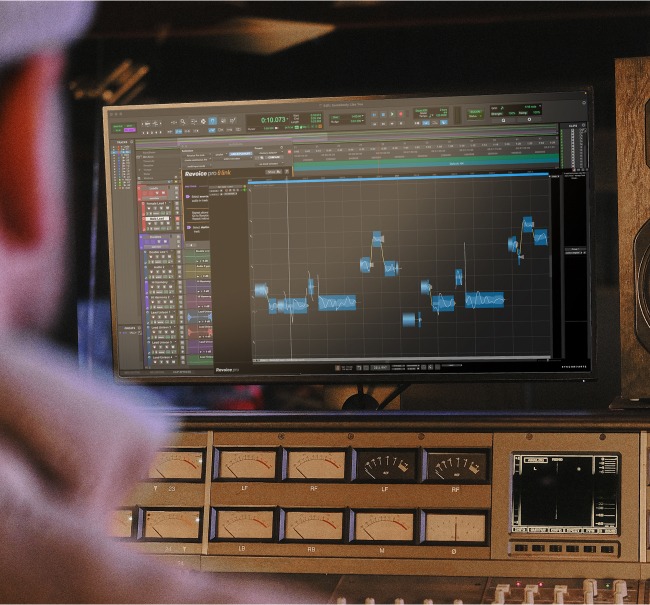
1. Clean up your tracks to get them ready
When it comes to vocals, you need good raw material to get good results.
That means making sure your tracks are ready before the process of mixing vocals even begins.
Editing and comping are essential music production tasks that help create the sound of finished studio vocals.
Editing and comping are essential music production tasks that help create the sound of finished studio vocals.
It’s during these phases that you’ll choose the best moments of each take to create a composite performance and remove any clicks, pops or artifacts that are distracting from the song.
Check out our guide to brush up on the basics of audio editing if you need help getting started with this step.
Finally, address any performance issues with pitch correction to tighten up your composite take if needed.
2. Even out your levels with pre-fader automation
Vocals are one of the most dynamic sources you’ll deal with when recording music. They can be as soft as a whisper or as loud as scream—often within the same track.
The main tool you’ll use to control the dynamic range of a vocal track is compression. But you can get even better results from your compressors if you do a bit of manual control first.
Automation is how you make it happen.
;
To automate the level of the signal before it hits the rest of your processing, insert a utility plugin first in the chain.
Vocals can be as soft as a whisper or as loud as scream—often within the same track.
Instead of automating the fader, make level changes in line by automating the gain plugin.
This way you can control your levels before they hit the next insert.
Play the unprocessed vocal through and listen to how loud it seems. Stop and make gentle adjustments where you feel like the vocal is too powerful or too quiet.
If you have a control surface, you can even ride the fader as you listen to draw in the automation curve—just like back in the analog days!
3. Use compression to control the dynamics
After a basic pass of automation, your tracks are ready for the next step—compression.
Studio vocals need to soar above the mix with every detail in focus. To make each passage sound punchy and clearly audible above the rest, you need to reduce the dynamic range with compression.
With such a prominent element of your mix, getting the compression right is critical. Your vocal needs to sound stylish and sophisticated but never unnatural or lifeless.
One trick that can help when mixing vocals is called serial compression.
Serial compression means using two or more compressors in series, or one after the other.
Serial compression means using two or more compressors in series, or one after the other.
This way you can dial each compressor to address a specific quality of the signal’s dynamics.
When done right, it means that neither compressor will work too hard, making each stage of gain reduction more effective and transparent.
In a signal chain with two compressors, a typical serial compression setup uses a fast and punchy compressor first in line with a slower more gentle one following it.
The first compressor catches the fast peaks and transients at the start of the phrase and the slower one smooths things out overall.
If you’re not sure what fast and slow means when it comes to compressors, check out our in-depth guide to brush up on compression basics.
4. Use EQ to fit the vocal into your track
With compression out of the way, your next step is to shape the tone of the vocal track and make sure there are no problematic frequencies getting in the way.
As always, the specific frequencies and EQ bands you choose to boost or cut will depend on your mix and the tonal balance of the vocals you recorded.
Even so there are some basic guidelines you can follow as a starting point for vocal EQ when mixing vocals.
First off, use a high-pass filter to gently roll off the lowest frequencies in the vocal if they’re making the sound too cloudy or bassy.
Hot tip: If the vocal sound is especially boomy, the extra low end may cause your compressors to overreact. Use a high-pass filter before the compressors if you encounter this issue.
Next, pay attention to the rest of the mix and experiment with boosting or cutting other frequencies to see what makes the vocal stand out in the texture.
Every mix is different but here are some areas you can investigate with vocal EQ:
- A high end boost around 8kHz-12kHz can bring out the sensation of “air” in the top end
- A cut in the presence zone (3.5k to 7k) can help decrease harshness
- A boost in the midrange (800 Hz to 2.5 kHz) can create a sense of power
- A cut in the low mids (150 Hz to 350 Hz) can clear up muddiness
Vocal recording takes place under very specific circumstances. Unexpected issues can come up with the singer so close to the mic in an environment like a DIY vocal booth.
Sometimes specific frequencies will poke out and get distracting if you listen hard.
If these peaky frequencies are jumping out too much, you can try surgically removing them with a steep Q notch filter.
Be careful though—it’s easy to get carried away notching out to too many frequencies and changing the sound too much.
5. Use a de-esser to decrease sibilance
With multiple stages of compression and EQ on your vocal track, some issues become more prominent.
With multiple stages of compression and EQ on your vocal track, some issues become more prominent.
I’m talking about the distracting effect called sibilance that occurs when words with the ‘S’ sound pop out and sound extra harsh.
Sibilance can come from a poor match between the mic and singer. In the worst situations it can cause a noisy wooshing effect that’s much louder than other syllables the singer pronounces.

Our powerful, AI-driven mastering engine listens to your song and delivers pristine, studio-quality music that’s ready for release. Master a track.
De-esser plugins are how you control it. A de-esser is a compressor that only affects a narrow range of frequencies where the sibilance occurs.
Check out our guide to get a detailed overview of how de-essers work and some of the best plugin options available.
You may not be able to remove sibilance entirely, but inserting a de-esser at this point in your vocal chain is your best option if you face this issue.
6. Create ambience with send effects
Now that your vocal is well situated with dynamics and EQ it’s time to create a sense of realism and space with audio effects.
It’s best practice to eliminate any natural reverberation from the room when you record your voice. That’s why engineers use vocal booths and close miking techniques while tracking.
The benefit to recording this way is that you get to craft the ambience with delay, reverb and other effects after recording.
Your goal is to situate the vocal sound in the song so that it sounds natural and blends in with the rest of the texture.
Apply these effects on aux return channels and set their output to 100% wet. That way you can use your DAW mixer to blend them in precisely.
Feel free to get creative when it comes to send effects, but here are a few ideas to get you started:
- Use a stereo chorus create width and depth
- Use a short delay to simulate a double tracking effect
- Use smooth plate reverb for a vintage style sound
- Use a realistic room reverb for an intimate sound during sparse sections
7. Use automation and momentary effects to create interest
With a solid basic tone and stylish send effects, you’re almost done mixing vocals.
The last step is to create interest by adding effects that emphasize the arrangement.
I’m talking about engaging effects that happen during buildups, breakdowns, choruses and any other time the vocal needs to command extra attention.
Creating this sense of action in the vocal sound can be as simple as automating the level or effects mix.
Experiment with sampling, creative pitch correction and automating individual effect parameters to add intrigue to your vocal sound.
Vocal mixing techniques
Mixing vocals is critical to creating a track that catches a listener’s attention.
A great vocal can make or break a song. Creating the right conditions for the vocal to shine is why mixing is so important.
If you’ve made it through this article you’ll have a head start on the most important techniques to mix vocals.

Michael Hahn is an engineer and producer at Autoland and member of the swirling indie rock trio Slight.
@Michael HahnGear guides, tips, tutorials, inspiration and more—delivered weekly.
Keep up with the LANDR Blog.