

Recording Vocals at Home: 9 Big Mistakes and How to Avoid Them
Recording vocals properly is the cornerstone of a good mix.
They tell the story and set the emotional tone. They tie the entire project together. The truth is, an amazing vocal will make or break your song.
But there’s lots of variables that get in the way of capturing a great take.
In this article, you’ll learn common recording mistakes that can ruin any vocal and how to avoid them.
Here’ 9 vocal recording mistakes to avoid:
- Choosing the wrong room
- Wrong mic placement
- Your room isn’t treated
- Using the wrong microphone
- Using an omnidirectional mic
- Keeping the mic at lip level
- Your levels are too hot
- You only recorded one take
- You’re not encouraging your singer
Let’s dive in!
1. You chose the wrong room
Here's everything you need to know about setting up a home studio.
It’s easy to think that mixing has the biggest impact on the vocal. But in reality, your recording is far more important.
One of the most influential factors during the recording phase is your choice of room.
Recording in a home studio poses many challenges…
It’s easy to think that mixing has the biggest impact on the vocal. But in reality, your recording is far more important.
You probably don’t have access to a professional vocal booth. You only have access to what you have—maybe just a few rooms in your home:
- A kitchen.
- A bedroom.
- A bathroom.
- A living room.
- And so on…
It’s a mistake to simply pick the one that’s most convenient!
The room that an instrument is recorded in always changes the tone. This is ESPECIALLY true for vocals.
If your vocals are recorded in a bad room, it’s extremely obvious by the end of the mix.
Reverb pulls the vocals back in a mix. The more reverb an instrument has, the less it sounds present and “in your face.” It sounds farther away from the listener.
You want the singer to sound up-close and personal. Recording vocals in a very reverberant room will make that intimacy nearly impossible.
The room that an instrument is recorded in always changes the tone. This is ESPECIALLY true for vocals.
Room reflections can also cause compression and pitch correction to sound unnatural. It’ll make the vocals sound “fake,” like they were tacked on at the end of the mix.
So… what room should you pick?
Try to use a small-to-medium sized room with a lot of stuff in it. Specifically, with a lot of SOFT stuff like beds, couches, pillows, rugs and so on.
All of those items tend to absorb sound, making the room less reverberant and more neutral for getting the best vocal
You also want to avoid rooms with a lot of hard surfaces and windows. So your kitchen and bathroom are probably not the best places to record a vocal.
Rooms: The perfect balance
There’s a flip side to this: You want your room to be dead, but not TOO dead.
If you put so much absorption material in a room that ALL of the room sound is gone, your vocal will sound dull and muffled.
There is, in this case, too much of a good thing. Find a balance.
Contrary to popular belief, a closet is NOT a good room for recording vocals. That myth started because professional vocal booths tend to be small and secluded.
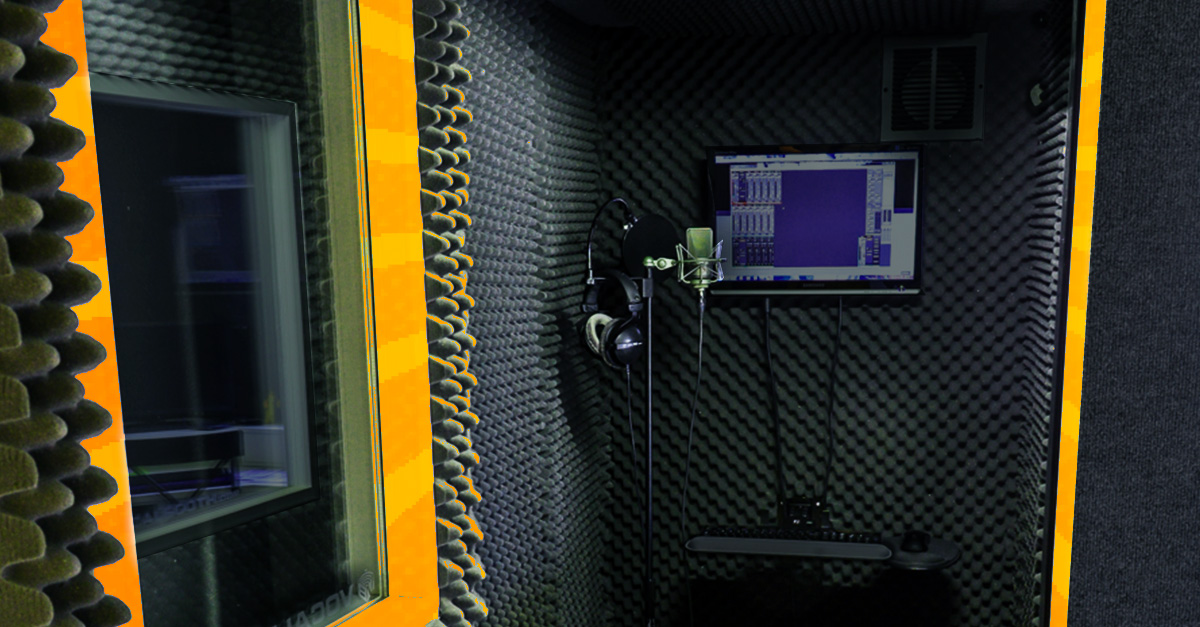
But the difference is that professional vocals booths are often covered in soundproofing fiberglass over 12 inches deep! Unless that’s how your closet was built, avoid it for recording vox.
No matter how many clothes are in them, a closet simply does not have enough absorption material to keep the room resonances out. Because of that, the reverb, though extremely short, will be extra loud in the microphone (especially once the voice is compressed).
So, think about this when you’re recording vocals. You’ll get a better sound with a well treated room!
2. Your mic placement is wrong
Once you’ve found the right room, your job isn’t over. Far from it.
The next common mistake is mic positioning errors. It may seem small, but trust me—mic position is important to the tone!
Your 2 rules of thumb for mic placement are:
- Don’t put the microphone in the exact center of the room.
- Put the microphone as far away from the walls as possible.
This will prevent you from recording any weird room resonances that occur outside the “sweet spot.”
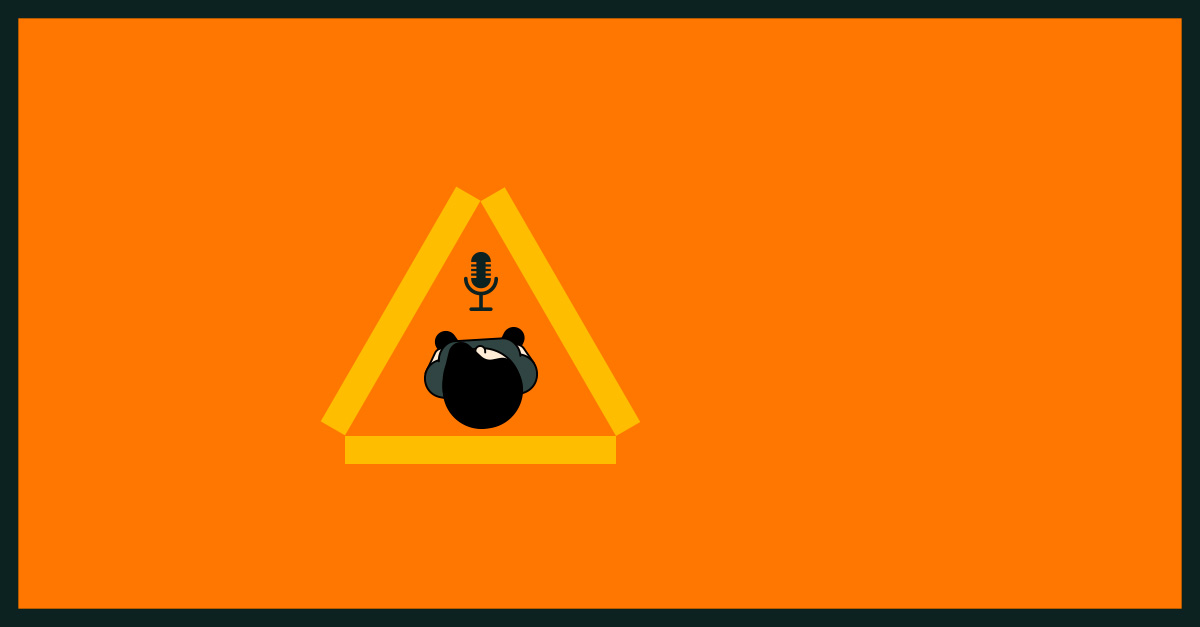
So where’s the sweet spot? Here’s a simple chart to show you:

Stay out of the orange area and you’re good. You don’t want to be in the center of the room, and you don’t want to be close to the sides either.
Stay in the brown and you’ll be fine.
🧠 Hot tip
If you can, point the mic at one of the corners of the room. This increases the distance to the closest wall.
If you can, point the mic at one of the corners of the room. This increases the distance to the closest wall.
3. Your room isn’t treated
Condenser microphones are pretty sensitive. They can pick up stray sounds from all the way across the room.
So treating the space around them is essential!
If you have proper acoustic panels, use them to create a temporary vocal booth around the vocalist.
If you don’t have proper acoustic panels, use what you have on hand—Mattresses, duvets, and heavy curtains can work to create a makeshift booth.
Wondering if something will absorb enough sound? Try shouting at it and listen for how much sound it absorbs. The more the better.
🧠 Hot tip
If you can`t create the classic “triangle” vocal booth, then put something up behind the singer`s head. That`s the area that will affect the sound the most.
4. You’re using the wrong microphone
At this point, you’re starting to understand the main rule of recording vocals: EVERYTHING affects the tone. So take the time to get it right.
Each vocalist has a different tone to their voice. Some are deep and powerful, others are high and airy. There’s a thousand possibilities in between.
Match your microphone to your vocalist!
Match your microphone to your vocalist!
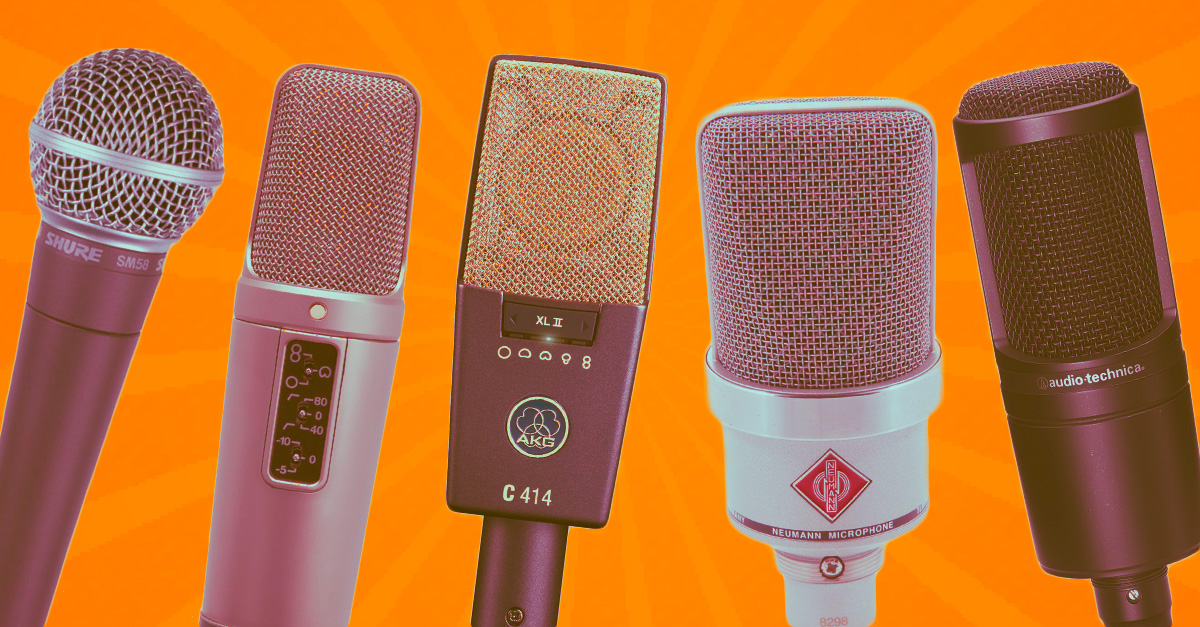
Every microphone is going to sound different. I’m not going to bore you with talk about the frequency curve of every single mic on the market.
But there are some general concepts that are important to know.
- Small Diaphragm Condenser Mics
Small diaphragm condenser mics tend to sound bright and airy. The bass response is noticeably lower.
- Large Diaphragm Condenser Mics
Large diaphragm condenser mics tend to sound clean and focused. The frequency response tends to be pretty balanced.
- Dynamic Mics
Dynamic mics tend to sound warmer and more aggressive. There’s less top end, which works perfectly for certain singers and genres.
The mic you pick will depend on what you’re looking for from your vocalist.
You could be looking for a mic that will accent their natural tone. For example, if you have a bright and airy singer and you want their tone to be even more obvious, then a small diaphragm condenser mic is perfect.
Other times you might want a mic that will balance their tone. If you feel like the bright and airy tone from your vocalist is too much, then a dynamic mic might be perfect to warm things up a bit.

No matter what, make sure you experiment! Set up 2 to 3 microphones and have the vocalist sing the chorus into each of them. Listen back to the tracks and see what you think.
If you only have the budget for one microphone, I recommend the Se 2200a II. It’s an affordable condenser microphone that’s well balanced for the price. If you need to start your microphone collection somewhere, it’s a great place to start.
🧠 Hot tip
Change the mic out if your vocalist is going to be singing harmonies! The change in tone will help the main vocal to stick out more.
5. You’re using an omnidirectional mic
Let me be clear: Omnidirectional microphones can sound awesome. Especially for intimate, whispery vocals.
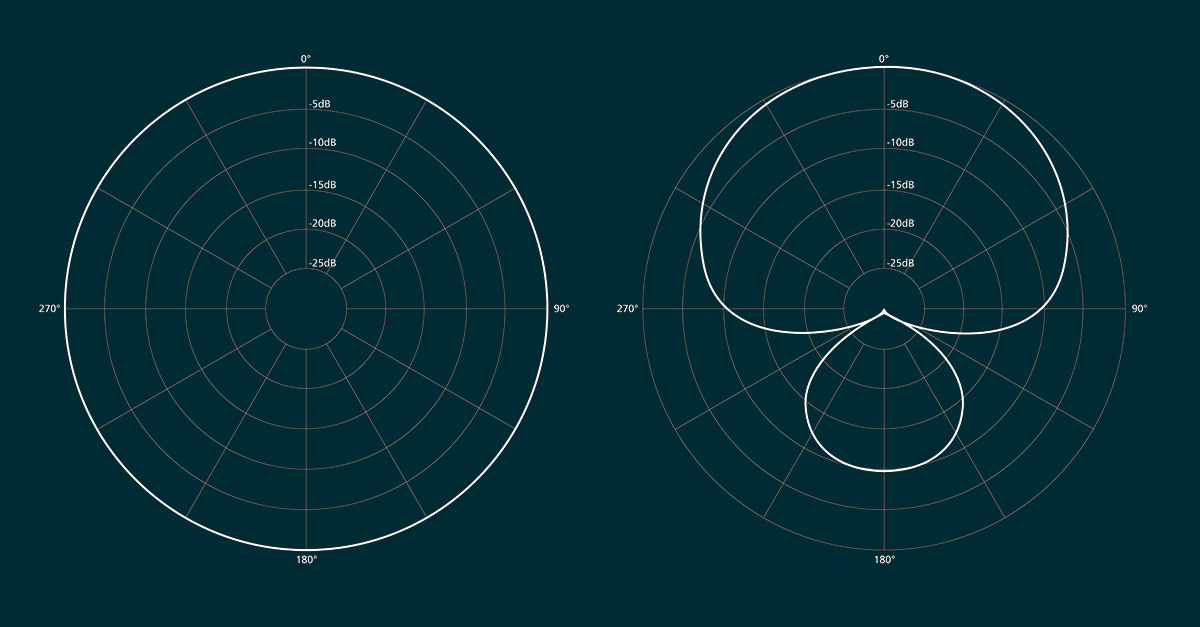
But for home recording, they have a fatal flaw: They pick up EVERYTHING in the room.
While cardioid microphones (like the Se 2200a C) pick up sound from one direction, An omnidirectional mic does exactly what the name says: It picks up all sound in the room equally.
When you’re recording vocals in a professionally treated sound booth, using an omnidirectional mic is totally fine. There’s very little room sound for the microphone to pick up, so it’s irrelevant what direction it picks the sound up from.
But when you’re recording at home, in a bedroom or living room, omnidirectional mics make it nearly impossible to record a dry vocal.
So unless you have a well treated room, stay away from omnidirectional mics.
6. You’re keeping the mic at lip-level (unless that’s what sounds best)
Once you’ve found exactly which room and mic to use, you’re almost done.
You already know where to put your mic in relation the room, but where do you put it in relation to the singer?
These three placement factors can change the tone of your microphone:
1. Distance
If you’re using a condenser mic, the distance between the mic and the singer will have the greatest effect on the tone because of the proximity effect.
The proximity effect is a phenomenon where the closer you get to the microphone, the boomier your vocals become:
- If I was a 12 inches away, the vocal would sound open and airy.
- If I was 5 inches away, the vocal would sound warm and intimate.
A good starting place is to set the singer 6 inches away from the mic, and then move them forward or backward to get the tone you’re looking for.
2. Height
Height is another factor in the tone you get from your mic. When a mic is at lip level, it’s at your “default” height, so to say.
When you lower the microphone, you’re increasing the low end of the voice. The closer you get to the chest, the more prominent the low-end.

The opposite is true as well – when you raise the microphone, the top end is accentuated.
Make sure the vocalist looks straight ahead when singing, otherwise they’ll put unnecessary stress on their vocal chords!
3. Axis
Finally, the last factor is the axis of the microphone.
Pointing the microphone at the singer is standard, of course. But when you rotate the mic, you’re reducing the bass from your singer. You’re also reducing plosives.
This is a great thing to try for singers with heavy P’s and S’s. Try moving the mic 20 degrees to the left and right and see what sounds best.
If you tweak these three variables accordingly, you should get the tone you’re looking for before you ever reach for an EQ!
7. Your levels are too hot
This one is easy to overlook…
In the age of digital, the recording levels you set don’t matter nearly as much as they did back 60’s and 70’s.
But that DOESN’T mean they don’t matter at all!
In the age of digital, the recording levels you set don’t matter nearly as much as they did back 60’s and 70’s. But that DOESN’T mean they don’t matter at all!
When you’re setting levels, try to maintain 10dB of headroom.
Without getting into the technical details, the digital sweet spot is basically an average level of -18dBFS. That’s where most plugins are going to sound best.
When setting your levels, try to get an average of -18dBFS. You should be peaking around -10dBFS. Make sure you’re definitely not peaking higher than -6dBFS.
This keeps your levels low enough that you won’t accidentally clip (which means you’d have to re-record the part), but also avoid recording too quiet either.
8. You only recorded one take
Make sure you’re recording several takes when you record a vocalist.
Sometimes you’re working with a singer that you think is so good that one take is enough. You would never edit it! It was perfect!
And then, inevitably, you start to mix, and… oh. There’s out of tune notes. There are spitty words. Some phrases are out of time. Yikes!
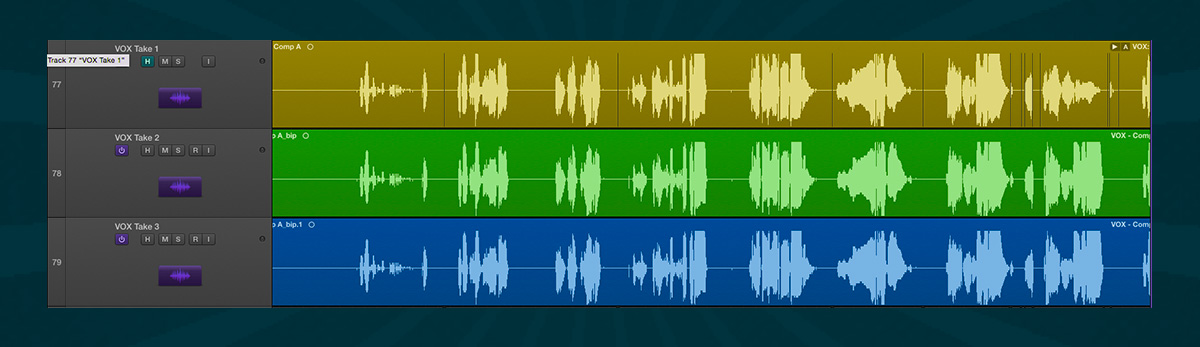
Make sure you have enough content to work with! You need to comp your vocals to create the best possible version for your song. It’s better to have too many takes rather than not enough.
Sometimes the singer won’t know when they’re doing something wrong. Gently coach them towards a better performance, but be wary of introducing self-doubt. You’re there to help, not to hurt.
Rule of thumb: Make sure to record a minimum of three takes from the singer. Even if the first take is a banger!
I always find something wrong later. And I always thank myself.
9. You’re not encouraging your singer
The voice is something we ALL have. We use it share our thoughts, our hopes, and our fears.
That’s why confidence is so important to a singer. They have to feel the emotion and KNOW they sound good.
When you’re recording vocals, you need to wear a few extra hats. You’re not just the engineer or producer anymore. You’re the coach, the therapist, and the cheerleader.
[adbutler zone_id=”291816″ secure=”1″ type=”asyncjs”]
You have to do your best to nurture their best performance!
Here’s a few things to try:
- Set the room ambience: If it’s a happy track, make the room extra bright. If it’s more mellow, just turn on a lamp. Do whatever would make your singer feel comfortable based on the mood of the track.
- Complement them regularly: Singing tends to make people very self-aware. Make them feel confident in their performance, and they’ll actually give you a more confident take.
- Coach occasionally, but NEVER criticize: Sometimes the singer won’t know when they’re doing something wrong. Gently coach them towards a better performance, but be wary of introducing self-doubt. You’re there to help, not to hurt.
- Get them to visualize the lyrics: Singing is intensely personal! We can hear the emotion in someone’s voice without even trying. Help your singer to give a more emotional performance by talking them through how they feel about the lyrics. They need to be thinking of the lyrics as a story, not as just words.
- Take more breaks than you think you should: The voice gets tired very quickly if worked too hard. For every 25 minutes of recording, take a 5 minute break.
Do these things and you’ll get a quality performance.
Pitch Perfecting
Recording vocals is an art, for sure. There are so many variables to consider!
But the more you practice, the better results you’ll get—Avoiding these 9 mistakes will help you get there faster.
Rob Mayzes is an audio professional, musician and educator. He’s helped millions of home studio owners to produce better music and mixes through his website Musician on a Mission.

Rob Mayzes is an audio professional, musician and educator. He's helped millions of home studio owners produce better music and mixes through his website Musician on a Mission.
@Rob MayzesGear guides, tips, tutorials, inspiration and more—delivered weekly.
Keep up with the LANDR Blog.