How to Build a DIY Vocal Booth for Studio Quality Vocals

A DIY vocal booth is the best solution for recording great sounding vocals at home.
Vocals are one of the most important elements of a song. Getting them right in a home studio can be difficult.

Unlimited mastering & distribution, 1200 royalty-free samples, 30+ plugins and more! Get everything LANDR has to offer with LANDR Studio.
There’s no fancy mixing techniques that can save you if you record your vocals poorly at the source.
But it’s not hopeless. With a little knowledge of the basics and some common materials you can create a surprisingly effective vocal tracking environment at home.
Here’s everything you need to build a DIY vocal booth to get studio quality vocals.
Why build a DIY vocal booth?

Here's everything you need to know about setting up a home studio.
You can’t just record your vocals in any room if you want them to sound polished and professional.
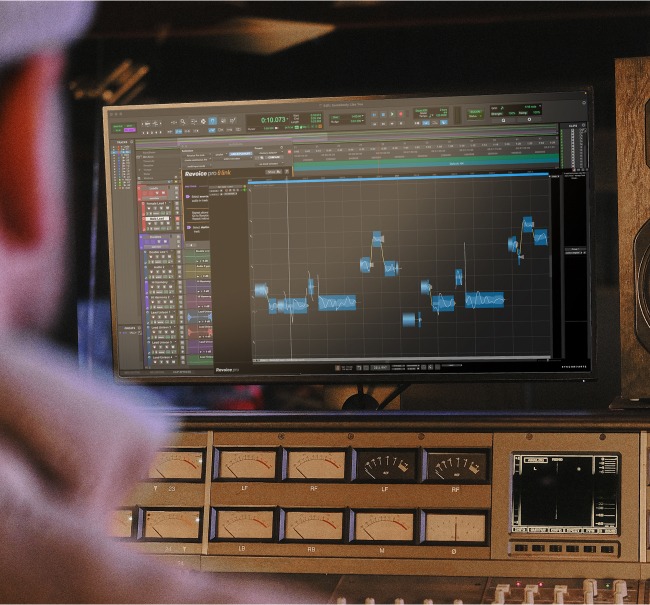
Any seasoned pro engineer will tell you that the environment where you record is just as important as your gear—if not more!
Since vocals are often the loudest, most prominent element of a track any negative effects of a bad sounding room will be front and centre in your mix.
Engineers record vocal tracks as dry and direct as possible to make them big and authoritative in a mix.
Engineers record vocal tracks as dry and direct as possible to make them big and authoritative in a mix.
That means reducing the environment’s impact on the recording as much as possible.
Lots of uncontrolled room reflections competing with the dry signal can reduce the punchiness and upfront feel of a vocal track—and make it sound farther away.
And that’s not all. These bad reflections contribute to a negative effect called comb filtering that’s impossible to remove after recording.
Highly comb filtered vocal takes will turn your mix process into a nightmare. That’s where vocal booths come in.
Pro studios invest thousands in building vocal booths with perfect acoustics, but you can get most of the benefits just with DIY methods.
No matter what genre you’re working in, if your music has vocals a DIY recording booth setup can make them sound better.
1. Partition a larger space
You might think a tight, enclosed space like a closet would be ideal for recording vocals. But a space that’s too small is just as problematic as a big boomy one.
It’s more difficult to completely neutralize the reflections and buildups of low end in smaller spaces. And the main resonant frequencies in the room (room nodes) are naturally higher in small spaces.
It’s more difficult to completely neutralize the reflections and buildups of low end in smaller spaces.
These annoying resonances can get right up into a vocalist’s main range if the space is small enough.
The best approach is to partition a larger space like a bedroom to create your DIY vocal booth.
You’ll need to be able to hang the absorbent material from the wall or ceiling.
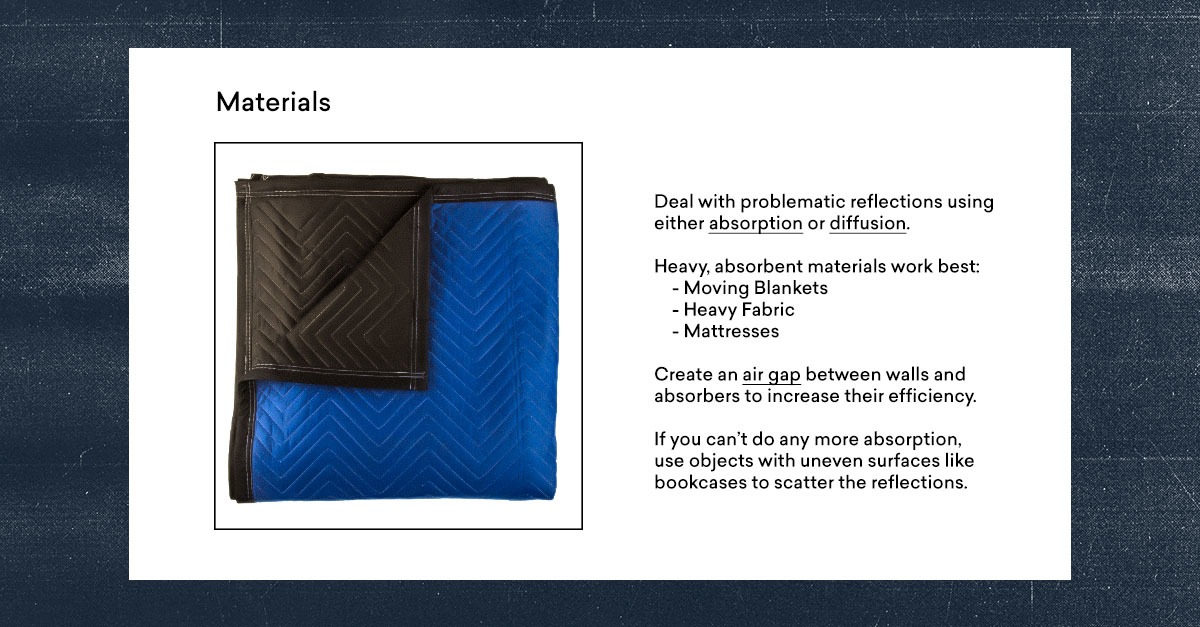
2. Use a sound absorbing material
Despite the persistence of the urban legend, egg cartons do absolutely nothing for the sonic qualities of a room.
Despite the persistence of the urban legend, egg cartons do absolutely nothing for the sonic qualities of a room.
The best option for sound absorption are real acoustic panels. You can DIY those too, but that might be more effort than you bargained for.
The next best option is to use moving blankets or another type of heavy fabric. A mattress can even work in a pinch!
Commercial acoustic foam may look like the perfect solution but its not necessarily more effective than basic absorptive materials for reducing reflections.
Your goal is to dampen reflections, so for that you’ll need mass and absorption—simple sheets or towels aren’t quite good enough!
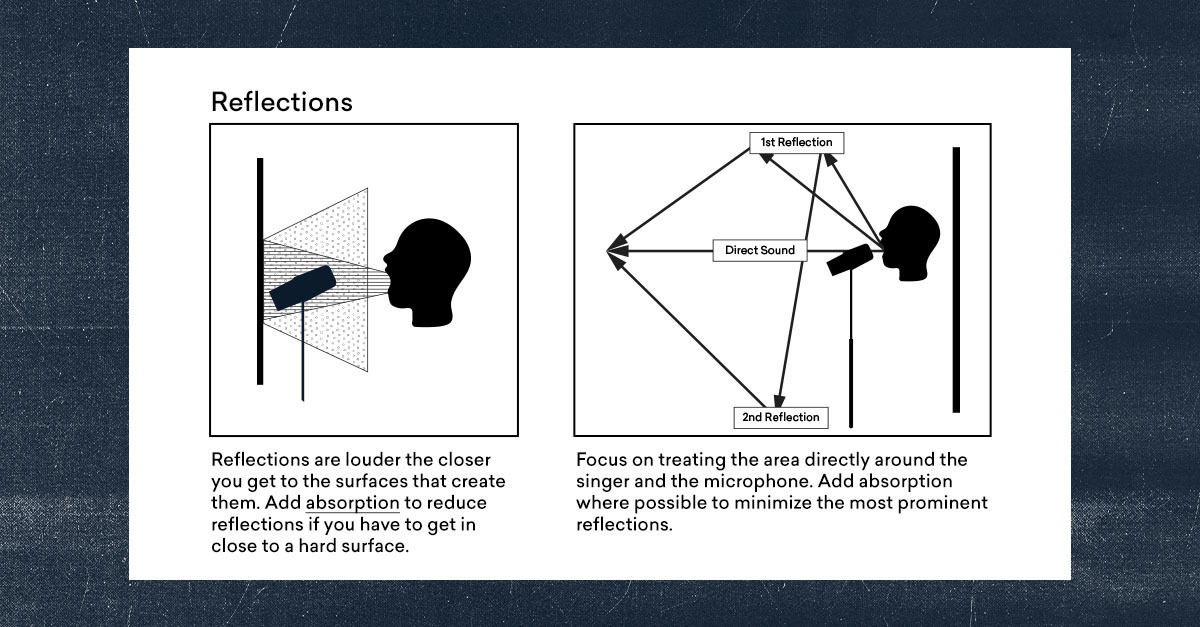
3. Add absorption to hard surfaces and corners.
Here’s where you get started creating your DIY vocal booth.
There’s no one-size-fits-all way to treat a room perfectly. But here are the main points. You’ll have to adapt these to your own space to make an effective DIY vocal booth.
The main sources of problematic reflections are parallel hard surfaces. That counts the ceiling—especially if it’s low.
The main sources of problematic reflections are parallel hard surfaces. That counts the ceiling—especially if it’s low.
Try to cover bare walls and the ceiling in your space with your absorptive material.
Here’s the trick though—you’ll need to use the natural properties of air to help you make your DIY acoustic treatment more effective.
Try to hang your absorptive material so that you create a 2” air gap before the hard surface of the wall. You can even use a pair of mic stands as supports to get it just right.
Corners can be equally problematic. Excessive low end can build up in corners and cause the room to sound boomy and bass-heavy overall.
Do your best to address these sources of bad reflections with absorption.
Experiment with your acoustic treatment to find out how to get the dryest sound possible
4. Focus on the area directly around the mic and singer
The design of so-called “portable vocal booth” products might lead you to believe that isolating the area directly behind the microphone is the most important.
Unfortunately, it’s almost the exact opposite.
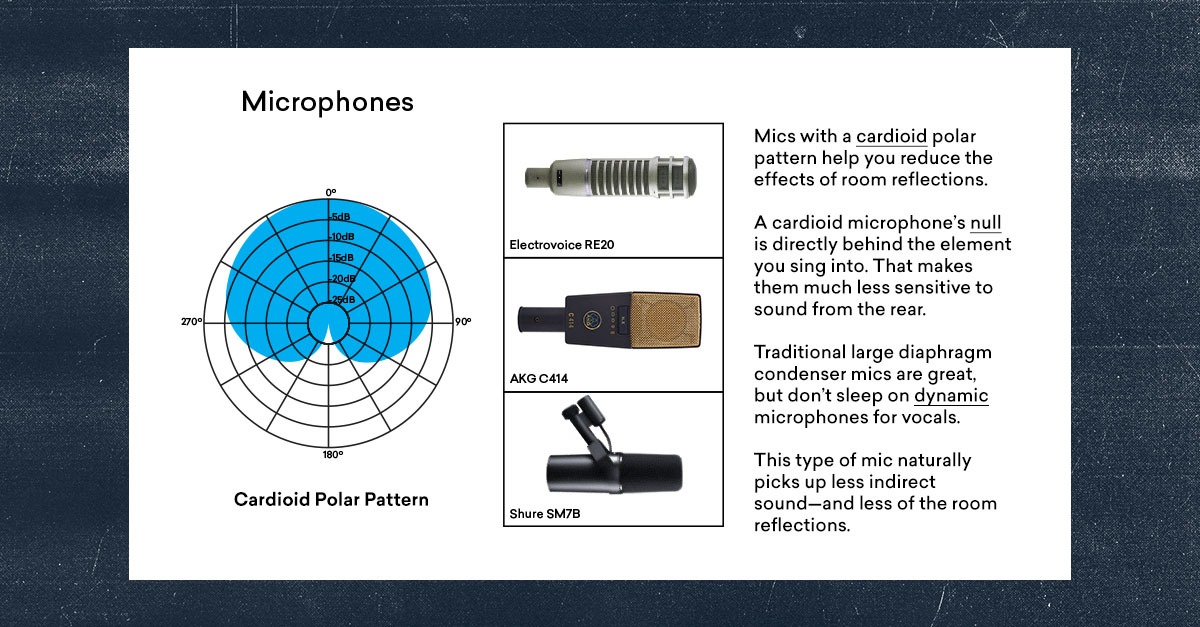
Here’s why. The best choices for vocals are often microphones with a cardioid polar pattern.
Cardioid microphones offer the greatest rejection directly behind the the address point. That means most of what’s behind the microphone is already in the null!
That’s why you should focus your acoustic treatment efforts on whatever will be placed directly behind you as you sing.
But it’s also one of the reasons that dynamic microphones like the Shure SM7B or Electrovoice RE20 are often the first recommendation for recording vocals DIY.
Not only are they great cardioid mics, dynamics like these are less sensitive, so they’re naturally less affected by reflections. Traditional large diaphragm condensers are always a great option as well, but to get the most out of them you’ll need to do some treatment.
All it takes to create an effective DIY vocal booth is a little bit of strategic absorption to reduce bad reflections.
After the area directly behind you, the next major offender for bad reflections is the ceiling. These can be more difficult to treat by positioning your material, but try your best.
One option is to hang yet another heavy blanket from your mic stand tent poles like a fort.
It may sound silly, but it works. Eliminating the reflections coming from these directions can drastically improve your vocal sound!
Unlimited mastering & distribution, 1200 royalty-free samples, 30+ plugins and more! Get everything LANDR has to offer with LANDR Studio.
DIY or DIE
A DIY vocal booth can do a huge amount to improve the quality of your vocal recordings.
All it takes to create an effective DIY vocal booth is a little bit of strategic absorption to reduce bad reflections.
Now that you have some ideas for trying a DIY vocal booth, get back to your recording space and try some acoustic treatment!

Michael Hahn is an engineer and producer at Autoland and member of the swirling indie rock trio Slight.
@Michael HahnGear guides, tips, tutorials, inspiration and more—delivered weekly.
Keep up with the LANDR Blog.