

How to EQ Vocals: 5 Tips for a Better Mix

Vocals are one of the most important elements of any mix. That makes mixing them well a major concern for all producers.
And while compression, send effects and proper editing are important for a good sound, many beginner and intermediate mixers struggle with how to EQ vocals for the best fit in the mix.
No two vocal recordings will need the exact same EQ decisions to work, but there are some basic techniques you can use if you don’t know where to start.
In this article, I’ll explain everything you need to know about vocal EQ and suggest 6 mix tips for better mixed vocals.
Mix tips, gear guides, inspiration and more delivered weekly
Subscribe to the LANDR Blog Newsletter.
Vocal EQ basics

Our powerful, AI-driven mastering engine listens to your song and delivers pristine, studio-quality music that’s ready for release. Master a track.
First off, you’ll need to understand the fundamentals of EQ to make the right decisions for your vocals.
EQ is the tool used in mixing to sculpt the frequency balance of the sounds in your DAW session.
The raw sound sources in your project have energy at different frequency ranges that can overlap and cause masking.
If you need the full breakdown on EQ in mixing, head over to our guide to brush up.
But if you just need the basics, your main task with EQ is to make sounds fit together so that each can be heard clearly in the mix.
It’s easier said than done, but the best way to get started is to dive in and experiment with EQ plugins.
By boosting or cutting the relative gain of different frequencies with EQ filters, you can give each sound its own space in the mix and let its best qualities shine.
How to EQ vocals in 5 steps
With the basics out of the way, here are six tips you can use to mix better vocals.
1. Decrease boomy lows with a high-pass filter
It’s common during vocal tracking for vocalists to sing close enough to the microphone to introduce proximity effect.
It means an increase in low frequencies that happens with some microphone polar patterns.
The closer you position a cardioid microphone to the source of a sound, the more low end is emphasized in the signal.
This can be a powerful effect to make vocals sound thick, warm and larger than life.
But too much low end can cause muddiness and dull sound that gets lost in a mix.
The first EQ move many engineers make is to set a high-pass filter to remove bass frequencies that aren’t contributing positively to the sound.
For me this is usually between 40-85 Hz. Higher frequencies may work for you, just be careful not to remove too much warmth and authority from the lows.
This technique can also help reduce rumbling sounds from the singer shifting position around the mic.
2. Boost the highs
Modern vocal production needs to soar above the mix with sophisticated top end.
Even with a bright microphone, you may need to boost the high frequencies with EQ for the sparkle and shine you need.
This is a delicate task since increasing the highs can introduce harshness if you’re not careful.
I generally start with my smoothest sounding EQ plugin and experiment with boosts between 8 kHz and 15 kHz.
It pays to be gentle here since even a few dB at these frequencies can make a big difference for an already bright sound.
The trick is to make sure you’re not accidentally boosting the range where the singer’s voice creates sibilance.
Which brings me to my next point…
3. Use a de-esser
This technique isn’t strictly EQ, but it affects the vocal’s frequency balance so I’ll include it here.
You may have noticed as you mix that certain vocal sounds are harder to control than others with EQ.
The most common culprit is sibilance, or the harsh scraping sound that can happen with some microphones when the vocalist pronounces an “S” syllable.
De-essers reduce it by attenuating the signal only in the range where the “S” sounds pop out most.
If you need a more in-depth guide to de-esser plugins, we created a list of the best ones with tips on how to use them.
For most de-essers, all you need to do is select the range where the “S” sounds are most offensive and decide how much to reduce them with a threshold control.
4. Sculpt the mids
The midrange frequencies are where most of the harmonic and melodic sounds in your mix conflict.
The midrange frequencies are where most of the harmonic and melodic sounds in your mix conflict.
That makes it especially hard to manage with EQ for the best sound.
Unfortunately there’s no correct answer here when it comes to vocals. Every mix is unique and requires different choices for the best result.
That said, here are a few common EQ moves and the effect they produce to help you get started.
Add warmth

Want more music production tips? Here's 50 tips you need to hear.
Low midrange frequency boosts can help warm up a brittle vocal track. I sometimes try narrow boosts between 250 Hz and 700 Hz if the vocal track sounds too thin.
This range is often associated muddiness, so boosting too much here can reduce definition. If your vocal is already warm enough might not need it!
Decrease boxiness
Some vocal sounds contain so much midrange that they sound filtered and narrow. Many engineers use the term “boxy” to describe this quality.
To help reduce it you can scoop out some midrange between 800 and 2.5 kHz with a broad Q filter. This can make the vocals sound more hi-fi and extended, especially if you’re boosting the high end as well.
Add power
On the other hand, some genres call for aggressive vocal sounds that punch through the mix with presence and power.
In these cases smooth, scooped vocals may not have enough edge to sit in the right place.
If you’re facing this issue you can experiment with boosting midrange frequencies between 1 kHz and 2.5 kHz.
It’s especially common to hear this type of vocal EQ in genres with mostly electronic production.
Without midrange instruments like distorted guitar or traditional keyboards, there’s a lot more space for the vocal to pack a punch.
Soften harsh areas
Some vocal recordings have harsh elements that get distracting as you add compression.
These tend to occur in the areas where your ears are most sensitive between 3 kHz and 6 kHz.
Our powerful, AI-driven mastering engine listens to your song and delivers pristine, studio-quality music that’s ready for release. Master a track.
Sometimes a surgical cut to this frequency range can reign in harshness and give a smoother sound overall.
Just be careful because cutting too much can bury some detail.
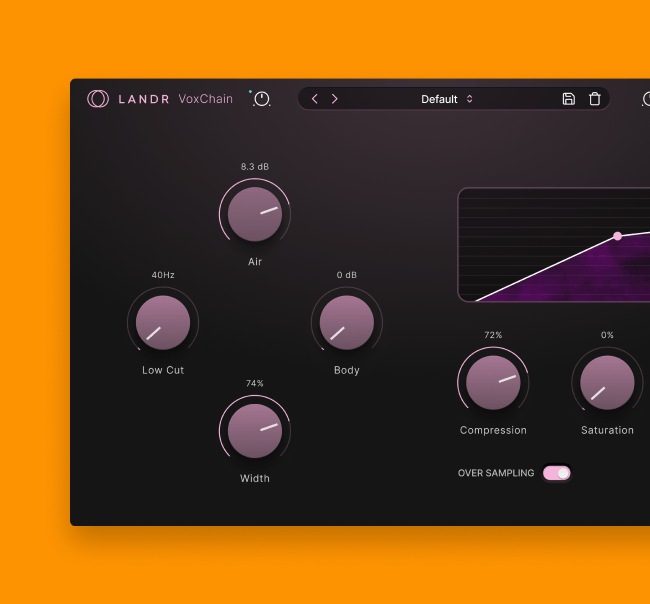
5. Add saturation for extra glow
Finally, this last technique isn’t exactly EQ, but it’s an alternative you may find useful for some vocal sounds.
Some vocal sounds contain so much midrange that they sound filtered and narrow. Many engineers use the term “boxy” to describe this quality.
Saturation in mixing is musical clipping that adds drive and harmonics to a sound. At extreme settings, it verges into full-on distortion, but that’s not what I’m talking about here.
For vocal mixing, saturation is usually gentle tone-shaping that’s meant to give vocals more presence in the mix.
As you introduce clipping with saturation plugins, the upper midrange frequencies become richer and more apparent in the overall texture.
If simple EQ boosts aren’t giving you enough activity in this area, light saturation can bring it out in a unique way.
Just be careful not to go overboard and create a lo-fi overdriven vocal—unless that’s what you’re going for!
To help keep saturation under control, many engineers blend it in parallel so it doesn’t get overwhelming.
Great equalizer
EQing vocals can seem like a daunting task, but there’s nothing to be afraid of once you break it down.
If you use your ears and take inspiration from the tips I described above you’ll have a great start for a better mix.

Michael Hahn is an engineer and producer at Autoland and member of the swirling indie rock trio Slight.
@Michael HahnGear guides, tips, tutorials, inspiration and more—delivered weekly.
Keep up with the LANDR Blog.