Beat Making Tips: How to Make Beats in 7 Steps
Everyone is making beats these days and it makes sense why.
You can be up and running in no time, all you have to do is try out free tools like LANDR’s new beat making tool Creator.
Smartphones and iPads are especially intuitive for beat making, they have that tactile element which especially lends itself to percussive creation.
But how to make beats that stand out from the crowd?
Randomly penciling something into a step sequencer isn’t likely to produce a good result.
It takes a little bit of knowledge and a lot of practice to learn how to make music that’s cool and authentic to your taste and aesthetic.
It takes a little bit of knowledge and a lot of practice to make something that’s cool and authentic to your taste and aesthetic.
In this guide, we’ll dip into the knowledge side of beat making so you can get set up to efficiently put the time in to get better.
How to make beats in 7 steps:
- Pick a DAW or groove box
- Find your producer palette
- Open up your DAW
- Start your session
- It’s tweaking time!
- Make it dynamic
- Throw in samples
Alright, ready to learn? Let’s go!
1. Pick a DAW or groove box
When you’re learning how to write a song the hardest thing is starting.
Learning how to make beats is a great way to get your creative juices flowing. And the more you do it the better you get at it.
The first step is to find a platform where you’ll produce your beat.
Chances are good that you’ll end up using a DAW or a groove box.
In this post, I am using Ableton Live to show you the basics of beat making, but any DAW can be used similarly to produce music.
2. Find your producer palette
Beat making is just like painting. Before you even touch the canvas you have to think about your colors.
Before opening your DAW, put together a collection of sounds. They’ll be the building blocks of your beat.
Before opening your DAW, put together a collection of sounds. They’ll be the building blocks of your beat.
The sounds you choose will help to guide your process from the start.
There are many approaches to choosing your sounds. For this post, I’ll be focusing on two.
- Sample packs
Sample packs are great if you’re wondering how to sample without getting sued.
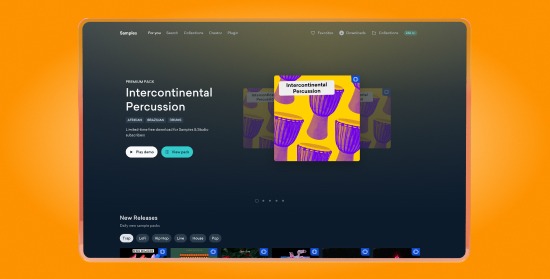
For example, in this post we’re using samples from Beached, a sample pack available for download via LANDR Samples. Download it and you can follow along too!
Remember, you can always hear how Samples sound together directly in LANDR Sample with the new Creator beatmaker tool. Give it a try!
- Virtual instruments
The second approach is to use the instruments that come with your DAW.
For beat making specifically, you’ll use a drumrack.
Your drumrack contains all the percussive elements of your beat. You will spend time here finding the right snare, kick, high hats, claps, and more.
Virtual instruments contain high-quality samples from the best and most iconic music gear. You don’t need to save up 4000$ for a Roland TR-909.
You should always be adding to your collection by downloading free VSTs whenever you find them. Who knows when you’ll need that Frohmage.
3. Open up your DAW
Time to start building! Fire up your DAW and let’s go.
Wait up, there’s something you should know first! It will save you major headaches in the future.
Stay organized with your samples from the get-go.
Stay organized with your samples from the get-go.
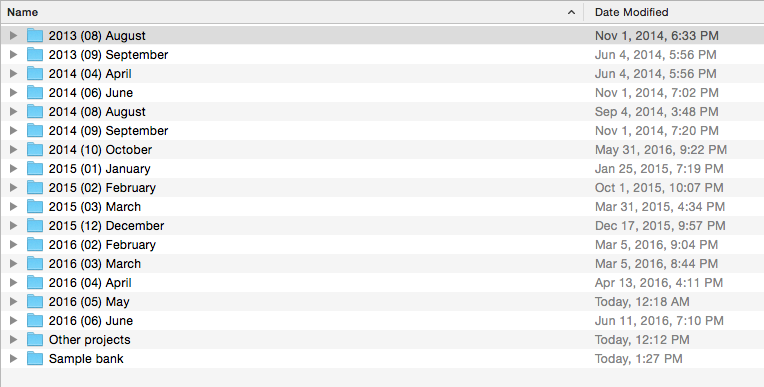
If you’re using sample packs, put them all in the same folder. Name the folder something you’ll remember – like ‘SAMPLES [name of your project]’.
Once you create your Ableton session, save it right away. Put your sample folder in the Ableton project folder.
That way you’ll never run into the ‘oops your DAW can’t find your files’ problem (trust me it’s no fun).
When you decide to move the Ableton project folder all your samples will be where you need them.
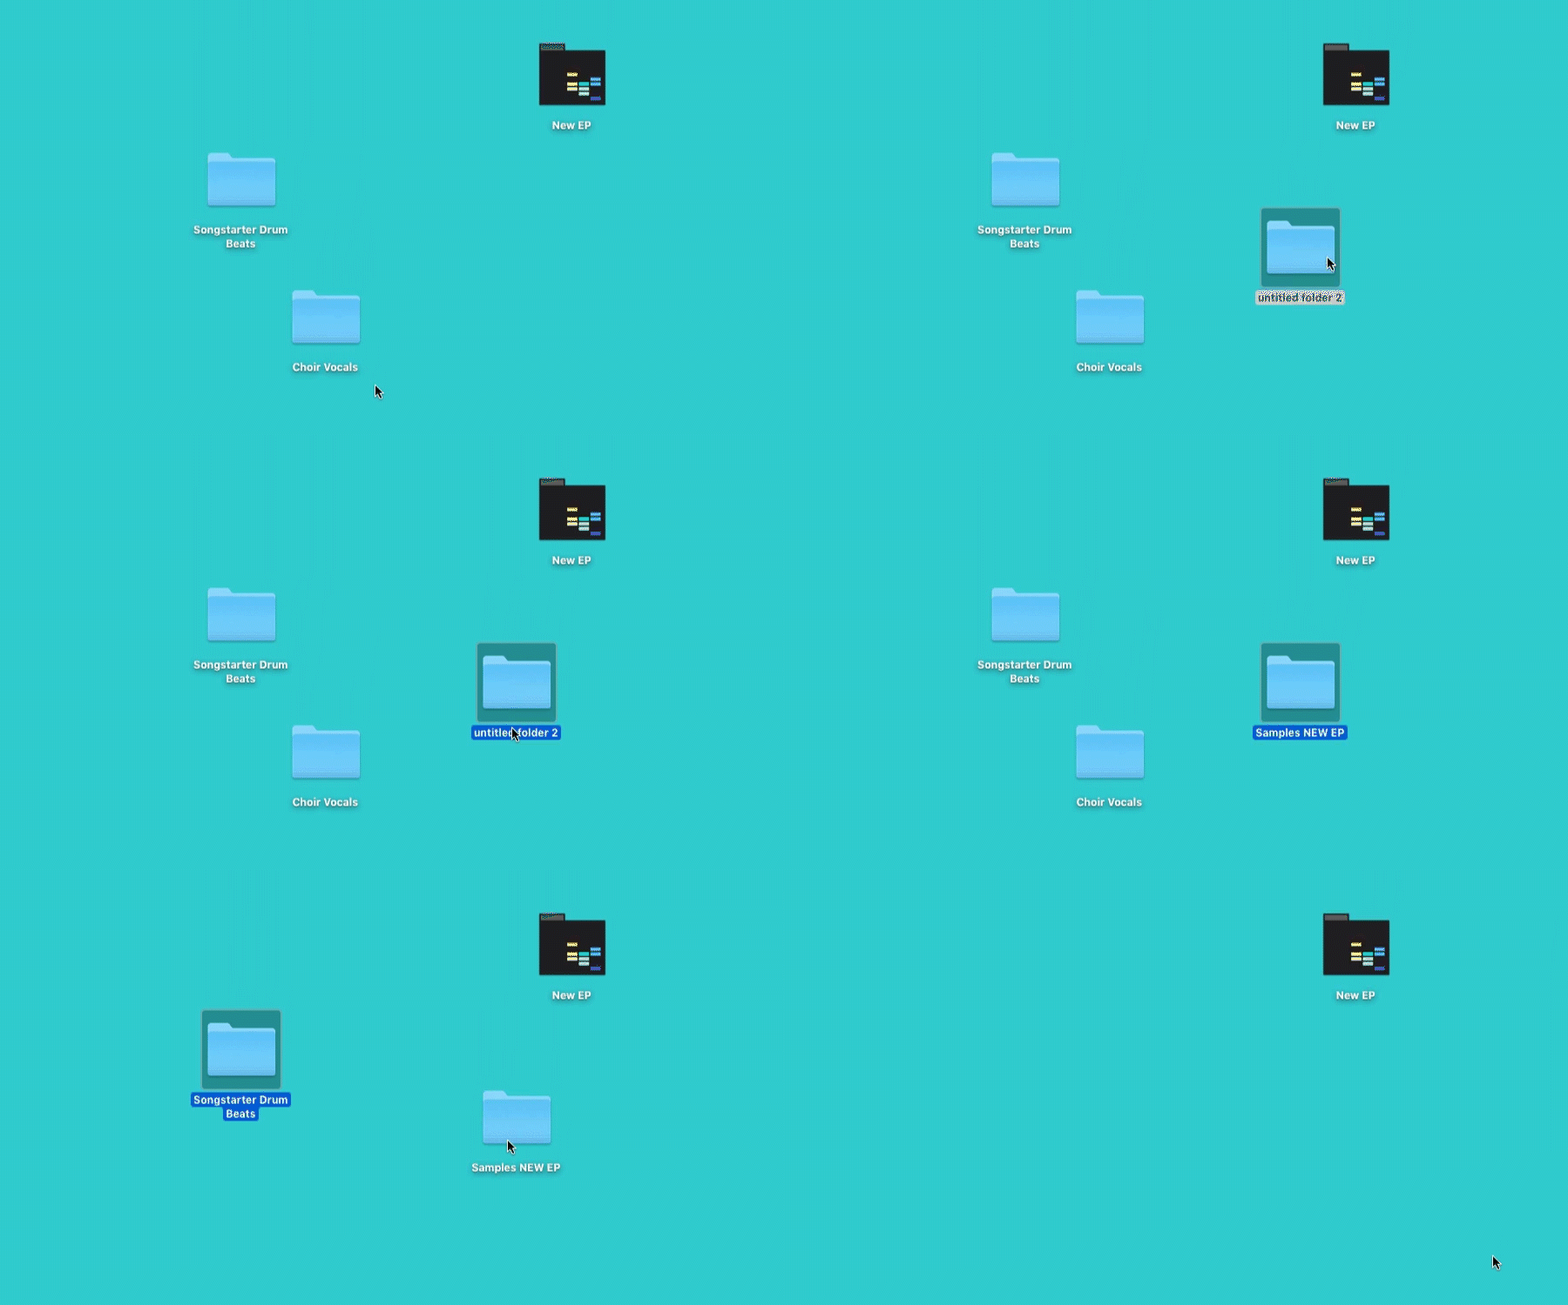
Hot tip: I even have folders for my Ableton projects by month so I keep track of my progression. But that’s optional – just for the organization freaks out there (like me)!
Ok, now let’s roll!
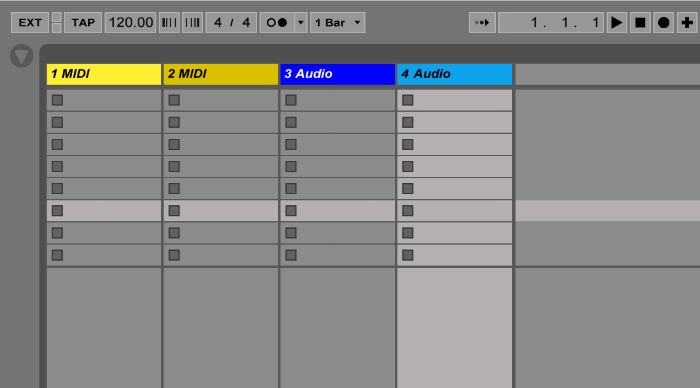
The first thing to know is that there are two kinds of tracks in your DAW – ‘MIDI’ and ‘Audio’.
If you’re using samples drag them into an Audio track. Audio tracks are also for recording vocals or an external instrument.
Use MIDI when you’re creating beats using virtual instruments or VSTs in your DAW.
4. Start your Session
Let’s start making the beat.
Ableton has two views: Session view and Arrangement view.
Session view is the default when you open a session. The tracks are laid out vertically. Use it to drag in your samples and start playing with ideas.
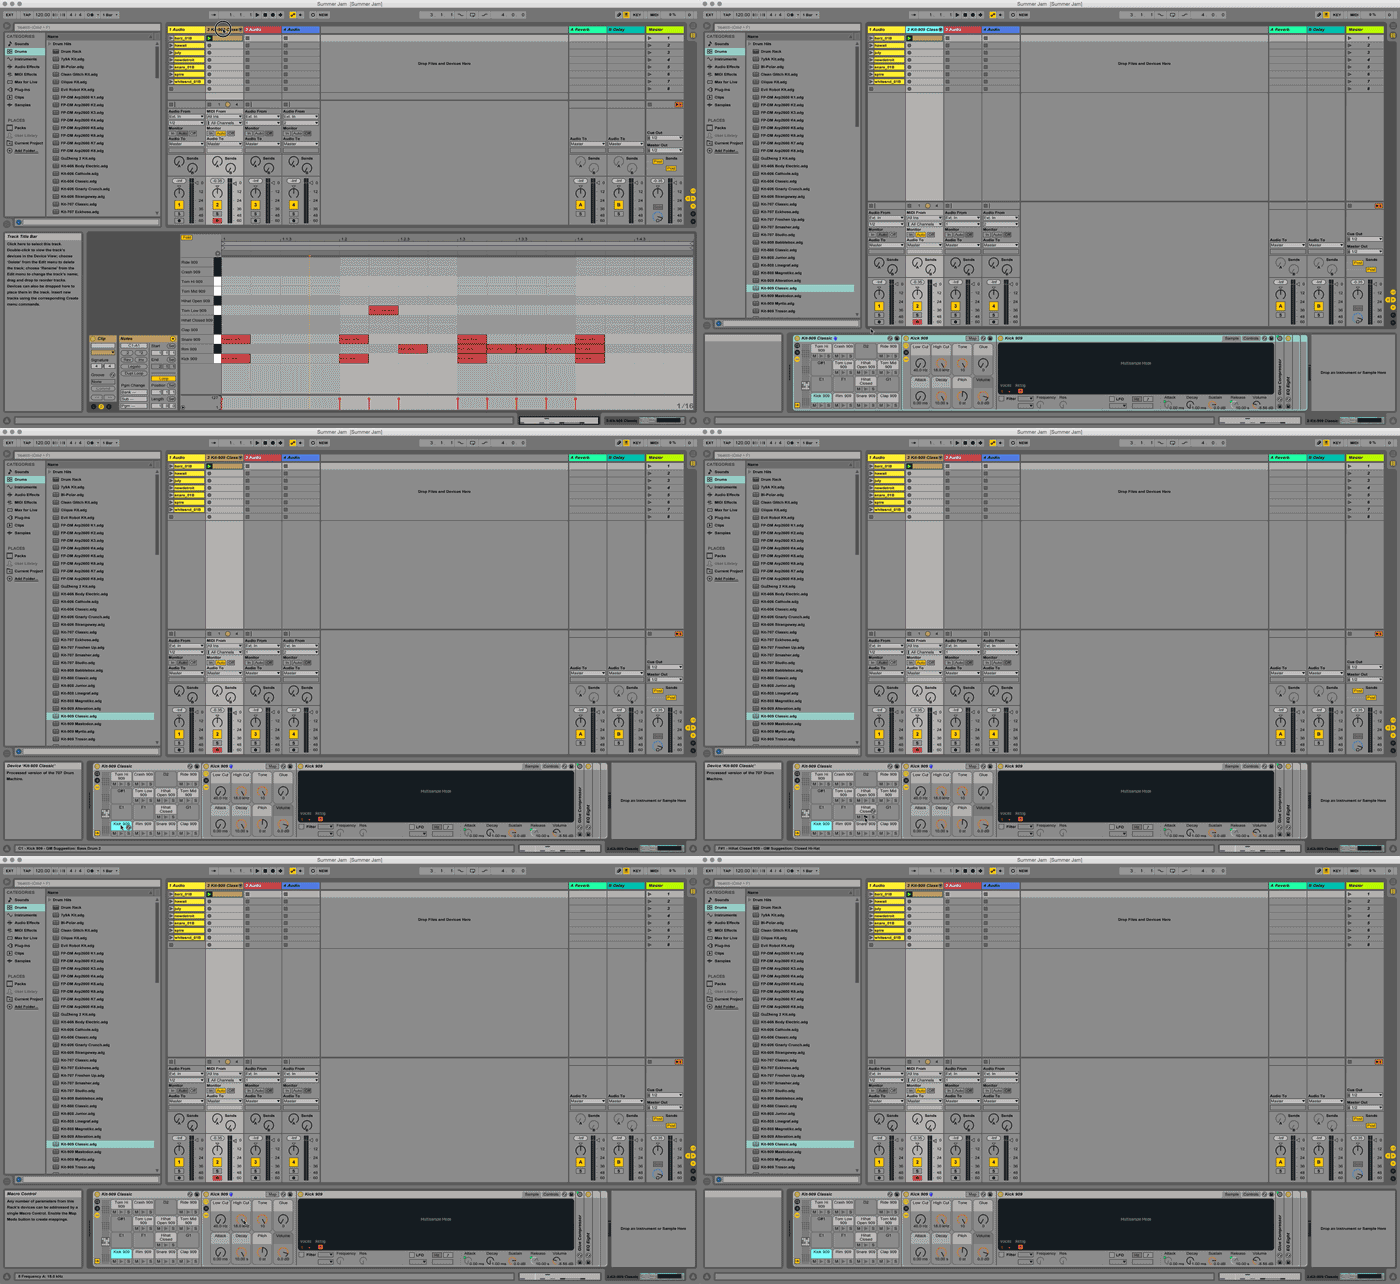
Choose a drum kit from the sidebar and load it into your drumrack.
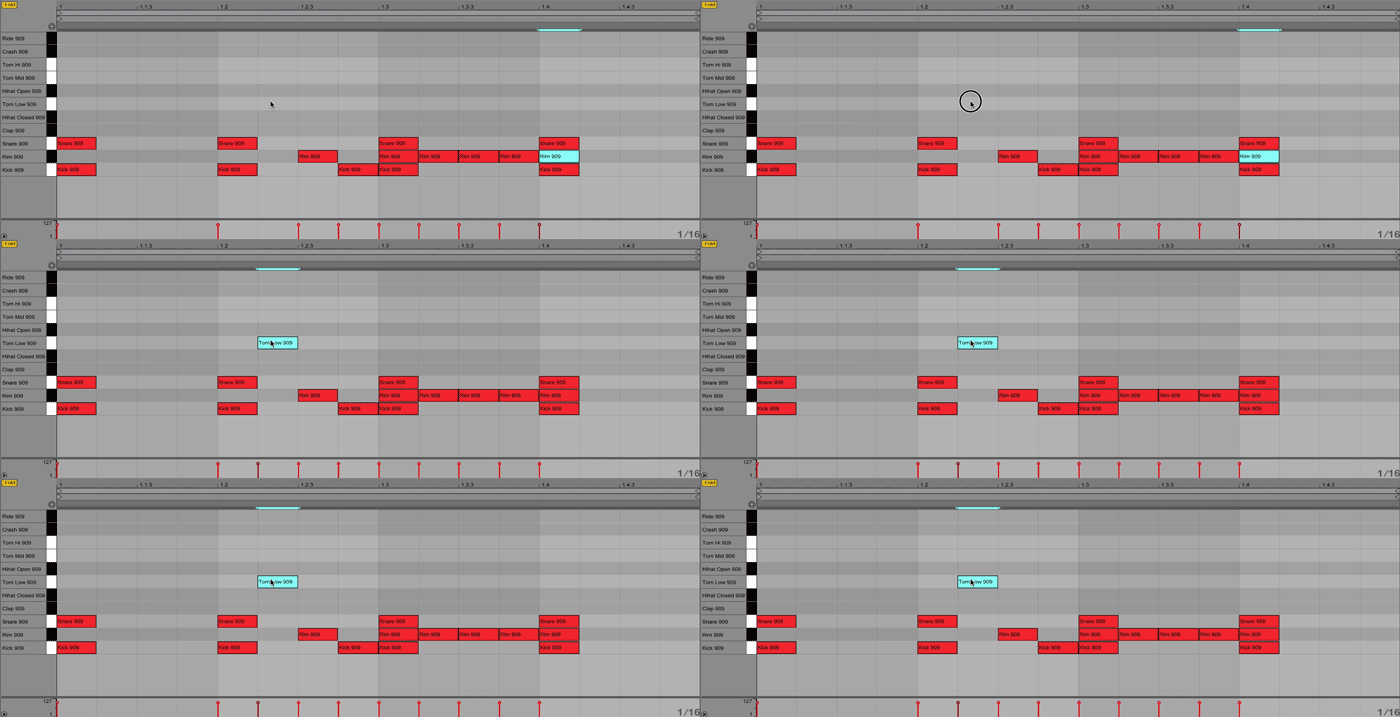
I’m going with the Kit-909 Classic. Drag it on a MIDI track. Click on the first clip slot of the track. Open up the MIDI Note Editor.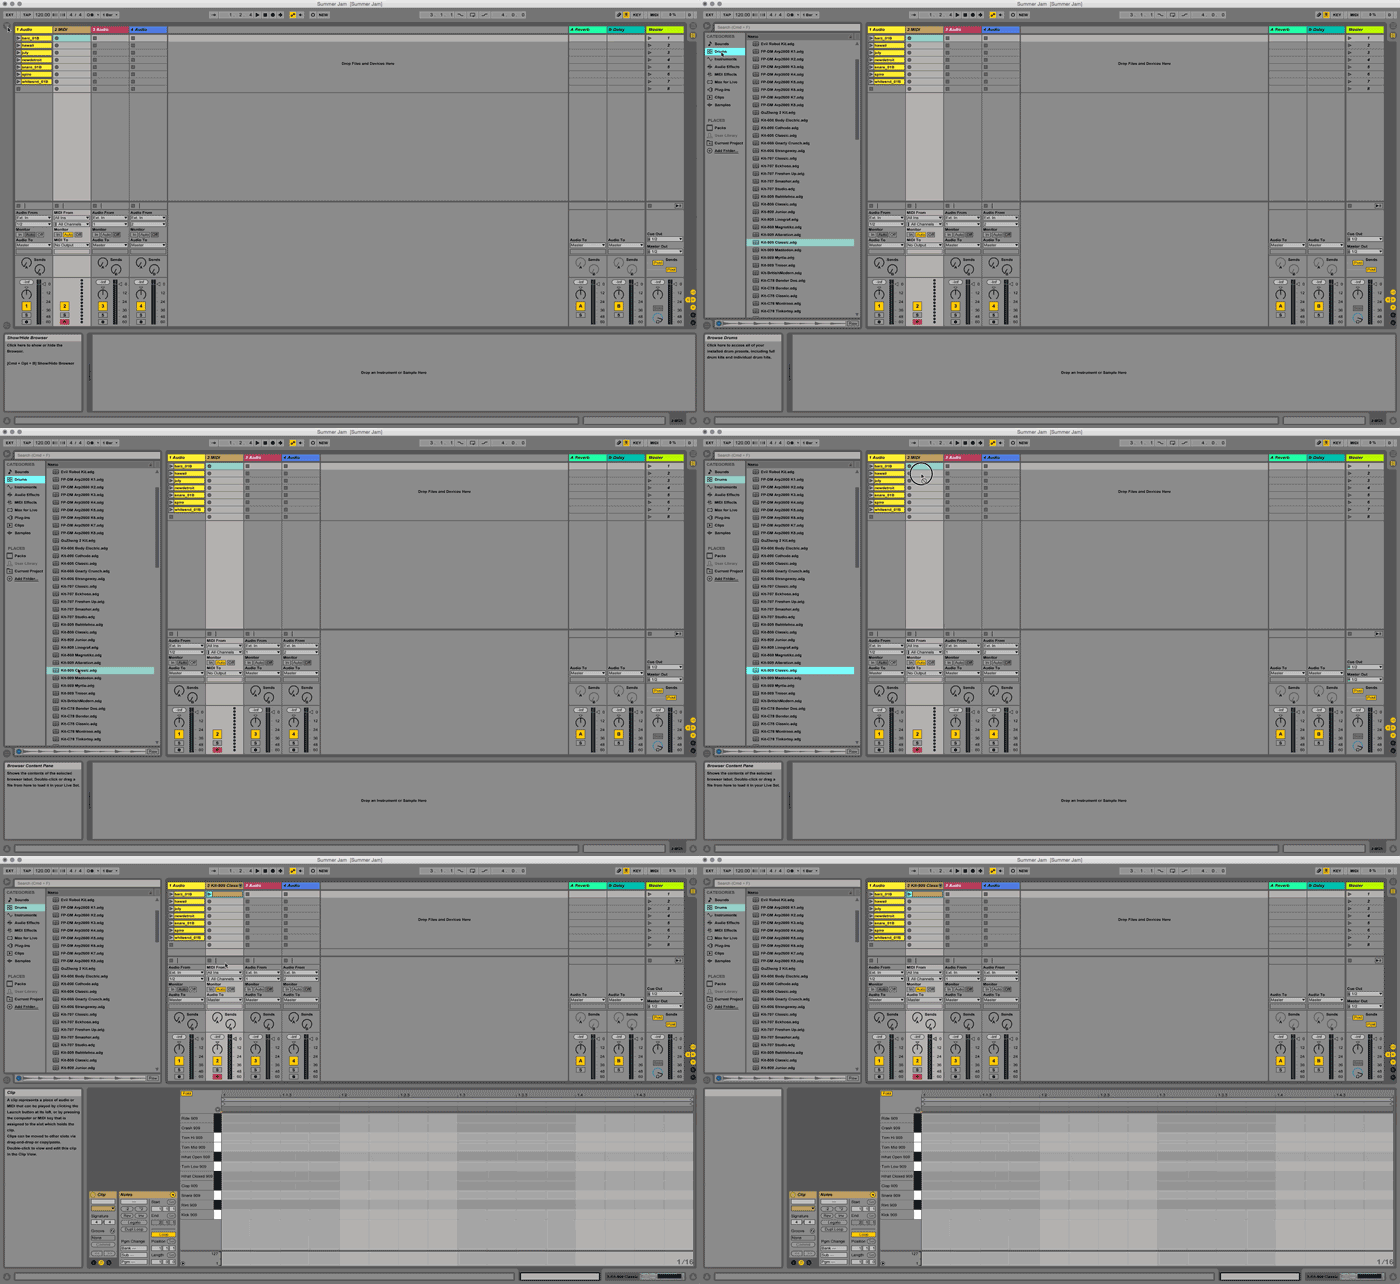 Now let’s write the beat starting with the Kick Drum. I’m going for four-on-the-floor with an extra hit before the third beat.
Add the Snare Drum. I’m putting it on the same beat as the Kick. It might sound weird for now but we’ll tweak the sounds in a moment.
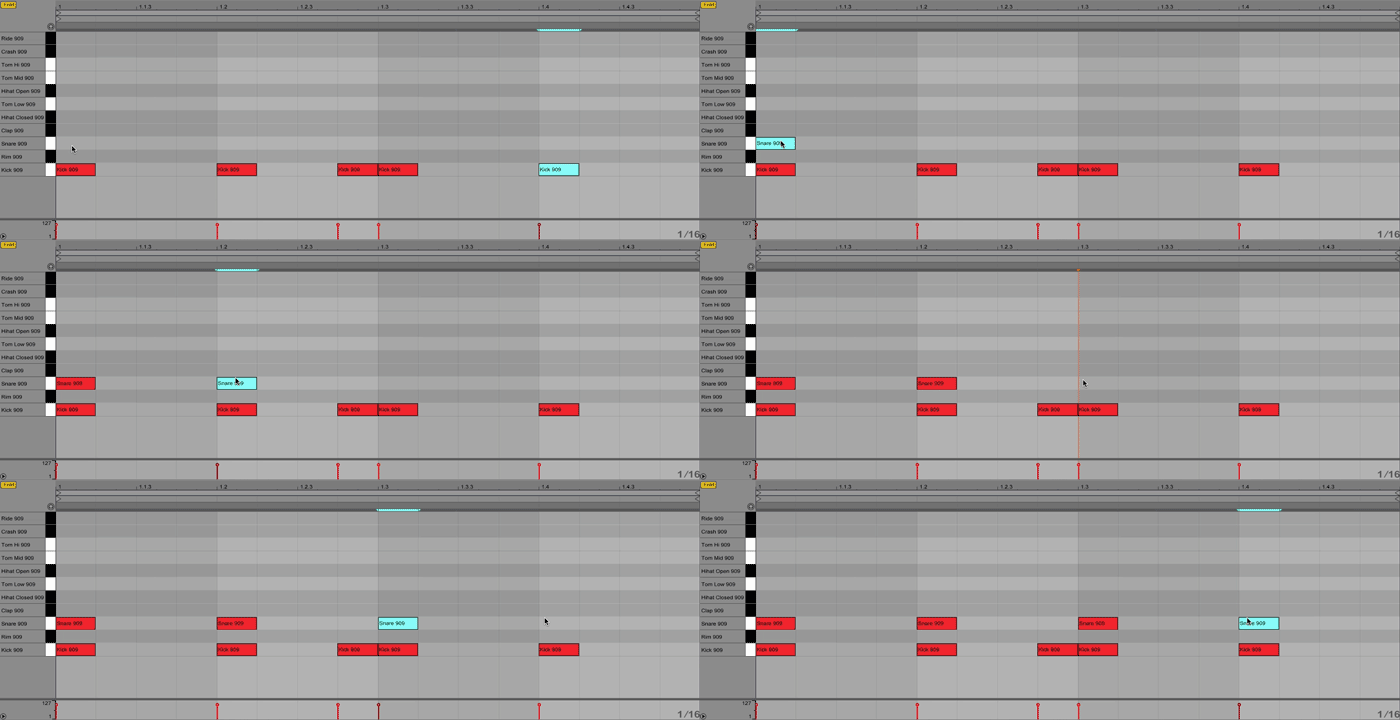 Here’s what it sounds like with the snare:
Now add another layer. I chose the Rim sound for some percussive variation.
But it can be anything you want, like a high-hat, a sample of your studio door locking, or anything else that fits.
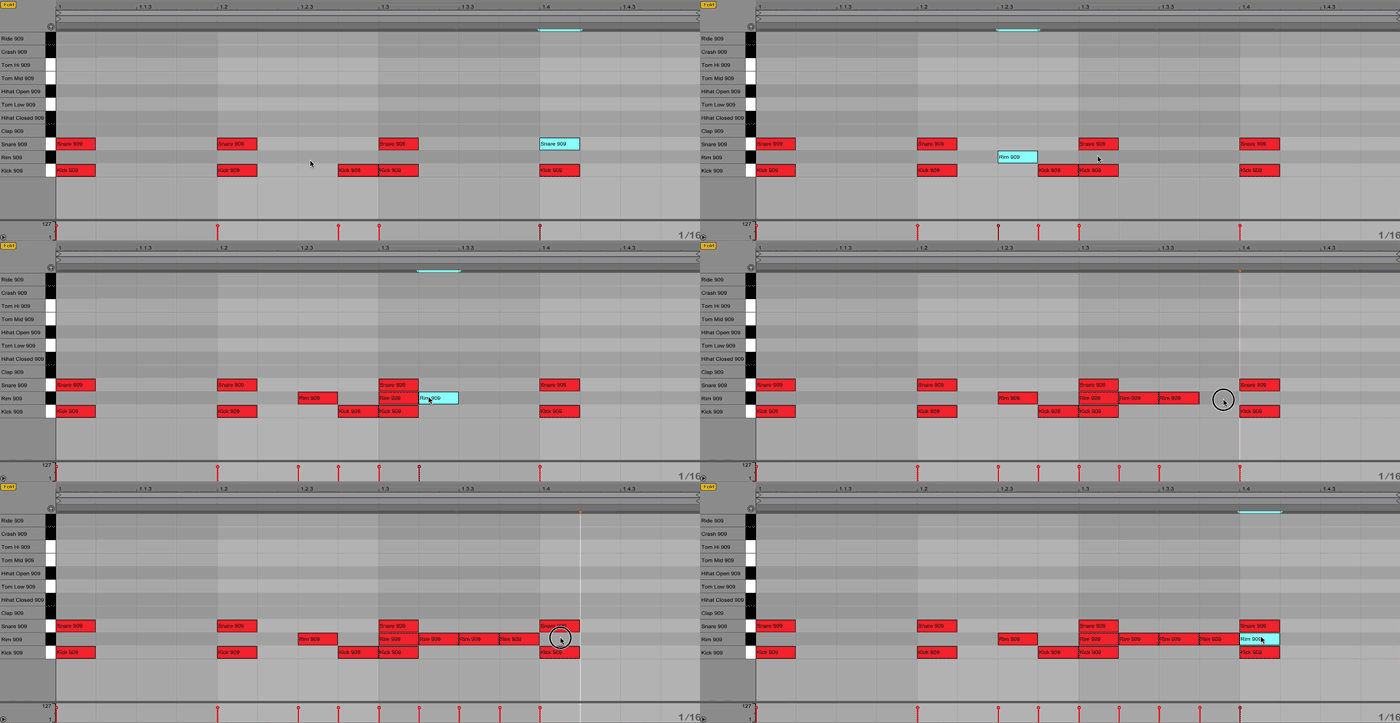 Listen to how it sounds with the Rim:
Time for some Toms. I dropped one in right after the second Kick.
5. It’s Tweaking Time!
Ok we’re getting somewhere! Let’s tweak some of the parameters to shape the sounds.
Click on the title bar of your drum track. Your drum device will appear at the bottom where your MIDI Editor was.
Play with the parameters of each sound in your drum kit. Experiment and find your signature style.
Play with the parameters of each sound in your drum kit. Experiment and find your signature style.
For the Snare I cut a lot of the high frequencies using the High Cut knob. This makes the Snare less aggressive.
Then I lowered the ‘Snappy’ knob. I also tweaked the Tuning knob to get a frequency that fit the beat. Here are the new settings:
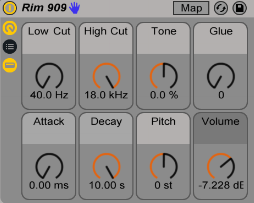
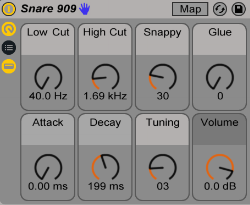 The volume of the Rim needed to be slightly lower so it’s not too in your face.
Always tweak until it sounds right. Most of the time the default settings won’t sound good until you switch them up.
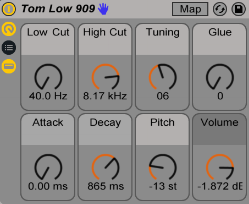
The Tom needed to be pitched down. To pitch a sound up or down play with the Pitch knob until it fits.
I also lowered the Decay and changed the Tuning knob similar to what I did with the Kick.
 Here’s how my beat sounds now:
6. Make it dynamic
Making music on a grid can sound a bit robotic.
But there is a way to make your beat less rigid and more expressive in your DAW.
There is a way to make your beat less rigid and more expressive in your DAW.
In Ableton the MIDI Note Editor has a section at the bottom called MIDI Velocity Editor.
Play with the velocity to change how fast and with how much pressure a note or beat is played. This will make your beat more dynamic.
In my beat, I’ve brought down the velocity on my Tom and the third Kick. They’re more subtle because they come in slower and with a softer touch.
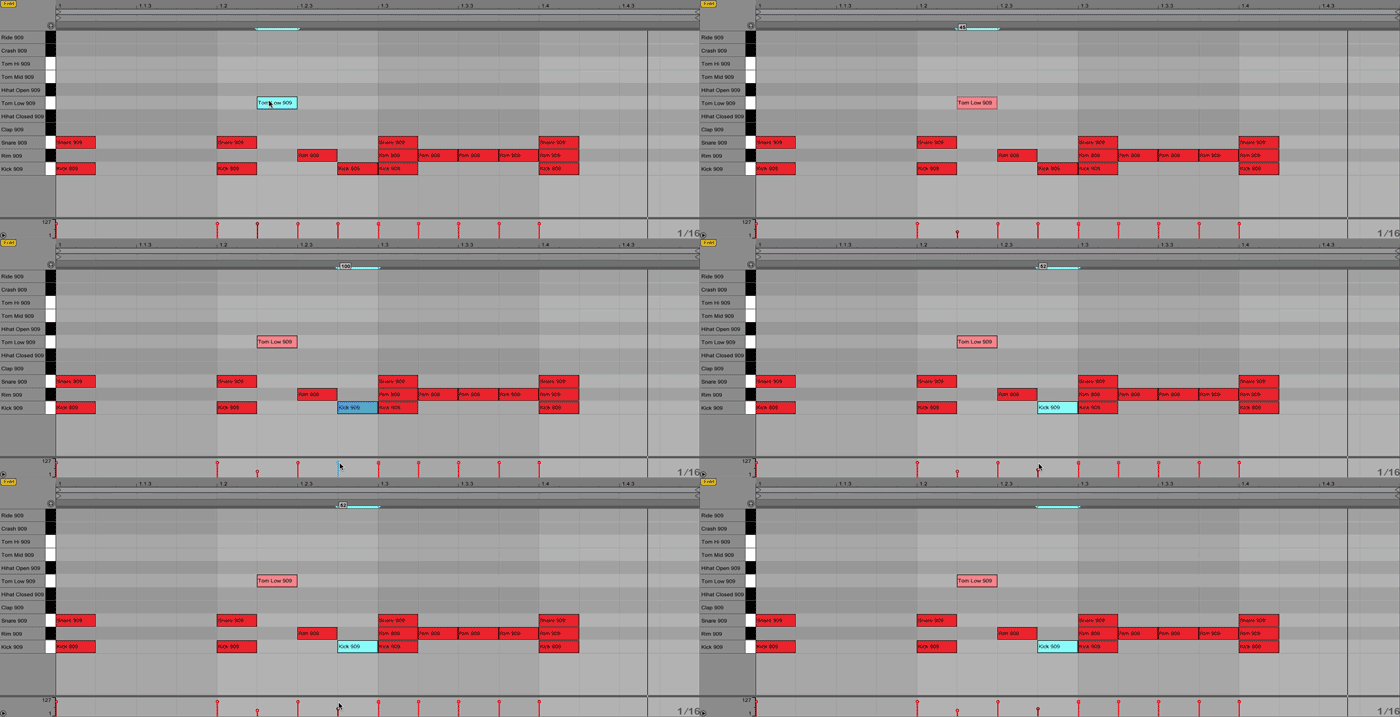 Listen for the subtle shifts in velocity:
7. Throw in the samples
Now you’ve got a drum part going right? Great let’s keep going. Time to throw some samples in there!
Drag and drop your samples into an Audio track in Session view to listen to them.
There’s many ways to use samples in your beat.
A lot of producers will chop them up into bite-size hits and trigger them with a midi controller to find the best way to fit them into a track.
Each DAW has its own intuitive way of chopping up samples. In Ableton, you’ll use the time warp and quantize tools to sync the sample to your beat.
Alternatively, you might use the Arrangement view to place samples into your beat.
The arrangement view is a horizontal view made for composing and finishing your track. It’s great for easily dropping a sample directly into your track.
To add samples via the arrangement view select your beat from the Session view and copy it.
Switch to Arrangement view by selecting the icon with horizontal bars in the top right corner. Paste it in the Arrangement view in an Audio track.
This might be confusing but look at the walkthrough below to see how I did it.
Hot tip: select your drum clip and press Command + D (Mac) or Control + D (PC) to duplicate it quickly.
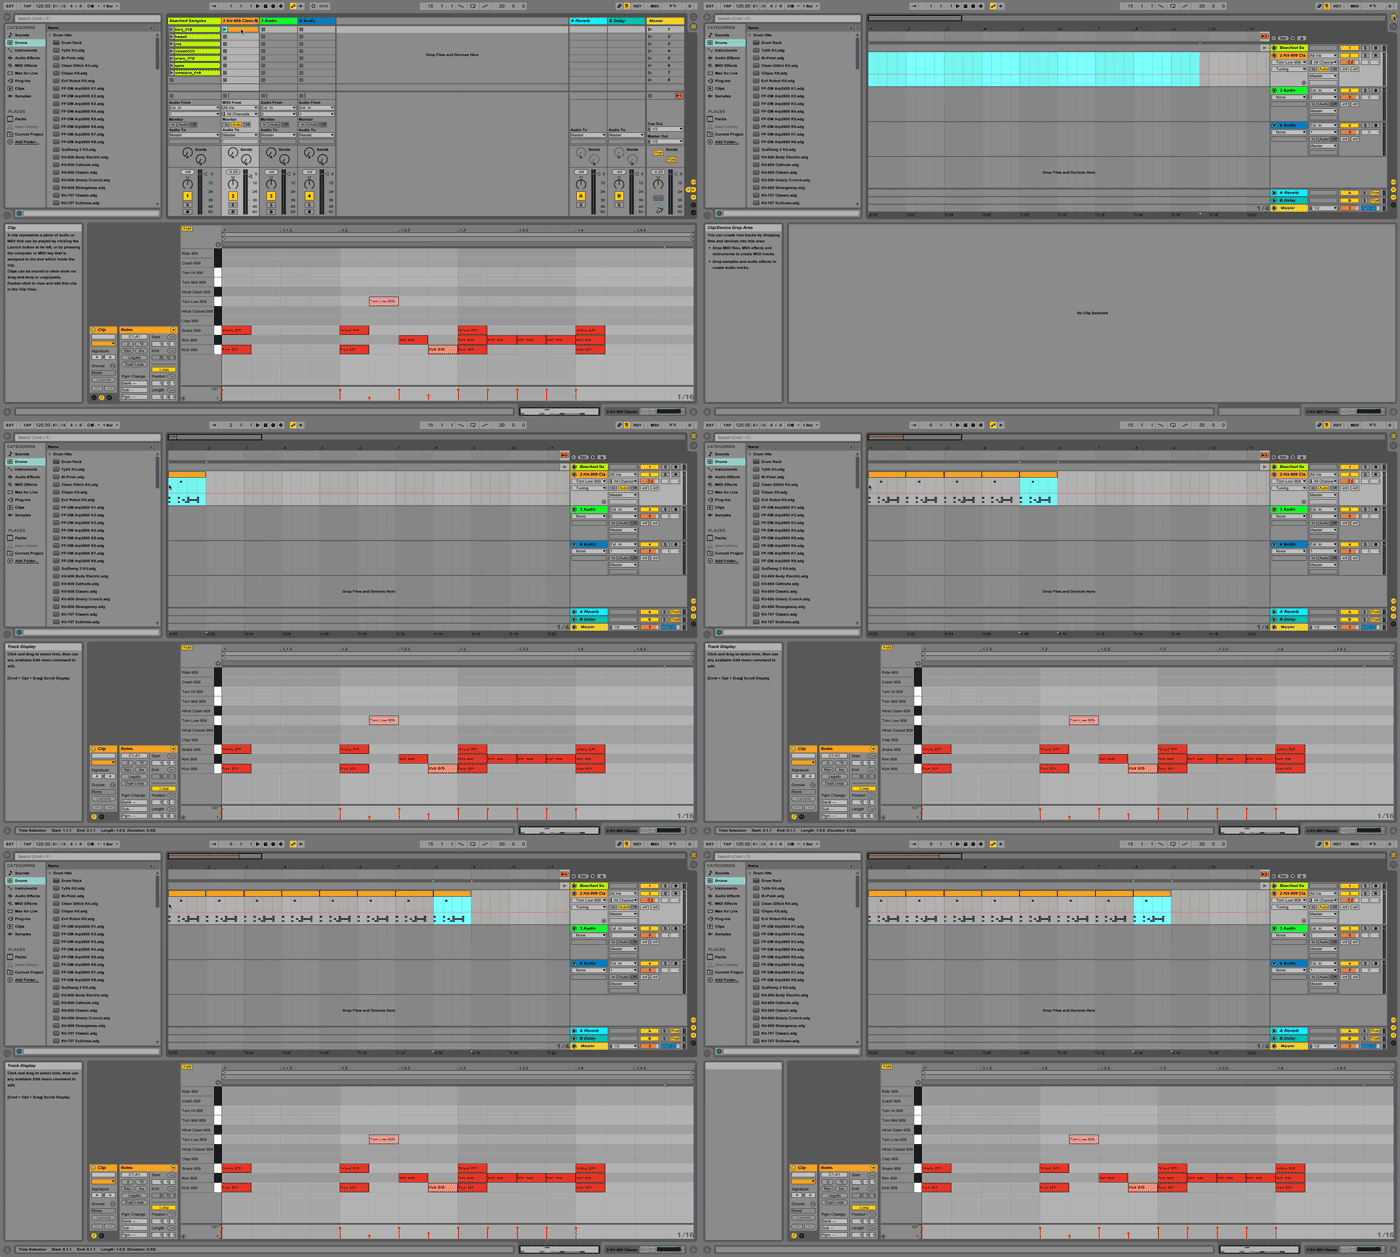 Go back to Session view and copy the sample you want to use. Paste it to the arrangement view in a new Audio Track.
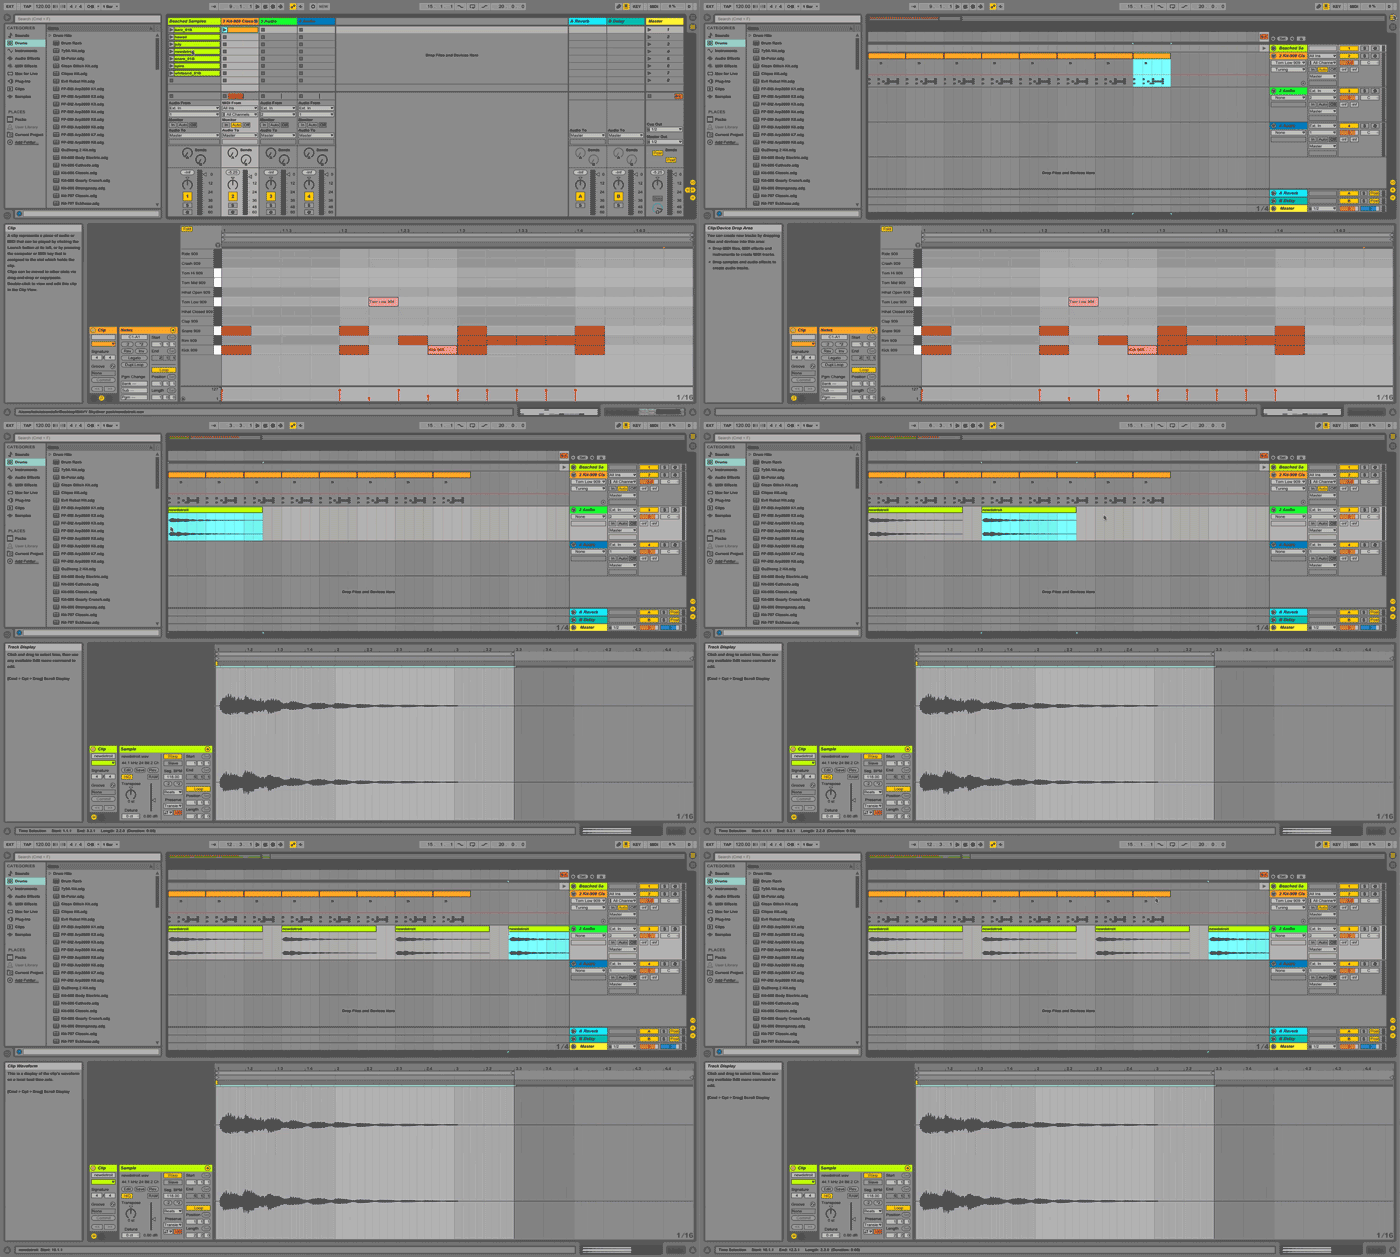 Arrange your samples where they sound best. Make them shorter. Move them around. Duplicate them. Listen. Repeat. Try things out!
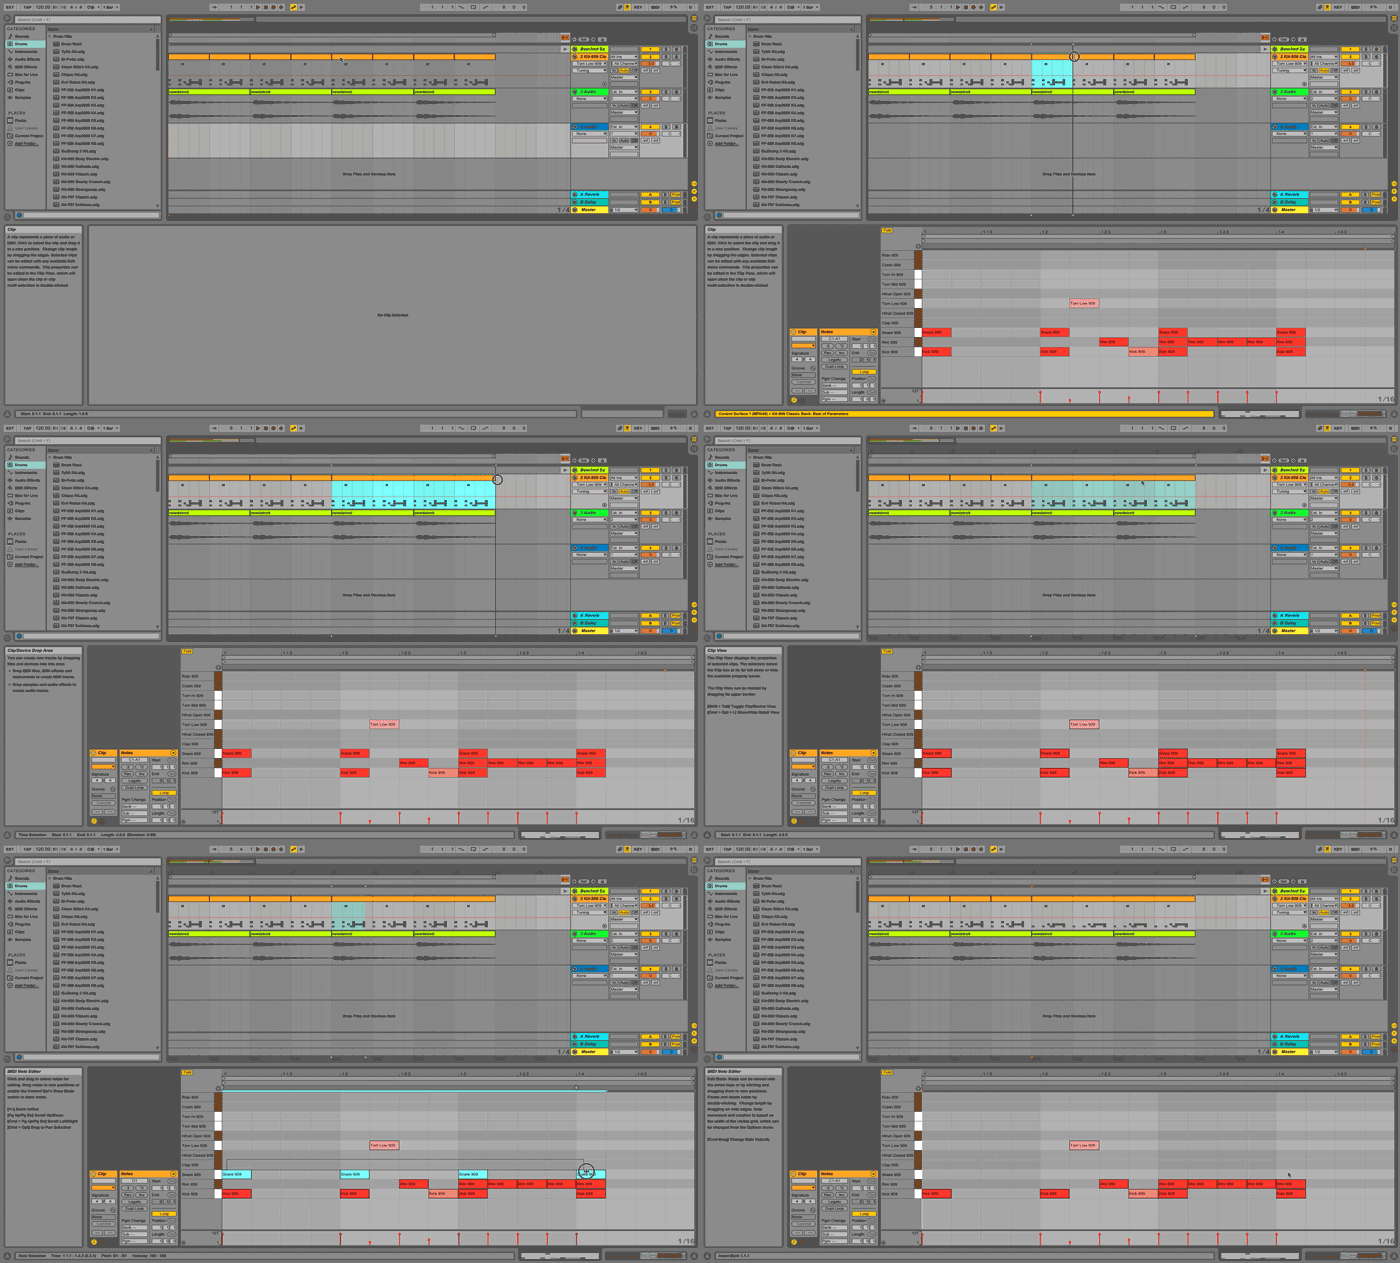
There’s a few common mistakes that happen during arranging so beware!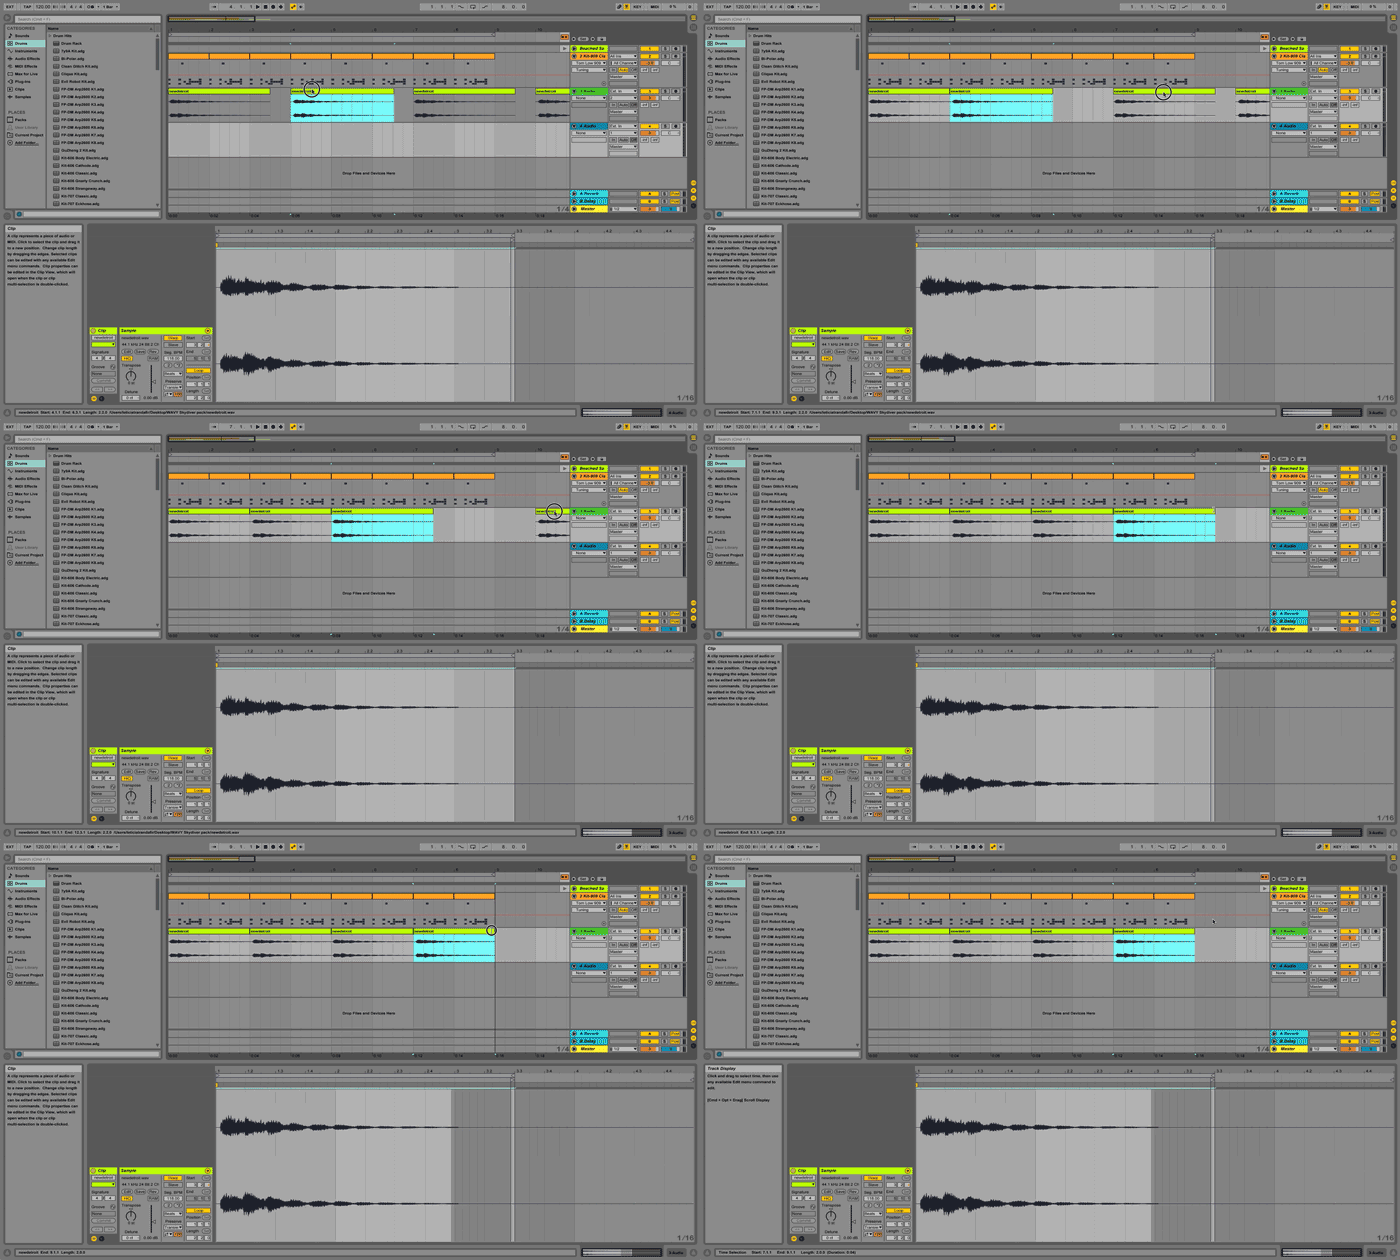 Make variations of your drum loop. Go to a particular clip and remove or add some parts.
Make variations of your drum loop. Go to a particular clip and remove or add some parts.
For example: I decided to delete the Snare in the last 4 bars to create variation.
Hot tip: Grab the corner of a clip and drag it. It’ll duplicate the clip as one longer clip. This lets you easily remove a part without having to do it on each clip.
Here’s how:
 Listen to your beat in a loop. Are you bobbing your head yet? Good.
Here’s the finished beat (I mastered it):
Make a beat every day to keep your creativity flowing
Congratulations! Now you know how to make beats!
The advantage of a DAW is that you can try anything by copying, pasting, deleting and undoing (phew). Once you know the basics of beat making, make it a goal to make a beat every day.
A good beat is the foundation of any song. The genre and style are up to your imagination.
Start by finding interesting sounds to work with. Stay organized. Fire up your DAW and go!
If you need some inspiration from the pros, check out this video of Four Tet making a crazy beat in 10 minutes using Ableton.
You’re still reading this? Why not start your first beat for free with Creator!
