The Reese Bass: Everything You Need to Know
Some sounds are so iconic that they help define entire genres, and the Reese bass is one of them.
Dance music is distinguished not only by its focus on rhythm and groove, but also its use of bass.
Bass is an art form in and of itself, from squelching acid to deep, rumbling subs and everything in between.
So, what about the Reese bass? If you’ve heard this term before and aren’t sure what it is (or why you should explore it), read on!
What is a Reese bass?
The term “Reese bass” refers to a synthesized bass sound that’s been used in dance music since the late 1980s. It was created and used for the first time by techno pioneer Kevin Saunderson in the track “Just Want Another Chance”, which he released under his Reese alias in 1988.
In its simplest form, the Reese bass is defined by its use of harmonically rich, detuned waveforms and a subtle chorusing effect.
This gives it a slightly wider stereo image than typical bass sounds.
The A3 track on Saunderson’s release was a version of “Just Want Another Chance” that lacked the main drum section, opening up the bass sound to easy sampling.
Six years later, drum ‘n’ bass producer Renegade would seize the opportunity and sample it for his track “Terrorist”.
Not long after that, the Reese bass could be heard on countless records, particularly in the UK.
It quickly became a staple in jungle and drum ‘n’ bass, while also appearing in various forms of UK garage.
The evolution of the Reese bass
The old-school Reese was recognizable for its balance between rich harmonics in the lower mids and a smooth, muted high end.
But over the years, it became more common for producers to either distort the original sound or synthesize their own Reese patches from scratch.
This allowed them to open up the filtering and lean into a brighter, more aggressive sound.
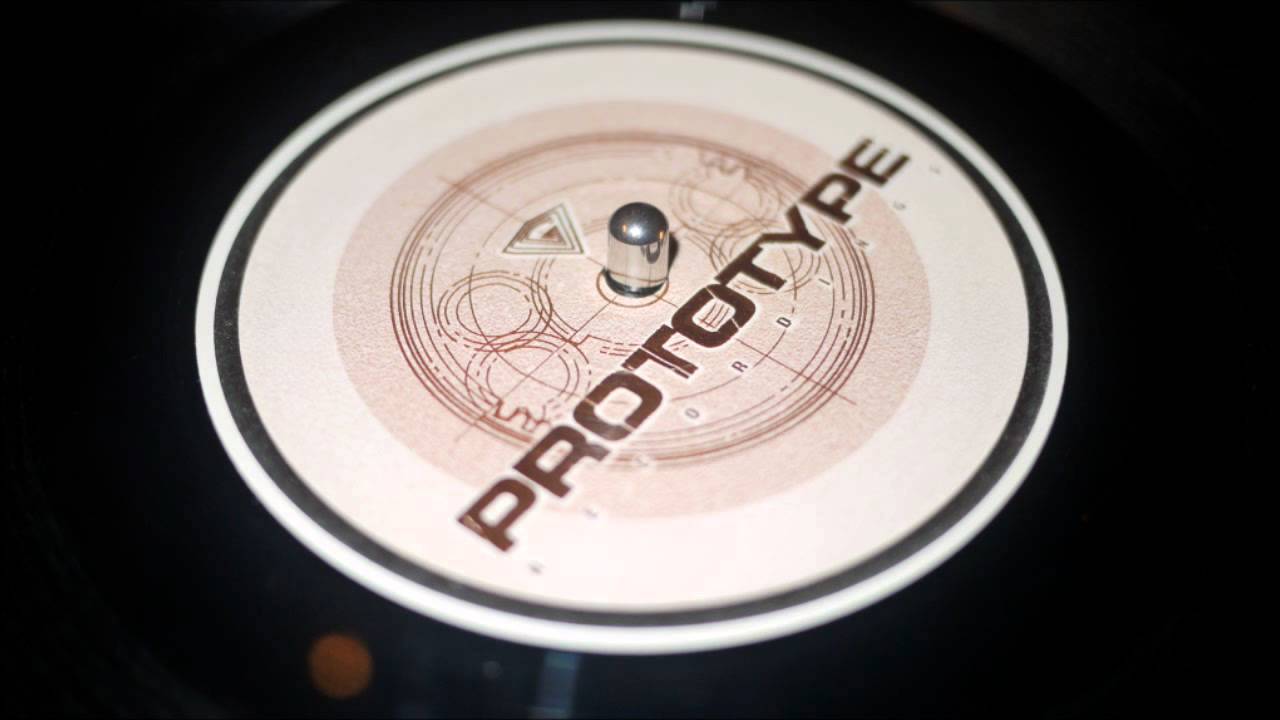
Jump to 3:35 to hear a classic distorted Reese.
In the mid and late ’90s, this take on the Reese was a common feature of techstep and neurofunk, a lineage of styles that emerged from producers like Trace, Ed Rush, and Optical.
Fast-forward to today and the term is now used for a broad range of bass and lead sounds, usually when they feature stacked and detuned sawtooth waves.
Dutch electronic music trio Noisia are famous for popularizing Reese-influenced sounds that are maximal and upfront, making use of various filtering and stereo imaging techniques.
This interlude track from Moderat’s second full-length album sits somewhere in the middle, giving us plenty of bright harmonics but taming them dynamically with filtering.
Whether you prefer the classic sounds, the modern sounds, or something in between, the fundamental ingredients are easy to put together.
How do you make a Reese bass?
The key to a Reese bass lies in getting that detuned sawtooth sound, which you can do in a few different ways.
Instead of going for a full-blown modern neurofunk Reese, we’re gonna go with the classic sound. A simpler approach will help you get a handle on the essentials.
We’re demonstrating with Ableton’s Drift synthesizer, which comes free with Ableton Live Lite.
1. Set your voice configuration to mono
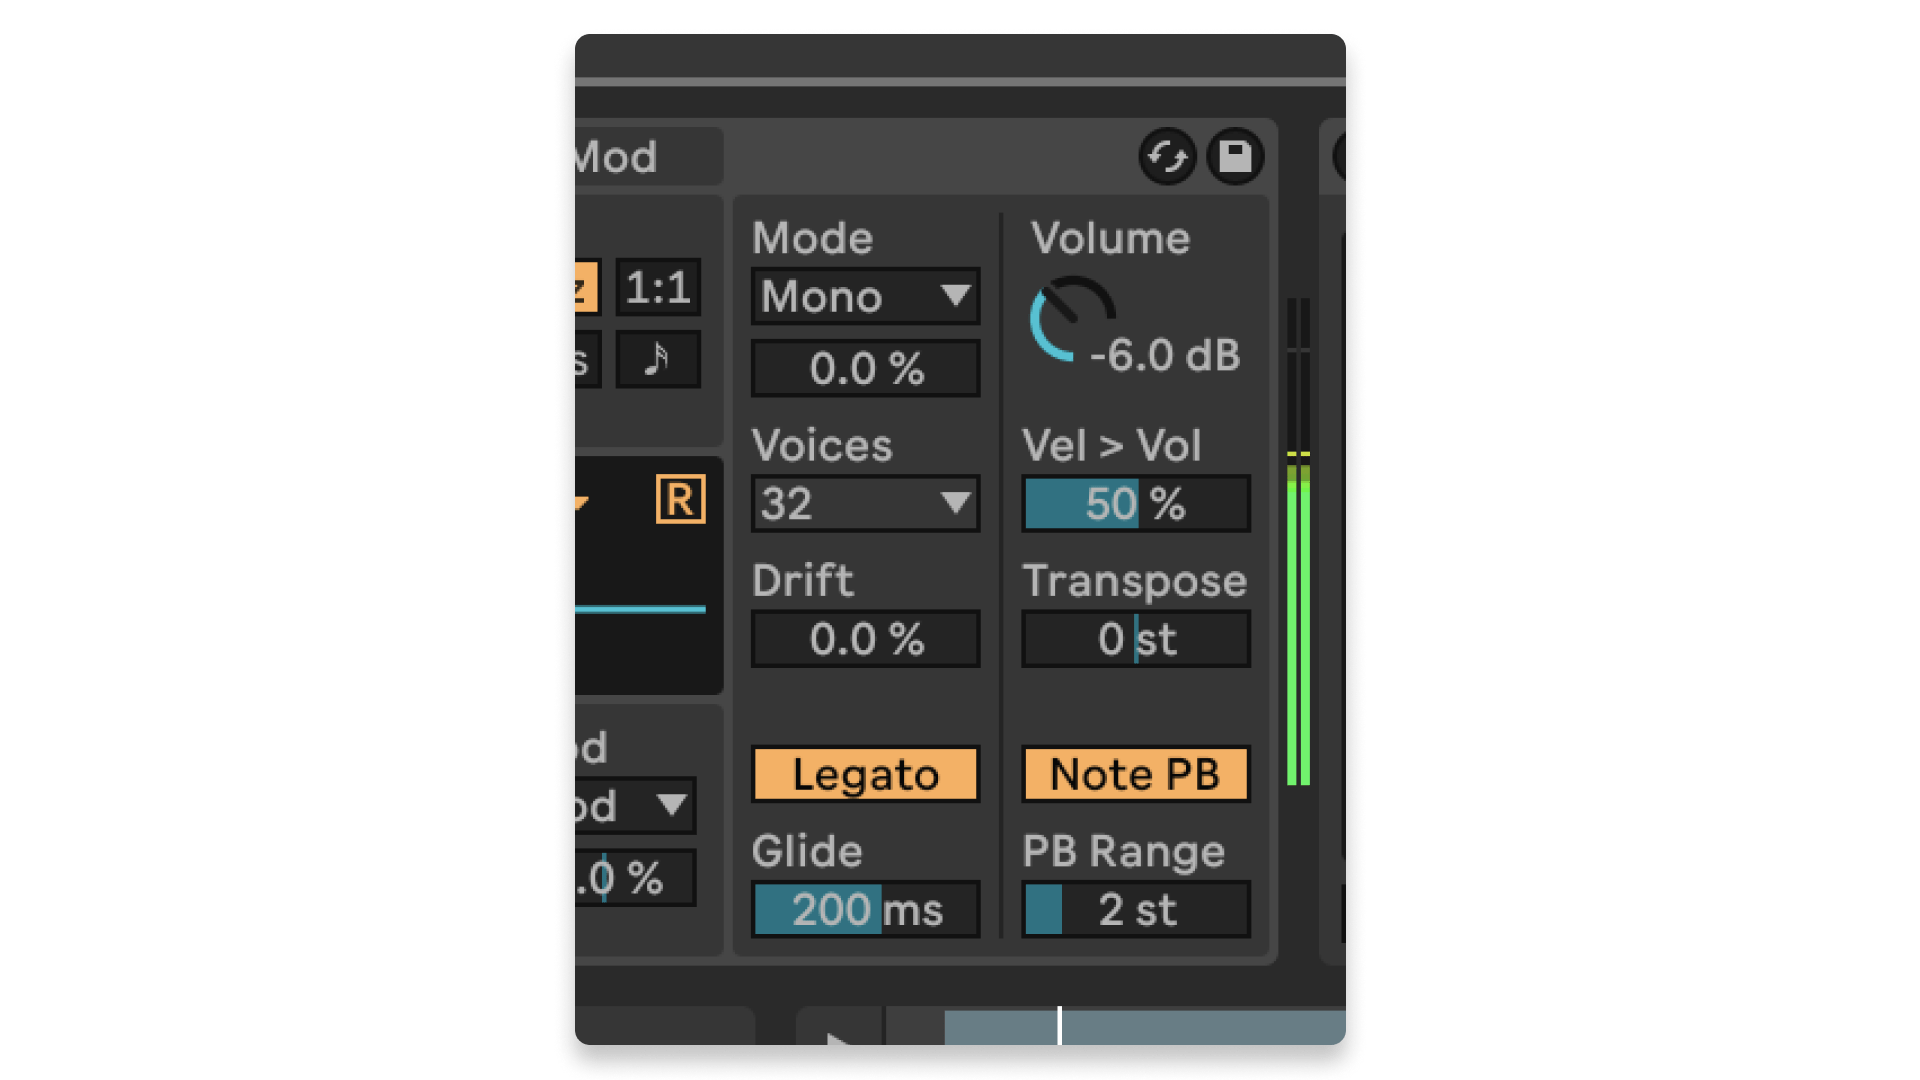
The two most common methods for Reese bass are to either stack several sawtooth voices in unison and detune them, or to use a mono voice with at least two oscillators (again, one of them detuned). We liked the results we got with the latter approach.
2. Turn on legato
Reese bass sounds typically have a bit of glide between notes, so hit the legato switch and set the glide time to about 200ms (or slightly more if you want it more pronounced).
3. Set your first oscillator to sawtooth
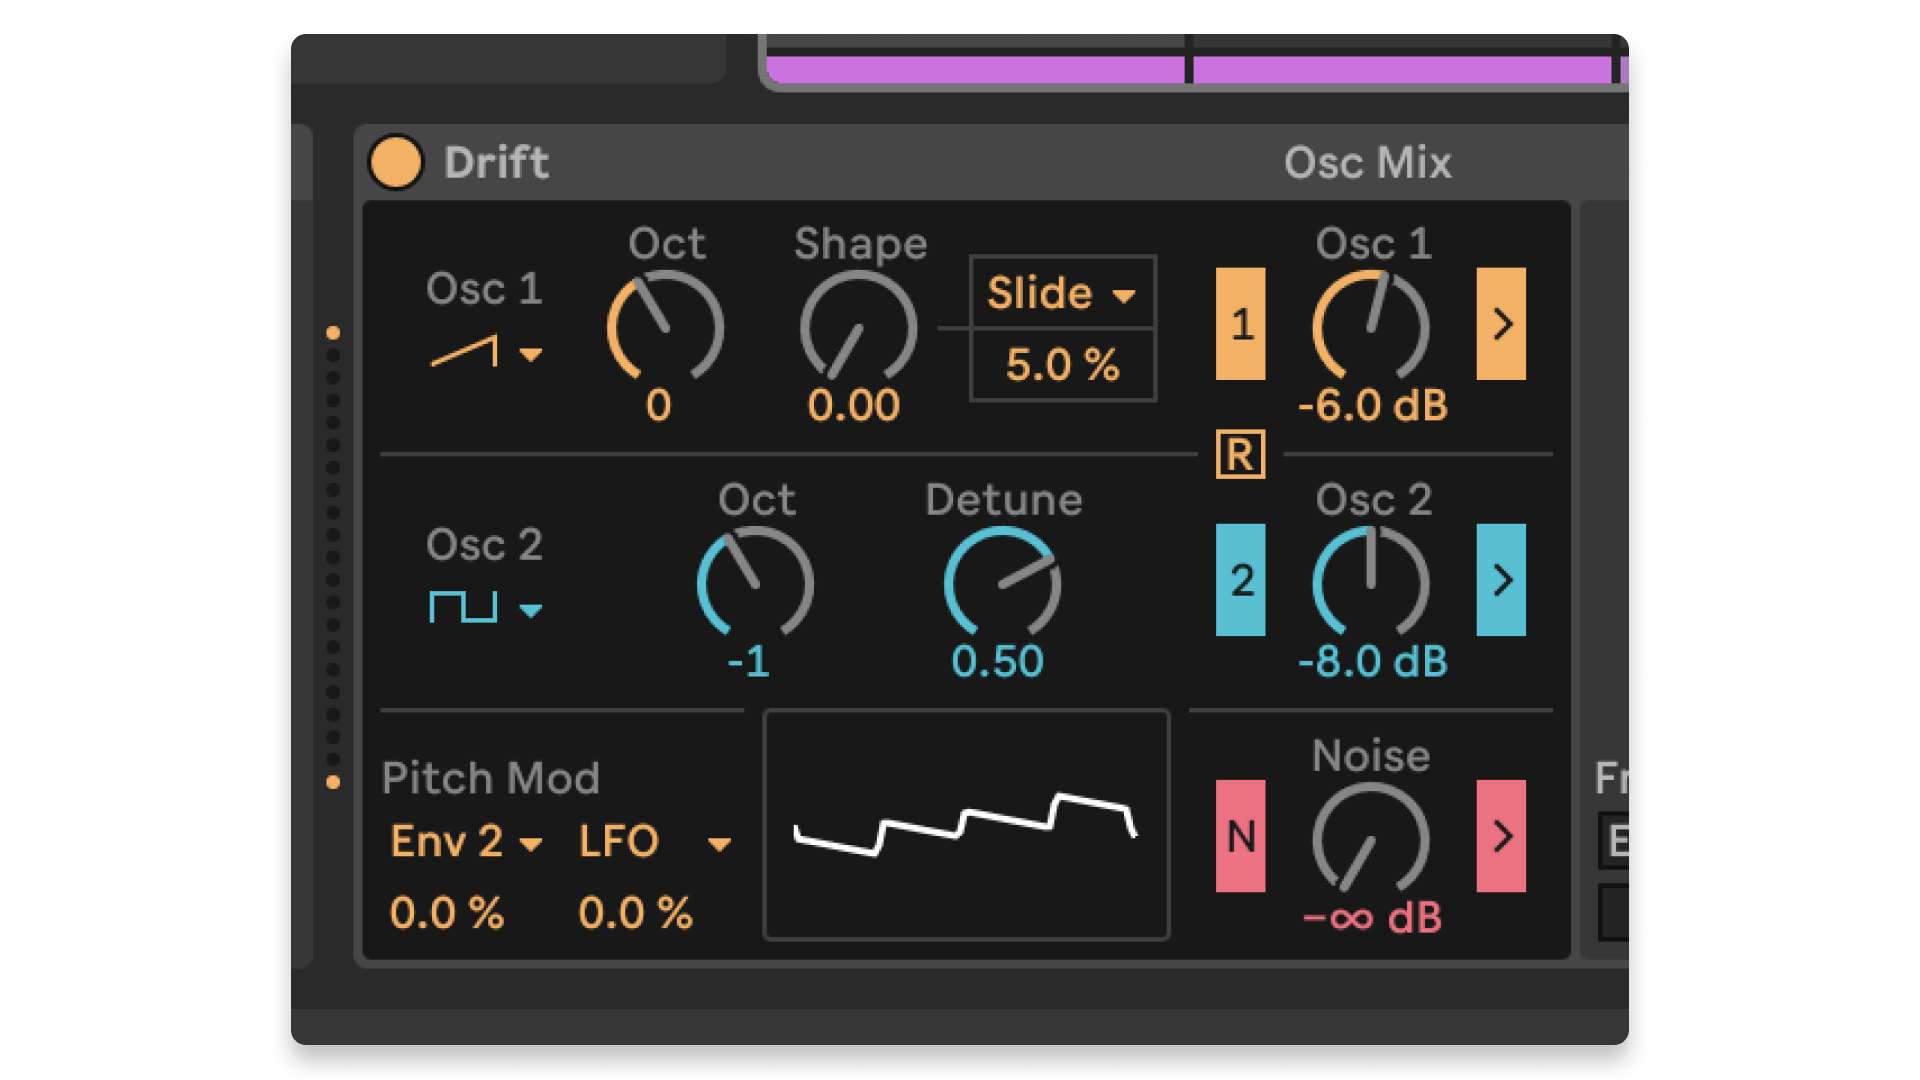
You don’t have to change the tuning for this one.
4. Set your second oscillator to sawtooth or square
We preferred a square wave for the second oscillator, as it gave us the kind of body and fullness we were looking for.
5. Detune your second oscillator
You’ll want to tune it an octave below your first oscillator before detuning it by about .25 to .5 cents. You can detune up or down, but we liked how it sounded when detuned up.
6. Filter out your high end, add resonance to taste
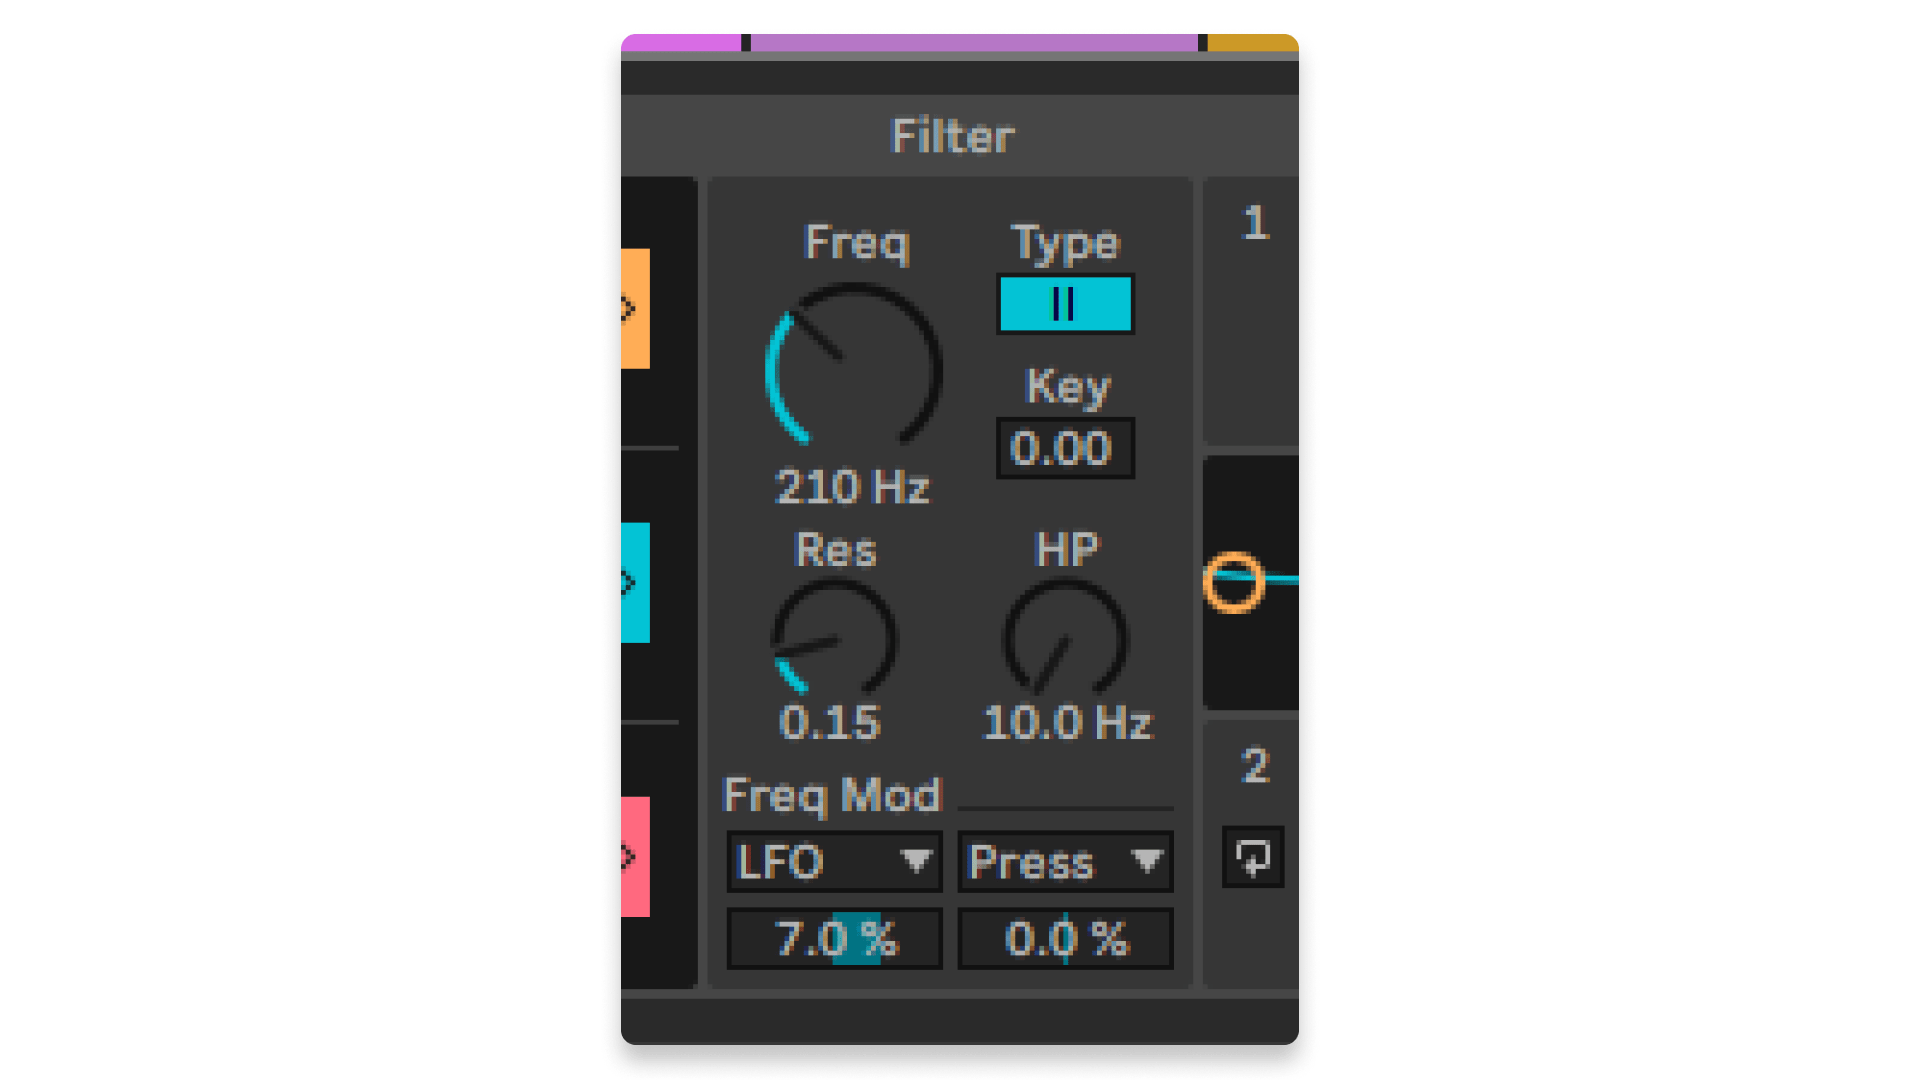
We experimented with the low-pass filter at a few different settings between 116 and 225. Optionally, you can bring the resonance up a bit to help emphasize the low end.
7. Modulate your filter
We added a subtle amount of modulation to the filter cutoff with a triangle LFO, which we synced to tempo at ⅛ note speed. This is one way to get some of that signature “wobble”.
8. Set your amp envelope for a full-bodied sound
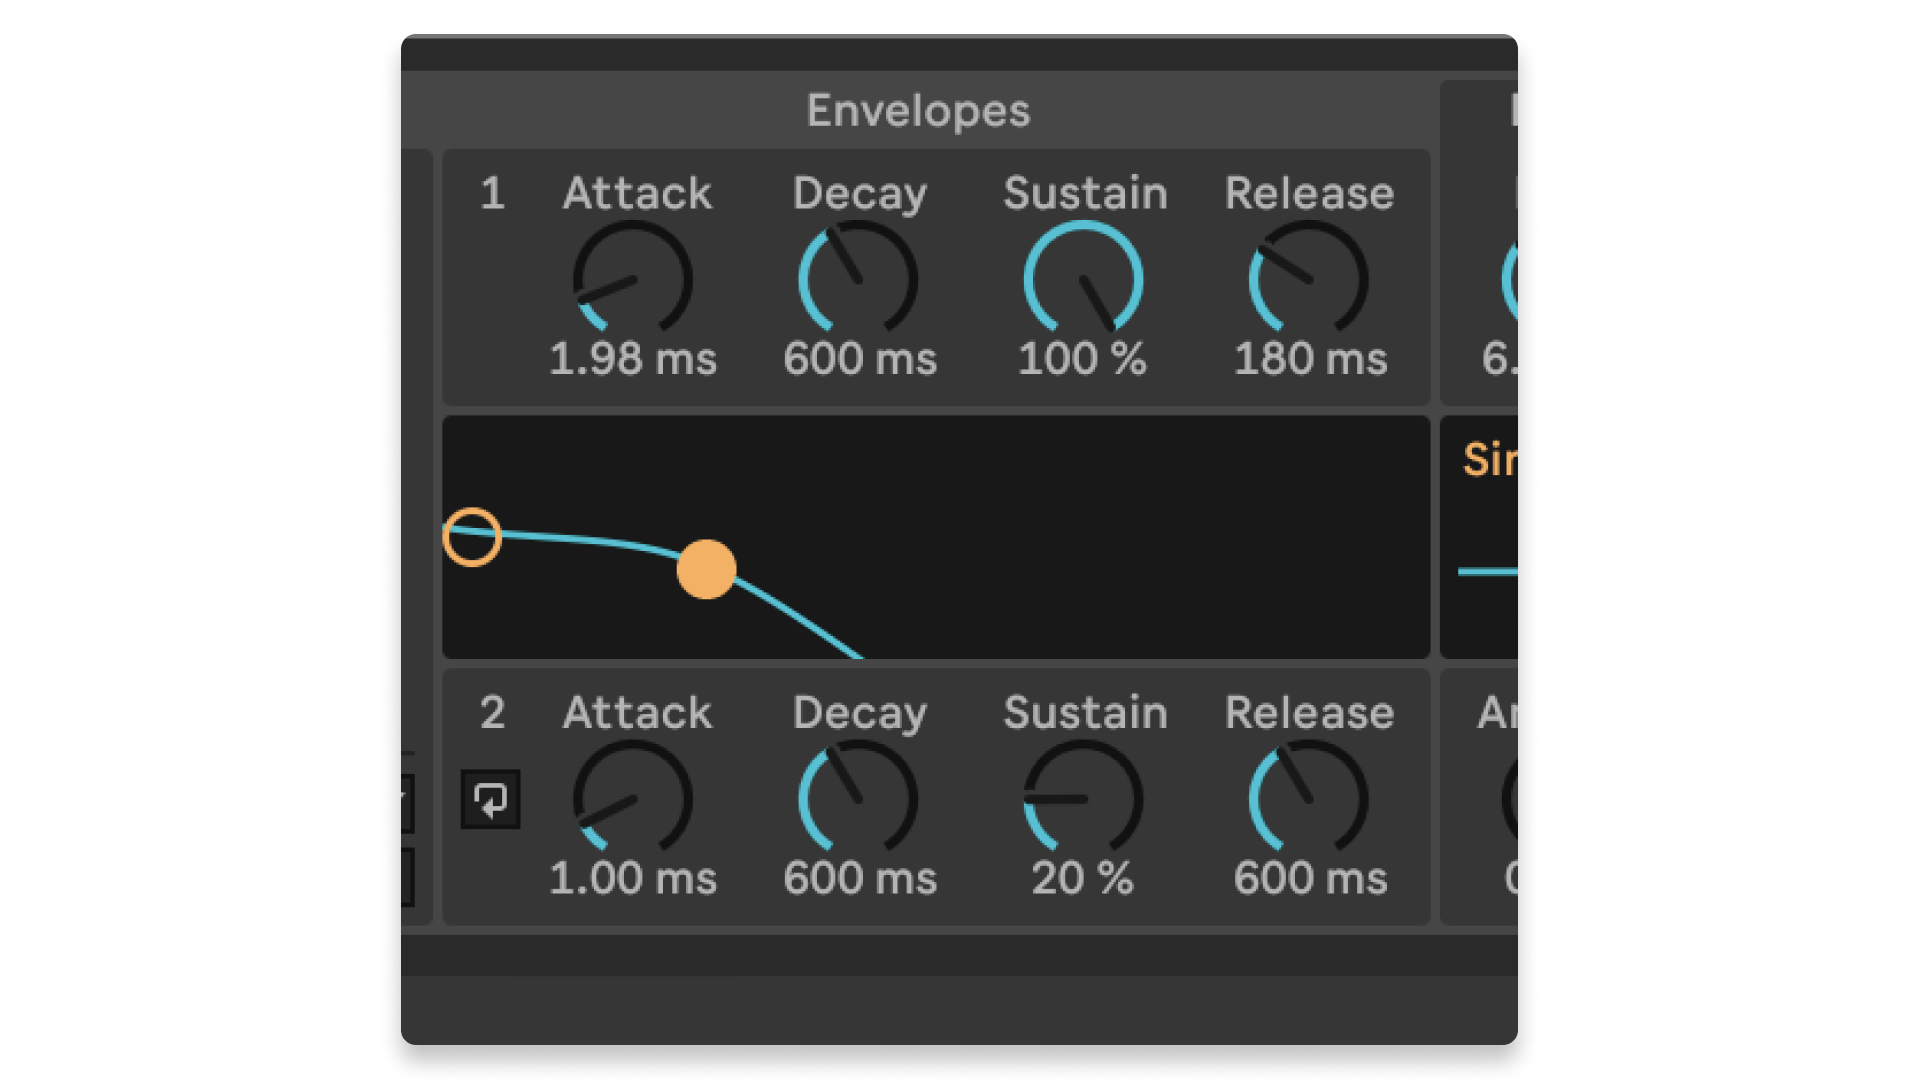
It’s good to have a little bit of room in the attack to avoid clicks, but not so much that you eliminate all the impact. A long sustain and a slightly tight release will give you fullness in each note, contrasted with a punchy finish.
9. Apply chorus and center the low end
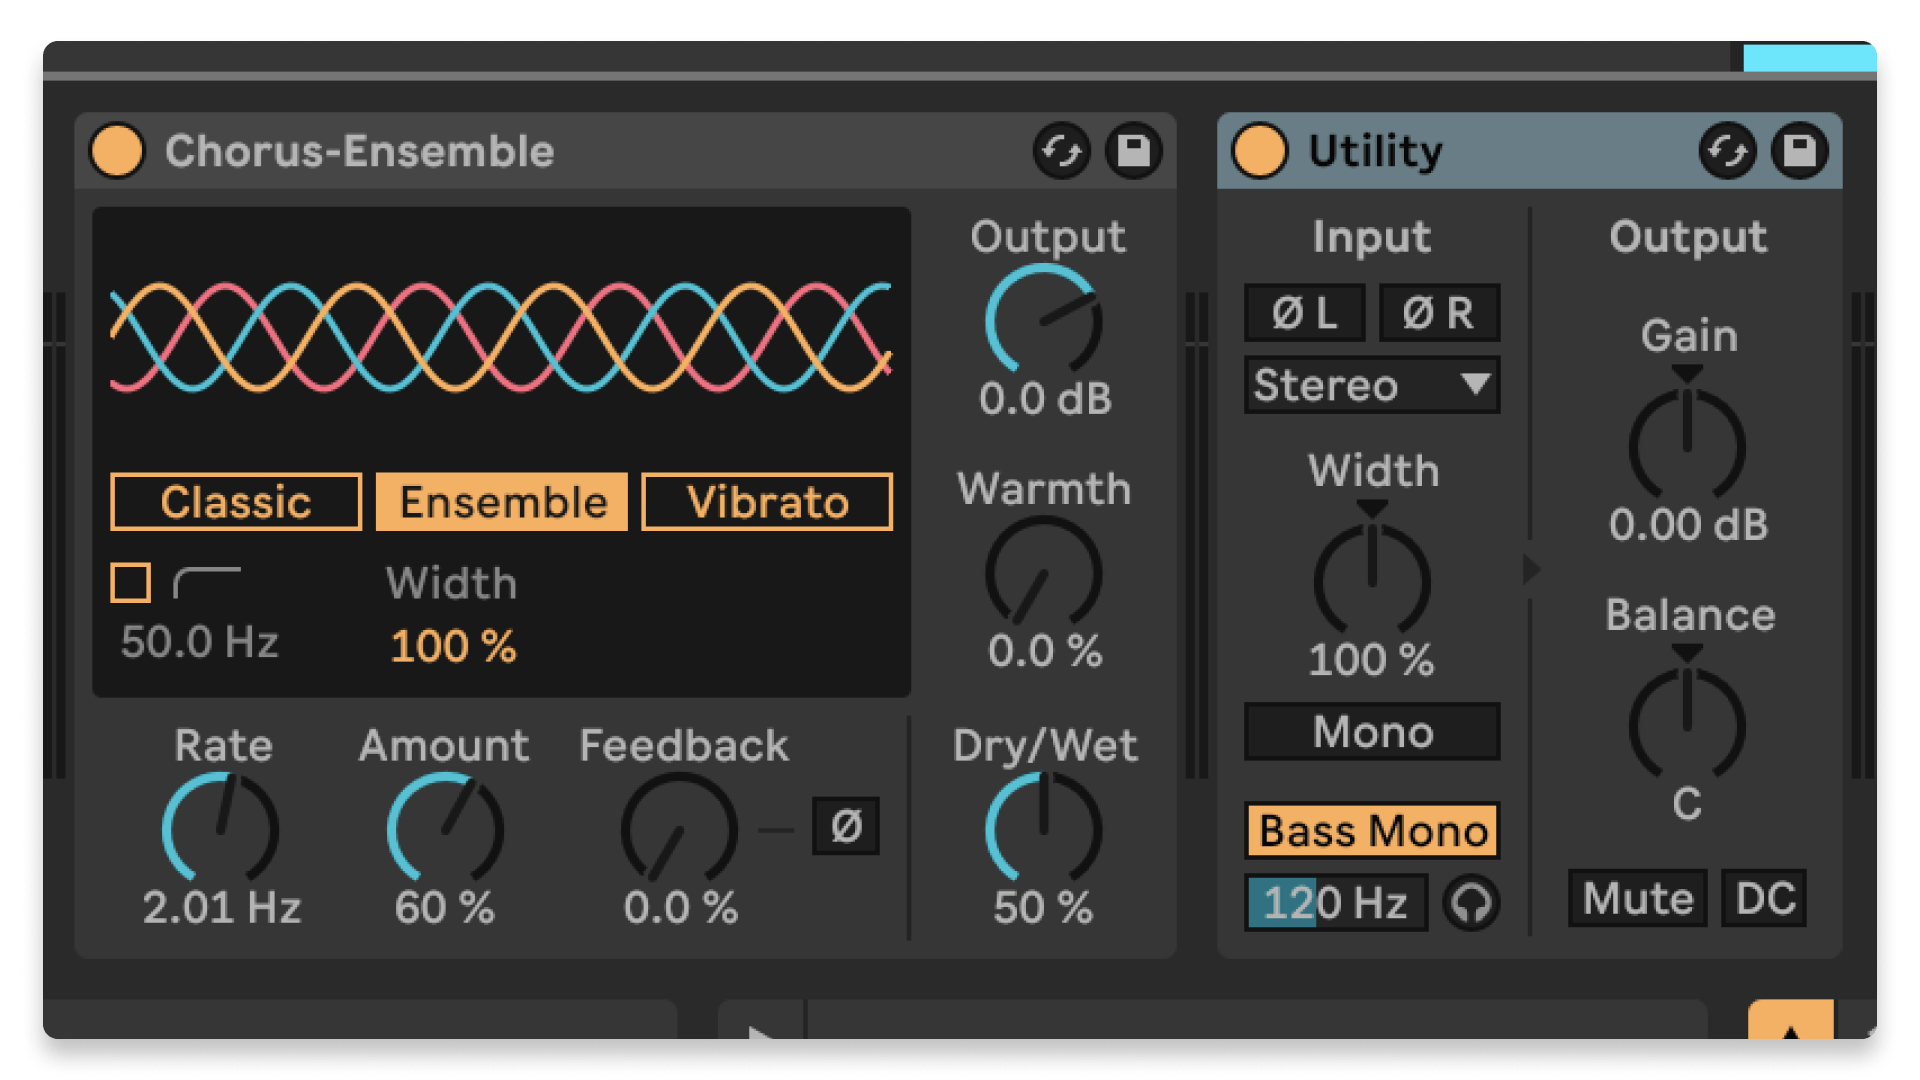
We went about 50% on the chorus to keep it subtle. Phase-based effects on sub bass can lead to issues in the mixdown, so we used Utility to center everything below 120 Hz. We also used added a little grit with Live’s Saturator and Erosion devices.
10. Mess around with LANDR FX Bass
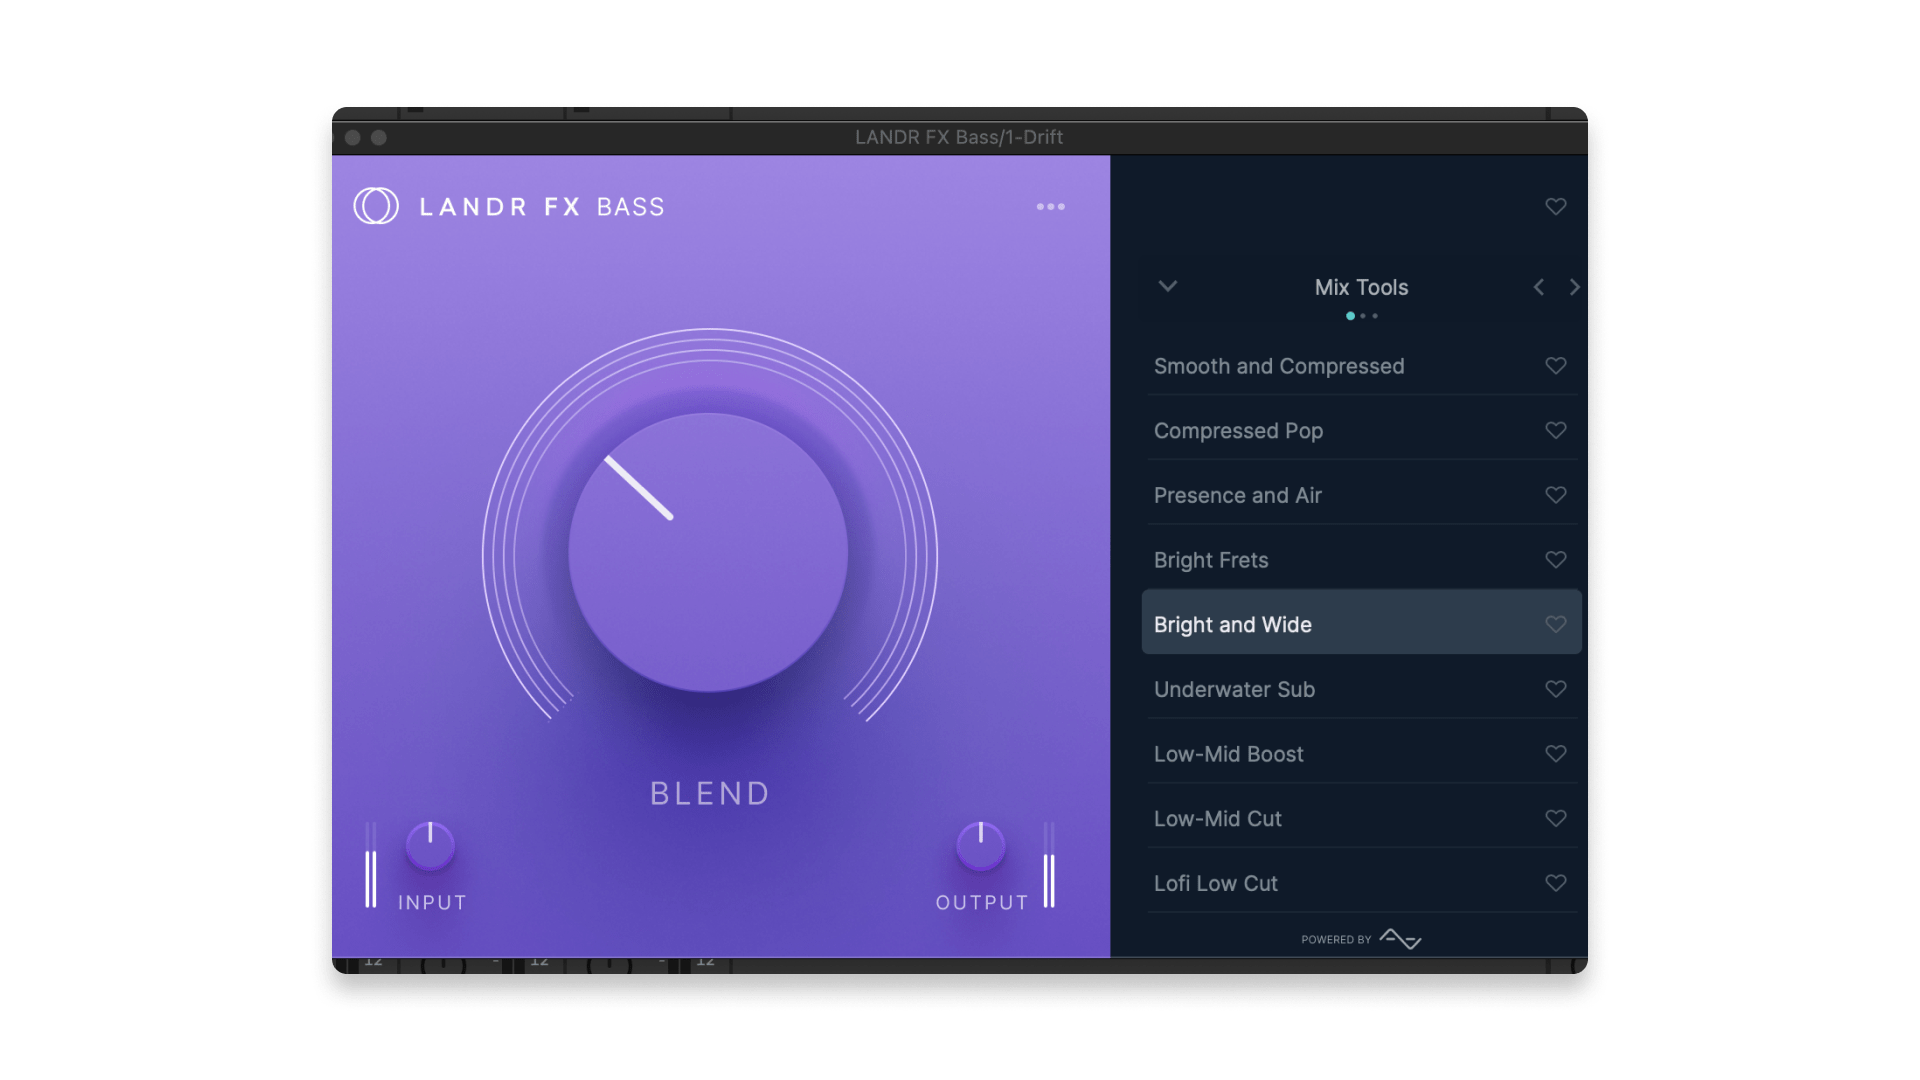
We love using this tool for quick and handy effects on bass sounds. Because of the importance of chorusing here, we tried out the “Bright and Wide” setting while disabling our chorus. This gave our Reese bass some excellent presence and a wider image.
Here’s how our Reese bass sounds in context with a drum loop, which we pulled into our session via the LANDR Samples plugin.
Reese bass presets
Keep in mind that the Reese bass is famous enough to show up as a preset in countless software synths out there.
Chances are good that a synth you already know and love has one under the bass category of its preset library.
Arturia Analog Lab Intro has a classic Reese bass under the name “Dark Reese”, and the DS90s synth in UVI Digital Synsations has one under the name “Nineties Dubstep”.
KV331 SynthMaster 2 Player has a bit more variety, with several Reese bass presets including an “old-school” one and a handful of modern ones.
Tips for using the Reese bass
Since you know that the rich harmonics, detuned sound, and stereo width are the key ingredients, you can work within those parameters to find your preferred sound.
A lot of producers (especially when using synths like Serum or Massive) get more advanced with oscillator stacking, modulation, and filtering.
These deeper techniques can get you even richer harmonics, powerful sub bass, interesting changes in timbre, and a more emphasized “wobble” effect.
In addition to centering the low end with a utility of some kind, some producers like to ensure that their fundamental tone is as pure and controlled as possible.
You can accomplish this by isolating the mid and high frequencies of your Reese, playing the fundamental sine with a separate synth, and mixing them together.
How exactly you EQ and mix your Reese bass depends on your stylistic preferences and the role you want it to play in the track.
If you keep developing your mixing and synthesis skills, you’ll know how to make your Reese bass sound just the way you want it to.
Gear guides, tips, tutorials, inspiration and more—delivered weekly.
Keep up with the LANDR Blog.

