


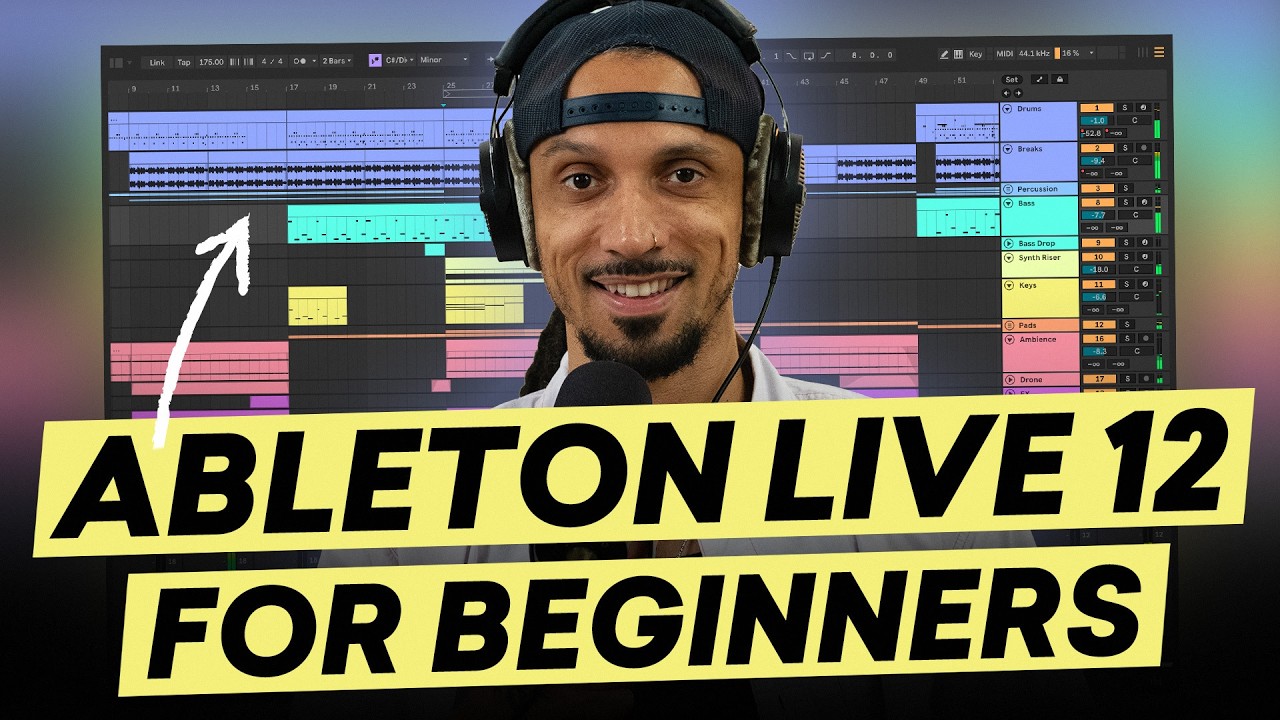
How to Get the Most From Ableton Live Lite
Ableton Live Lite is a fantastic and affordable way for beginners to start producing music.
It has all the fundamental tools you need to understand how DAWs work and what they can do.
Its low cost means that it comes with some limitations, but there are ways you can either work around them or use them to your advantage creatively.
So, let’s find out what separates Live Lite from the full versions and, most importantly, how you can get as much value as possible from it.
How much is Ableton Live Lite?
Here's a quick and fun tutorial outlining everything you need to know to get the most out of Ableton Live Lite.
Ableton Live Lite comes bundled for free with a wide range of software and hardware products, including MIDI controllers, plugins, and audio interfaces.
It’s also included in all yearly subscriptions to LANDR Studio.
Compared to the $99 Live Intro (Ableton’s base commercial version of Live), getting Live Lite bundled with another product offers a pretty fantastic value.
Ableton Live Lite vs. Intro
The most significant difference between Ableton Live Lite and Intro is that Lite limits you to eight tracks in total (which can be any combination of audio and MIDI tracks).
Intro, meanwhile, increases this limit to 16.
Live Lite is also limited to eight mono audio inputs and outputs, while Intro allows for up to 16.
Lite has fewer stock instruments and effect devices than Intro, but this is easily compensated for with the countless free plugins on the market today.
Both versions come with Ableton’s core library of samples, loops, and presets for the built-in devices.
To get a deeper look at the differences between Ableton Live Lite and Intro, you can view Lite’s full feature offering and a comparison chart for the paid versions of Live.
What’s new in Live 12 Lite?

The Lite version of Live 12 is now available, which means that Live Lite users are going to get even more bang for their buck.
Live Lite has inherited many new features from the full version of Live 12, in addition to features that were previously only available in paid versions of Live 11.
These include:
- Comping from Live 11
- Advanced tuning from Live 12
- Keys & scales from Live 12
- Sound similarity search from Live 12
- Upgraded file browsing and tagging from Live 12
- Upgraded MIDI tools for the new key & scale system
- Screen reader support from Live 12
Live Lite now also includes two new Ableton Live Packs — the hip-hop oriented Beat Tools pack and the EDM-oriented Build and Drop pack.
How to get more out of Ableton Live Lite
Modern producers have countless tools at their disposal, and Ableton’s design philosophy is all about flexibility. Put these factors together, and plenty of opportunities present themselves for getting more value out of Live Lite. Let’s explore some tips.
1. Use free plugins
While the selection of built-in instruments and effects is limited in Live Lite, the ones that it does include are excellent and well worth using in any project.
They’re particularly good for learning the fundamentals, from synthesis to EQ, dynamics, and beyond.
We love the analog-style synth Drift, the sampling instrument Simpler, the versatile Saturator, and the classic Beat Repeat.
However, if you find you want to go beyond what’s included, there are so many free plugins out there today that it’ll make you dizzy.
Whether you want a free and powerful software synth, drum machine, EQ, or compressor, there’s a top contender in almost every category you could imagine.
Fortunately, we’ve covered this topic extensively.
We recommend you bookmark our running list of the best free plugins available. We’ll continue to update and refine it over time.
2. Stock up on loops and samples
Since Live Lite comes with Ableton’s core library, you’ll have a pretty solid amount of content to get you started.
But if that doesn’t quite cut it for you, don’t worry.
There’s never been a better time to find loops and samples that make it easy to develop your skills and craft excellent tracks.
Freesound is probably the most widely-used site for getting free loops and samples.
If you want higher quality and better curation, a sample and loops marketplace like LANDR Samples is worth the step up.
It can also be interesting to “sample” your own material.
Create a fully-developed musical idea or a multi-layered percussion bus, export it as a single stereo loop, and re-import it into Ableton’s Simpler device.
From there you can further slice it, process it, and mangle it like you would a third-party loop.
If you build a whole collection of these and spend some time away from them, you could leave some useful surprises for yourself later.
3. Dig up some free racks
One of the most unique aspects of Ableton Live’s workflow is the “racks” system.
Racks are groupings of drum sounds, instruments, audio effects, or MIDI effects.
You can combine several devices in a rack and control them with macros, which allow you to make changes to multiple parameters at once with single knobs.
Essentially, this makes racks a basic platform for creating custom instruments, effects, and tools using Ableton’s plugins as the building blocks.
Some creators build unique racks with Ableton devices and release them for purchase, or even for free.
While they tend to contain devices that aren’t included in Live Lite, the developer ELPHNT has some excellent free ones that are compatible with Lite.
4. Use racks as a workaround
We have more good news about racks—they can contain as many Ableton or third-party devices as you want.
Plus, the individual outputs of each device in a rack are available as mixer channels in session view, just like regular tracks.
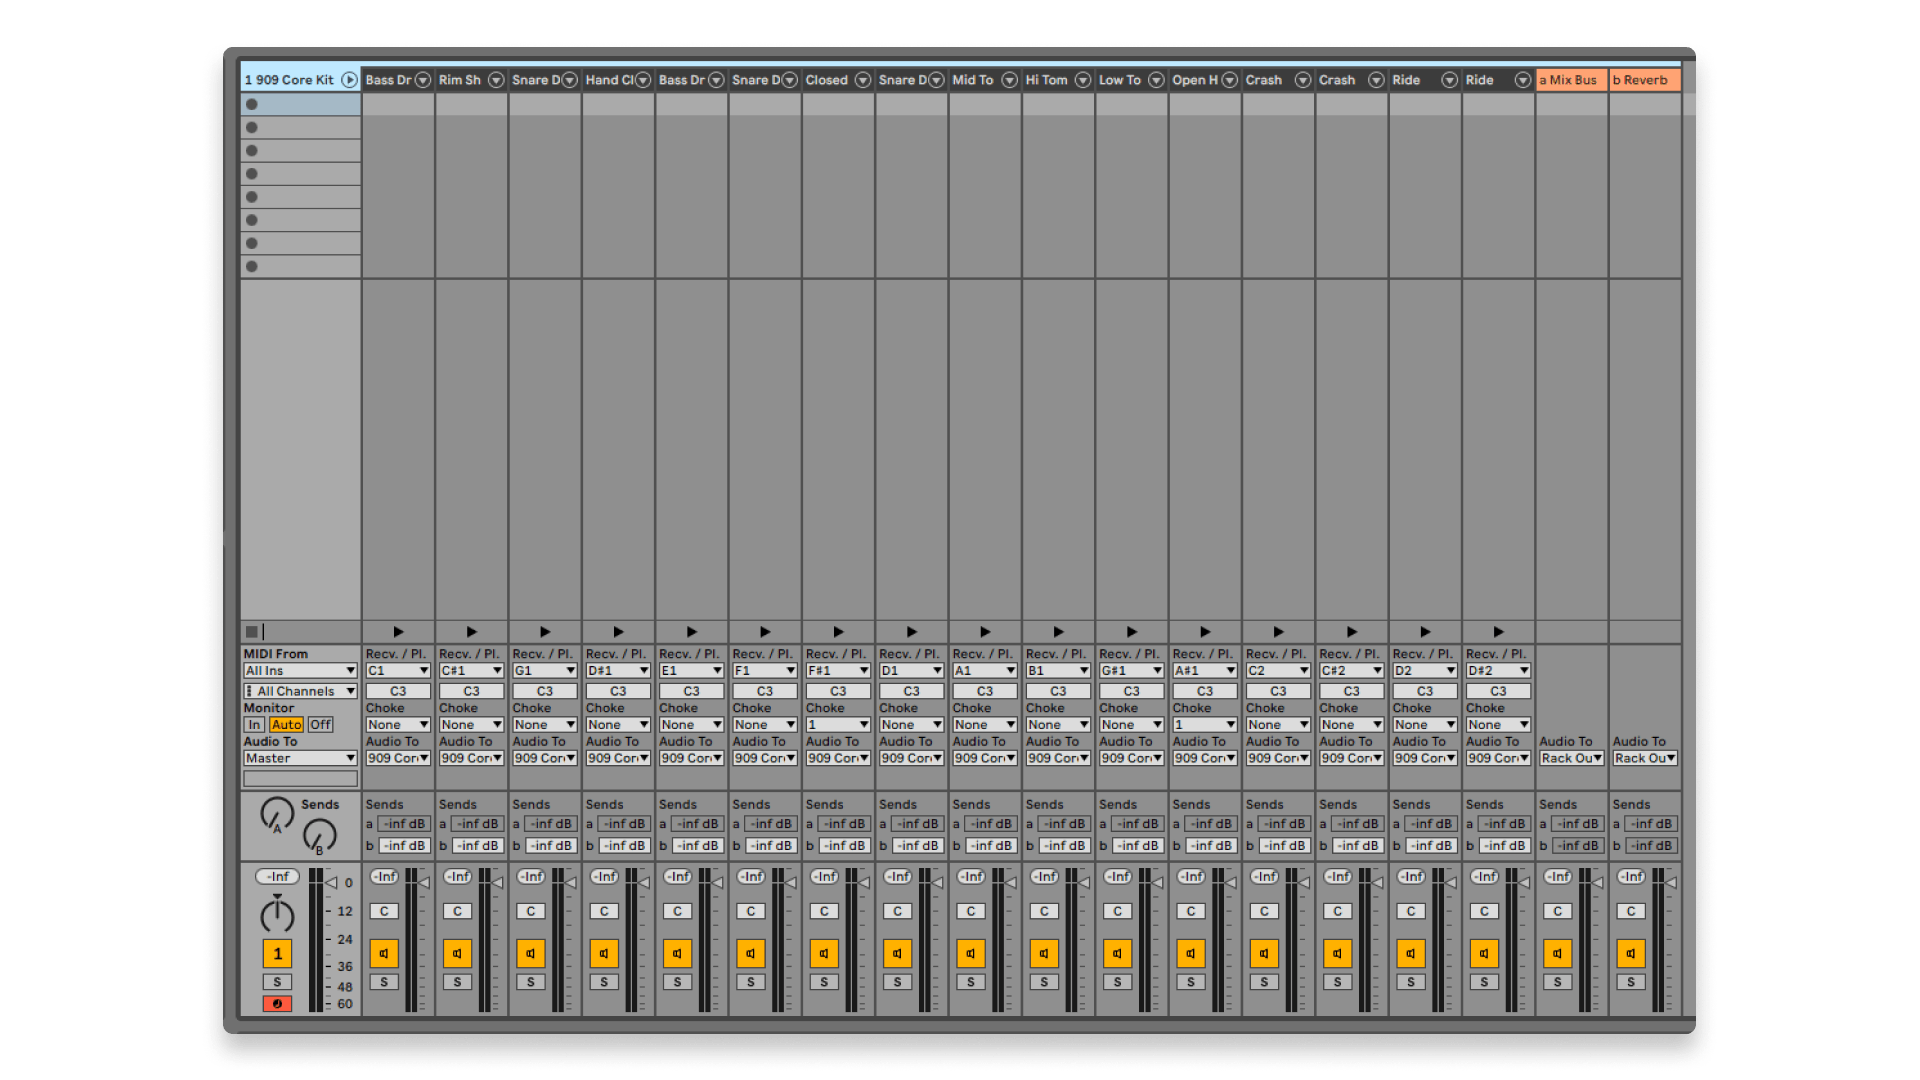
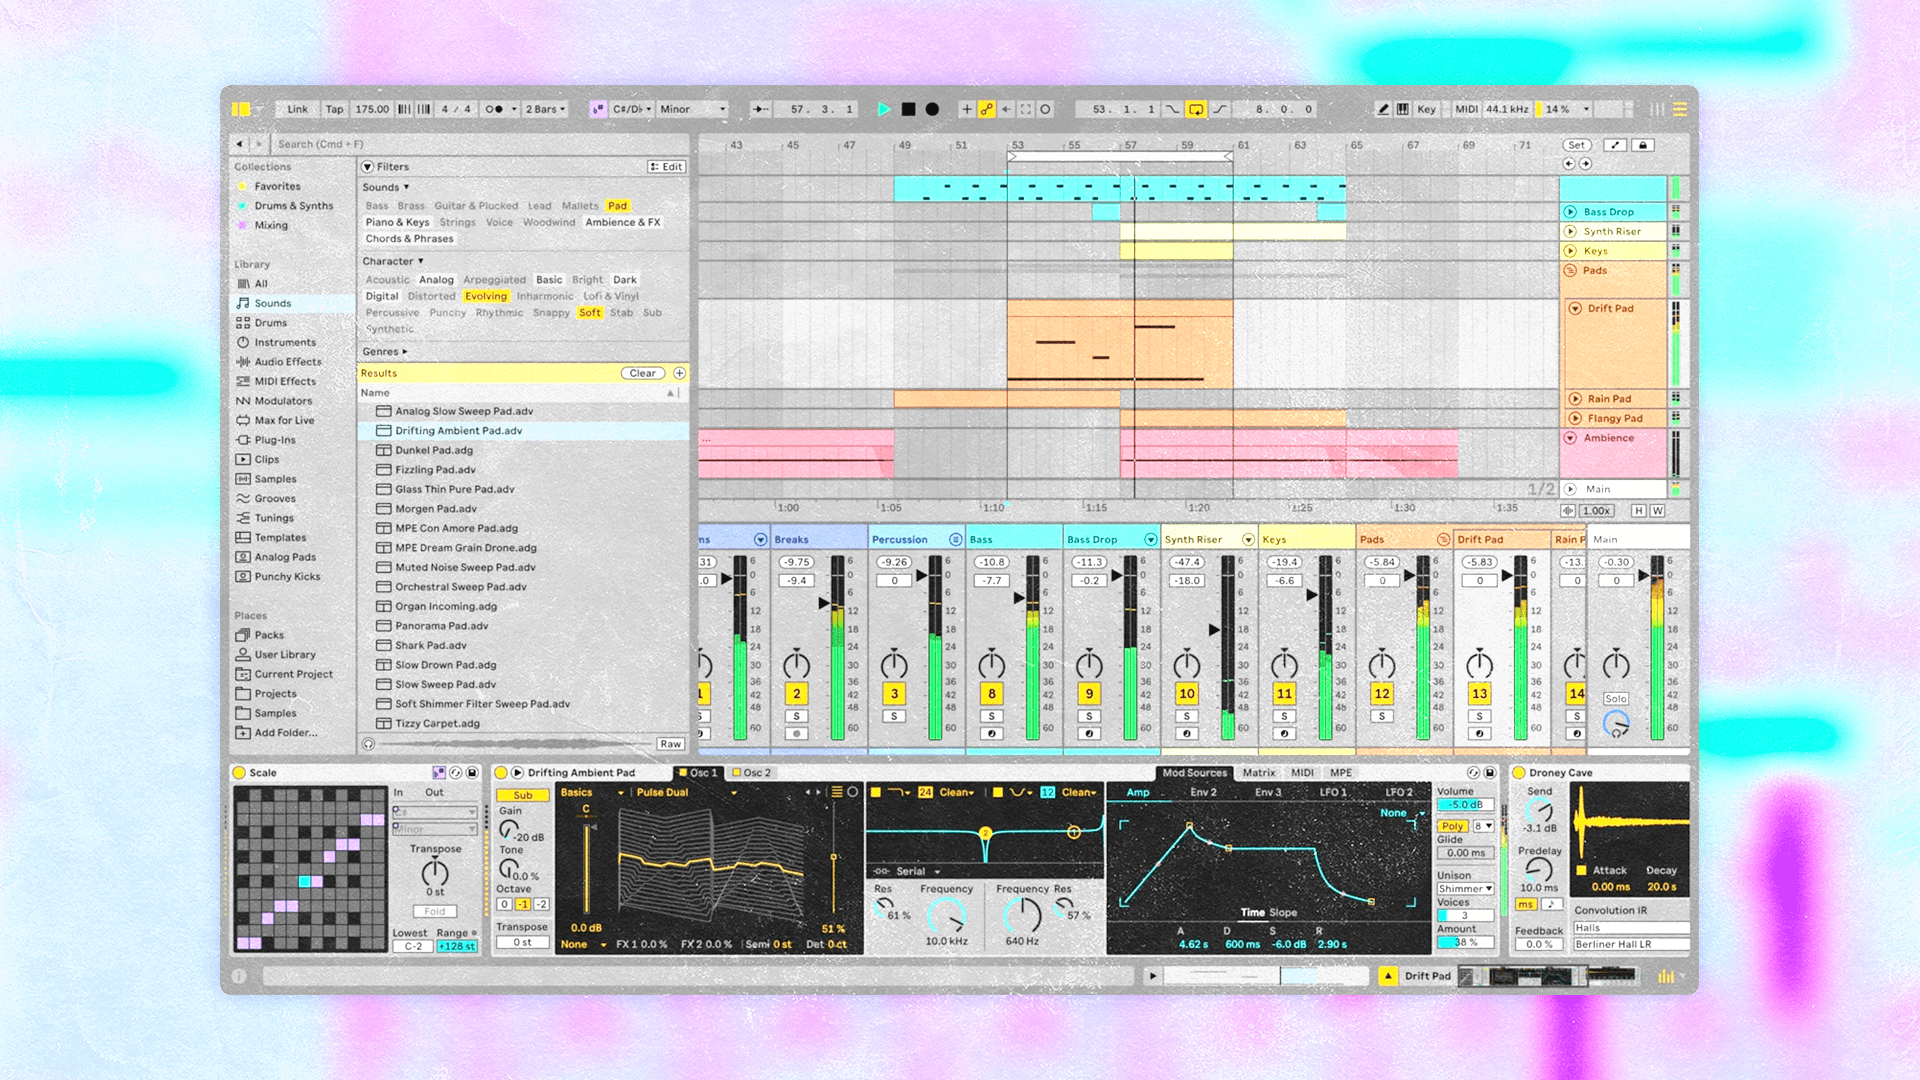
This 16-channel Drum Rack only counts as a single track in Ableton Live Lite.
You can even place effects on each individual instrument channel within an Instrument Rack.
This means that even if you place an Instrument Rack on one of your tracks and load it with twenty instruments, it still only counts as one of your available eight tracks.
It’s a pretty handy strategy for working around Live Lite’s track limit.
It’s important to note that the individual rack outputs will lack effects send levels by default.
You can set up effect sends within Drum Racks, which allows you to send your Drum Rack layers to a shared reverb or delay.
Effects sends are not available within Instrument Racks, however.
So if you’re using an Instrument Rack, you’ll need to apply all of your effects on the devices within the rack individually, which can be heavy on the CPU.
5. Mix, bounce, and repeat
Another way to work around the eight-track limit in Live Lite is to create dedicated projects for track groups, plus a master project for your final mixdown.
Say, for example, you create a project for a drum bus. You can layer drum elements with up to eight tracks, mix them down, and export the result as a stereo drum kit stem.
When you pull it into the project for your final song mixdown, it will only take up one track.
You’ll still have to switch back to your dedicated drum stem project if you want to make changes to the individual drum layers.
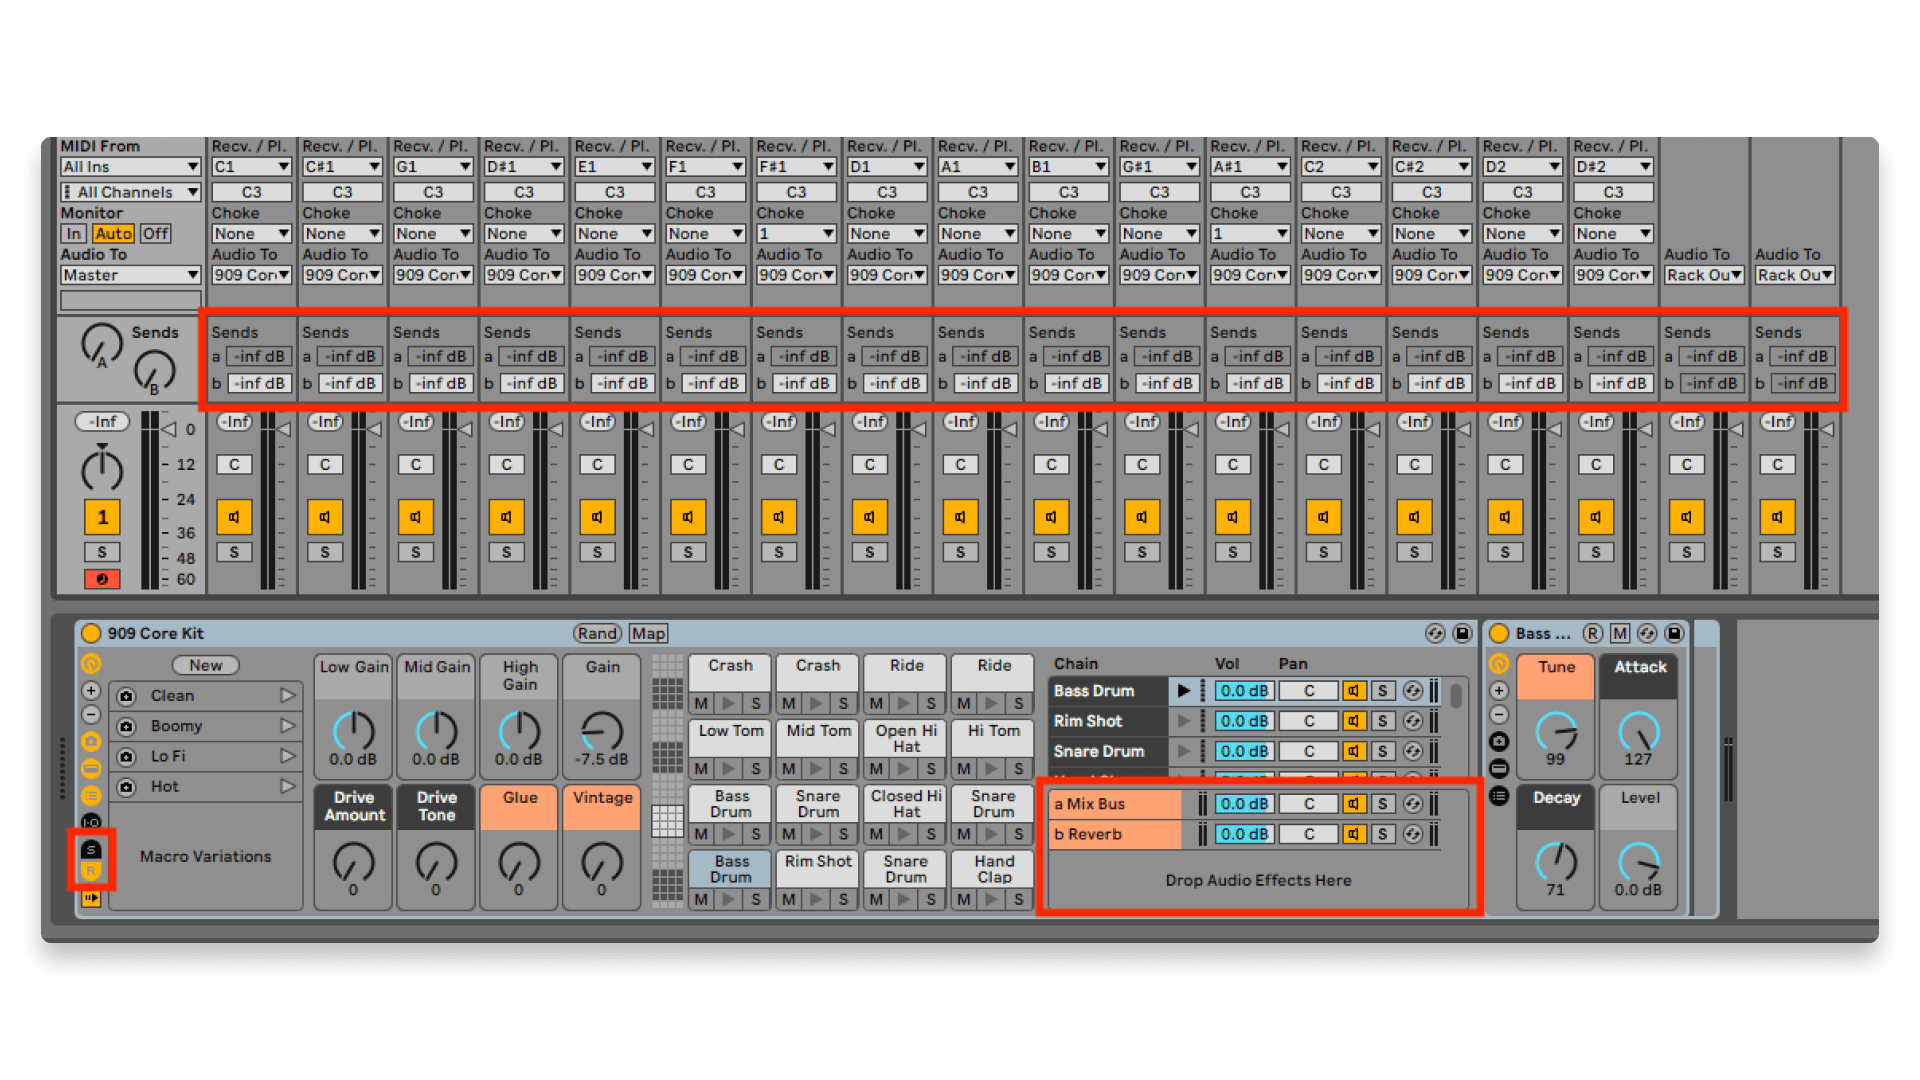
You can make this easier by grouping the tracks and dragging the group into your User Library, which will save that track group as its own Ableton Live project.
When you create a track group (right) you can drag the group into the User Library section of the browser, and it will create a new Live set file that stores your group (left).
Anytime you need to make changes to the mixdown of that track group, just double-click that save project file, make your changes, and bounce it down to a new stem.
Limitation and inspiration
With the combination of Ableton’s design philosophy and the countless free plugins available today, Live Lite has a ton of value packed into a “light” package.
While an eight-track maximum certainly presents a challenge, it’s the kind of challenge that breeds creativity and inspiration.
It’s a useful exercise in committing to your decisions, leaning on the strength of your songwriting, and being intentional with your mixing and use of effects.
We highly recommend Live Lite to anyone who’s new to music production, especially if you want to develop the core skills that will ultimately lead to better music.

Devon Hansen is a producer, DJ, and writer with 20 years of experience in electronic music production. Having worked under various names and in a wide range of styles, Devon has performed several editions of MUTEK Montreal and has released music with labels in North America, the UK, and Japan. When not working on creative projects or playing tunes on Montreal’s n10.as radio, Devon can be found watching movies, cooking, and reading too much about gear.
@Devon HansenGear guides, tips, tutorials, inspiration and more—delivered weekly.
Keep up with the LANDR Blog.