FM Synthesis: Everything You Need to Know to Get Started

Synthesizers are some of the most inspiring music machines around.
The fact that you can build complex musical textures from scratch inside a machine will always feel like magic.
When it comes to synthesis, many producers are familiar with the basics. Concepts like oscillators, filters, and envelopes have made their way into many musicians’ daily practice.
Those components all belong to a method called subtractive synthesis. But there’s a whole other, more mysterious world of synthesizers out there.
I’m talking about FM synthesis. Many producers think FM is dated and overly complex. After all, it comes from an era where most synths were bulky black boxes with tiny menus instead of real knobs.
But FM is one of the most interesting types of synthesis out there. If you’re looking for new and fresh synth sounds to bring into your music, there’s almost no better choice than FM.
In this article, I’ll explain what FM synthesis is and how to start using it in your music.
Let’s get started.
What is FM synthesis?
FM synthesis is a method of generating complex timbres by modulating the frequency of one sound with another.
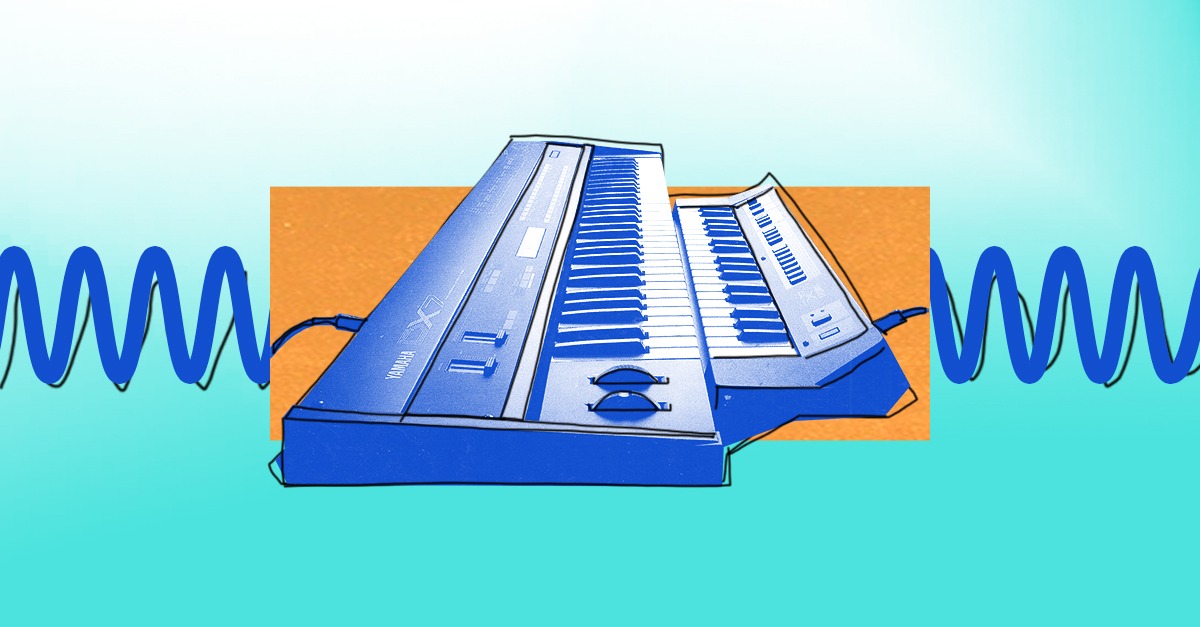
FM was invented by John Chowning at Stanford University in the late 60s, but it didn’t become popular until Yamaha released the DX7 synthesizer based on the technology in 1983.
The DX7 sold thousands of units and went on to define the sound of synths in the 1980s.
What is FM synthesis good for?
FM is a unique style of synthesis that works well for certain sounds.
FM synthesis is a method of generating complex timbres by modulating the frequency of one sound with another.
You probably recognize a lot of the classics from when it was most popular in the 80s, but there’s much more out there
FM synthesis works great for these types of sounds:
- Instruments with complex attack like electric pianos, bells and mallets
- Aggressive bass that punches through the mix
- Icy atmospheric pads
- Plucked strings or distorted sounds
How does FM synthesis work?
FM synthesis uses the principle of frequency modulation to create its unique sounds.
The term frequency modulation sounds a little scary, but you’re probably already using it in its simplest form.
Frequency modulation is just like any other kind of modulation you would create using LFOs in your subtractive synth—with one key difference.
If you need a refresher, here are the basics. A basic oscillator waveform on its own isn’t very interesting.
It needs movement and action to make it interesting. That’s where modulation comes in. Modulation creates change over time.
You use a special kind of oscillator called an LFO to modulate other parameters on your synth. Imagine you had a third hand that could turn a knob up and down at exactly the same rate every time—that’s LFO modulation!
Applying an LFO to oscillator pitch (or frequency) will give you a vibrato sound. That’s the simplest form of FM.
Applying an LFO to oscillator pitch (or frequency) will give you a vibrato sound. That’s the simplest form of FM.
The speed of the vibrato effect is determined by the frequency of the LFO. Its intensity is determined by the LFO amount.
This is essentially the same process that takes place within an FM synthesizer, although as I mentioned above, there’s a difference.
As you increase the frequency of the LFO more and more, it starts to sound less like vibrato and more like a whole other sound altogether.
That’s where things get interesting. At frequencies in the audible range and above, this type of modulation can create timbres never heard in synthesis before the dawn of FM.
I’ll show you how.
Operators
Modern day FM can all be traced back to the DX7. Even today, FM synths are based on the same basic components—operators, algorithms, carriers and modulators.
I’ll go through each one and explain how they work.
Operators are the basic building blocks inside an FM synth.
Think of each operator like a tiny little synthesizer with its own oscillator and envelope generator. Except each of these mini synths can only use a basic sine wave oscillator shape.
The classic FM synths had a total of six operators—that’s a lot of synthesis power in one unit.
Hot tip: Some of the newest FM synths on the market have only four operators. You might think this is less flexible, but modern day FM operators can often start with waveforms other than sine. As I’ll explain later, that simplifies the process of building up complex sounds and makes using FM even easier to get started with!
Carriers and Modulators
To create frequency modulation you need at least two sound sources. One to do the modulating and one to be modulated.
In an FM synth, both of these roles are played by operators.
The operator that does the modulating (think of it like the LFO in the previous example) is called the modulator.
The operator that gets modulated is called the carrier.
The magic of FM comes from changing the operator frequencies, envelopes and arrangement within a patch.
Algorithms
Speaking of operator arrangement, the way each carrier or modulator is connected to the other operators makes a big difference to the sound.
Which operator modulates which? How many operators are in use? Do they each modulate more than one operator?
With six of them in the mix, arranging operators individually would get overwhelming.
That’s why Yamaha decided to implement a set number of fixed operator arrangements for the most useful configurations.
These preset routings are called algorithms.
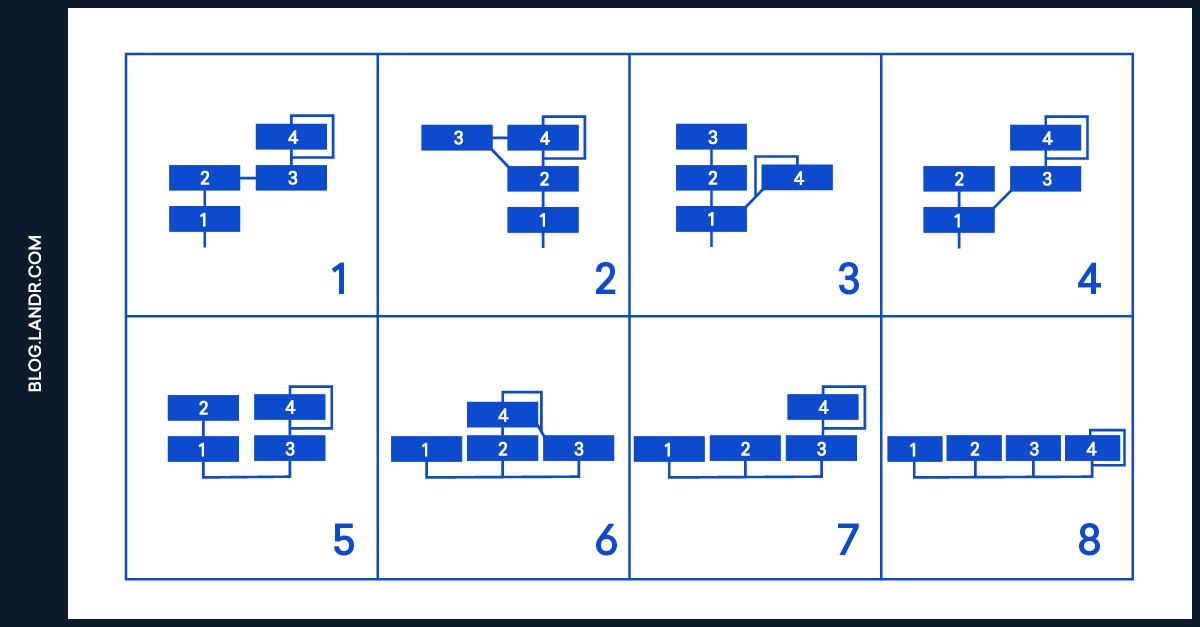
They’re the funny block diagrams depicted on the front panel of the DX7 if you’ve ever seen one in person.
The algorithms may look complex, but here’s all you need to know to understand them. The bottom row of operators in any given algorithm are the carriers. The rest are modulators.
The bottom row of operators in any given algorithm are the carriers. The rest are modulators.
The carriers play a similar role to the oscillators in a traditional subtractive synth.
For example, let’s take a look at algorithm five on this chart of four operator algorithms.

In this example each of the two carriers has one operator modulating them.
Setting these modulators to different frequencies will produce two distinct timbres.
Changing the level of each carrier will adjust the blend of timbres the same way mixing two oscillator waveshapes works in a subtractive synth.
Envelope generators
Of course, if the sounds you made with FM had no change in amplitude over time, they would get pretty boring.
Subtractive synths have envelope generators for the VCA and often the filter too.
That’s how you can turn a sound from a flowing sustained pad into a sharp percussive pluck.
EGs work the same way in FM, there’s just more of them—one per operator to be precise!
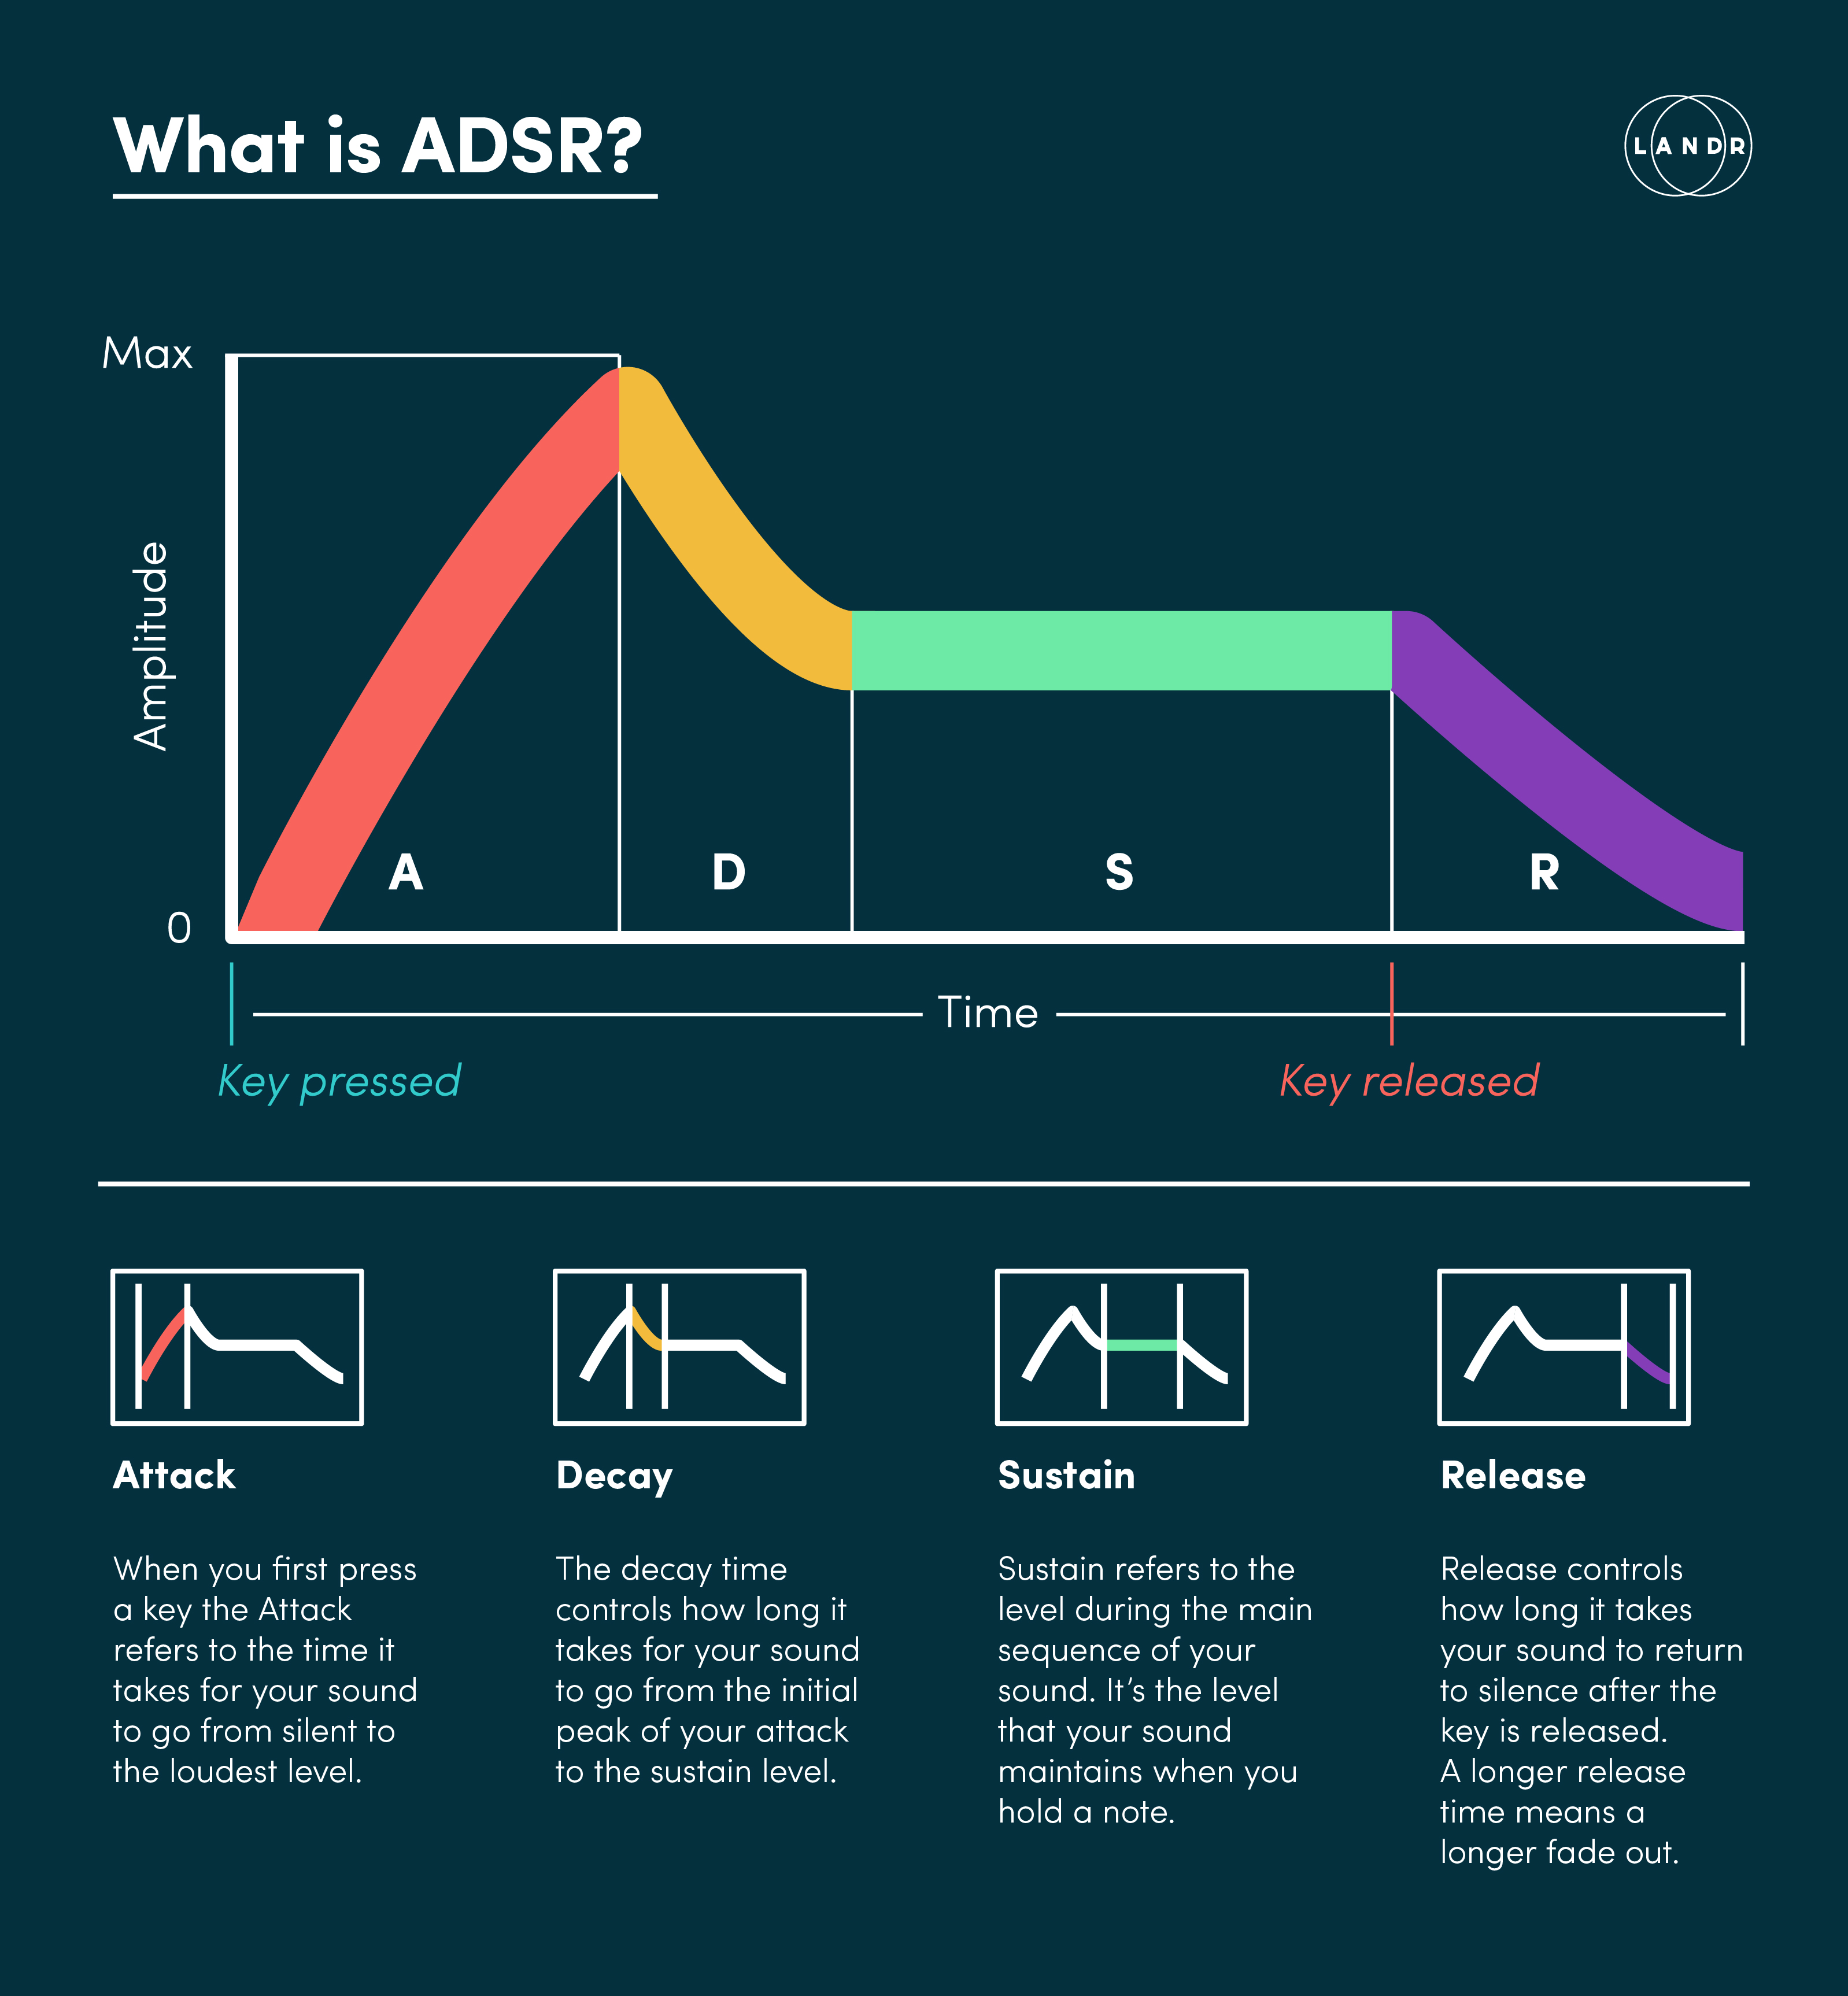
For carriers, the envelope generator works just like you’re used to in subtractive synthesis.

In the four operator example from above, setting both carriers for a slow attack and long release will create a pad sound—simple.
But modulators can have envelopes too. Let’s go back to basic LFO vibrato to understand how that works.
The LFO frequency becomes the vibrato rate, but the LFO amplitude becomes the vibrato depth.
Remember that the envelope generator makes changes to the amplitude of a sound over time.
If you added a pad type envelope to this LFO, the vibrato rate would remain constant, but its intensity would gradually build over time and then slowly diminish when you release the key. More on that later.
Ratios
One of strangest things about FM is how unpredictable it seems. Randomly choosing modulator frequencies creates some pretty chaotic sounds.
But you’ll rarely use this kind of fixed modulator frequency for programming most types of FM sounds.
Instead, the modulator frequency will most often be a multiple of the carrier. This makes it much easier to anticipate what type of sound you’ll create.
Here’s the rule: The higher the ratio, the more complex harmonics will be generated.
The higher the ratio, the more complex harmonics will be generated.
For example, a 1:1 ratio for the frequency of the modulator to the carrier will produce a sound with only slightly more harmonics than than a sine wave—in fact it will sound pretty similar to a saw wave if the modulator level is high enough!
A 2:1 ratio will produce something close to square wave. As the ratio gets higher, more and more complex tones will come out.
Ratios of 18:1 or higher are necessary to create some of the classic bell and tine timbres FM is known for.
Feedback
The last thing I’ll cover here is operator feedback. It’s not essential to the basics, but most FM synths include it, so it’s worth spending some time to explain.
The exact definition is a bit complicated, but all you need to know is that feedback means the operator’s frequency becomes its own modulator signal.
All that means is feedback is just another way to create harmonically rich waveforms from the basic sine waves available in FM.
As you turn up the feedback the operator’s output will approach a saw wave.
Feedback is indicated with a looping signal path around the operator. In traditional 6 operator FM there’s normally just one path with feedback per algorithm.
FM synthesis tutorial: How to program a bell sound
If all this is sounding a bit academic, don’t worry. There’s plenty of great practical and musical applications of FM.
To help you make your first patch in FM, I’m going to go through how to create one of the most recognizable FM sounds using a great free VST synth called Dexed.
In this tutorial I’ll be creating a bell sound.
Let’s get started:
1. Initialize a patch
Click the init patch button near the preset browser on Dexed to start with a blank patch.
Now if you play the keyboard, you should hear a basic sine wave as you play the keys.
2. Choose an algorithm
The next step is to select an algorithm to base your patch around. That way you’ll start with a clear idea of which operators are routed where and how they affect your sound.
This example requires only four operators, so you’ll only be paying attention to the bottom two rows of the algorithm.
Since it’s not a complex patch, let’s stick with the default algorithm.

3. Add a modulator
Right now your patch only has a single carrier with no modulator affecting it.
Mouse over to operator 2, which is directly above operator 1 in the algorithm.
As you turn up its level, you’ll start to hear your sine wave becoming more saw-like.
4. Change the ratio
The default ratio in this FM synth is 1:1. Let’s turn it up dramatically to hear the effect of increasing the ratio.
With the ratio set to 18:1, you can hear all kinds of harmonics are now present. Some are in tune, but others are highly dissonant. Turn down the level of this operator slightly to smooth out the sound slightly
This sound might not seem very pleasing right now, but the noisiness and unruly harmonics are key to simulating the complex attack of a bell sound.
5. Adjust the envelope
Reduce the sustain and decay time of the carrier’s envelope until it’s only a short pluck. Your goal is to use this complex attack for the onset of the bell sound only.
Dexed’s envelopes use the same control scheme as the original DX7. They might take some getting used to, but you can use the graphical display to help you.
6. Add another carrier
With this basic algorithm, adding another carrier is as simple as turning up the level of the other operator on the bottom row.
In this case, it’s operator 3. Turn up its level so that you begin to hear its sine wave tone alongside the short attack from the other carrier.
Now the initial attack provides interest during the onset and the sine wave provides the body.
7. Adjust the other envelope
The only step left to complete this bell tone is to give the sine wave carrier a more bell-like envelope.
Increase the release time on the envelope of the operator 3 so that it fades out gently and gradually.
FM adventure
FM is one of the youngest methods for synthesizing sound from scratch. That means it’s still full of unexplored sound design potential.
But whether you’re looking for brave new sonic territory, or you just love the iconic sounds of the 80s, there’s plenty to explore with FM if you’re willing to learn.
And once you dive in, you’ll find it’s not that scary after all.
Now that have the basics of FM down, get back to your DAW and start building your first patch with FM.
Gear guides, tips, tutorials, inspiration and more—delivered weekly.
Keep up with the LANDR Blog.


