


Cubase Tutorial: 12 Beginner Tips for Steinberg’s DAW
If you’re a beginner who wants to learn Cubase from the ground up, it might seem overwhelming at first.
However, just like learning any other DAW, it’s all about going one step at a time.
Let’s run through ten beginner-friendly Cubase tips that will be useful time and time again as you continue to gain experience.
Table of Contents
- Understand "events"
- Know the tools
- Learn the default key commands
- Customize the Inspector panel
- Optimize editing with snap
- Use markers to your advantage
- Get to know the MixConsole
- Use the channel strip for quick processing
- Understand the MediaBay
- Utilize templates and presets
- Integrate VocAlign 6 for pitch and timing
- Make the most of MIDI
- ...and lots more
Understand “events”
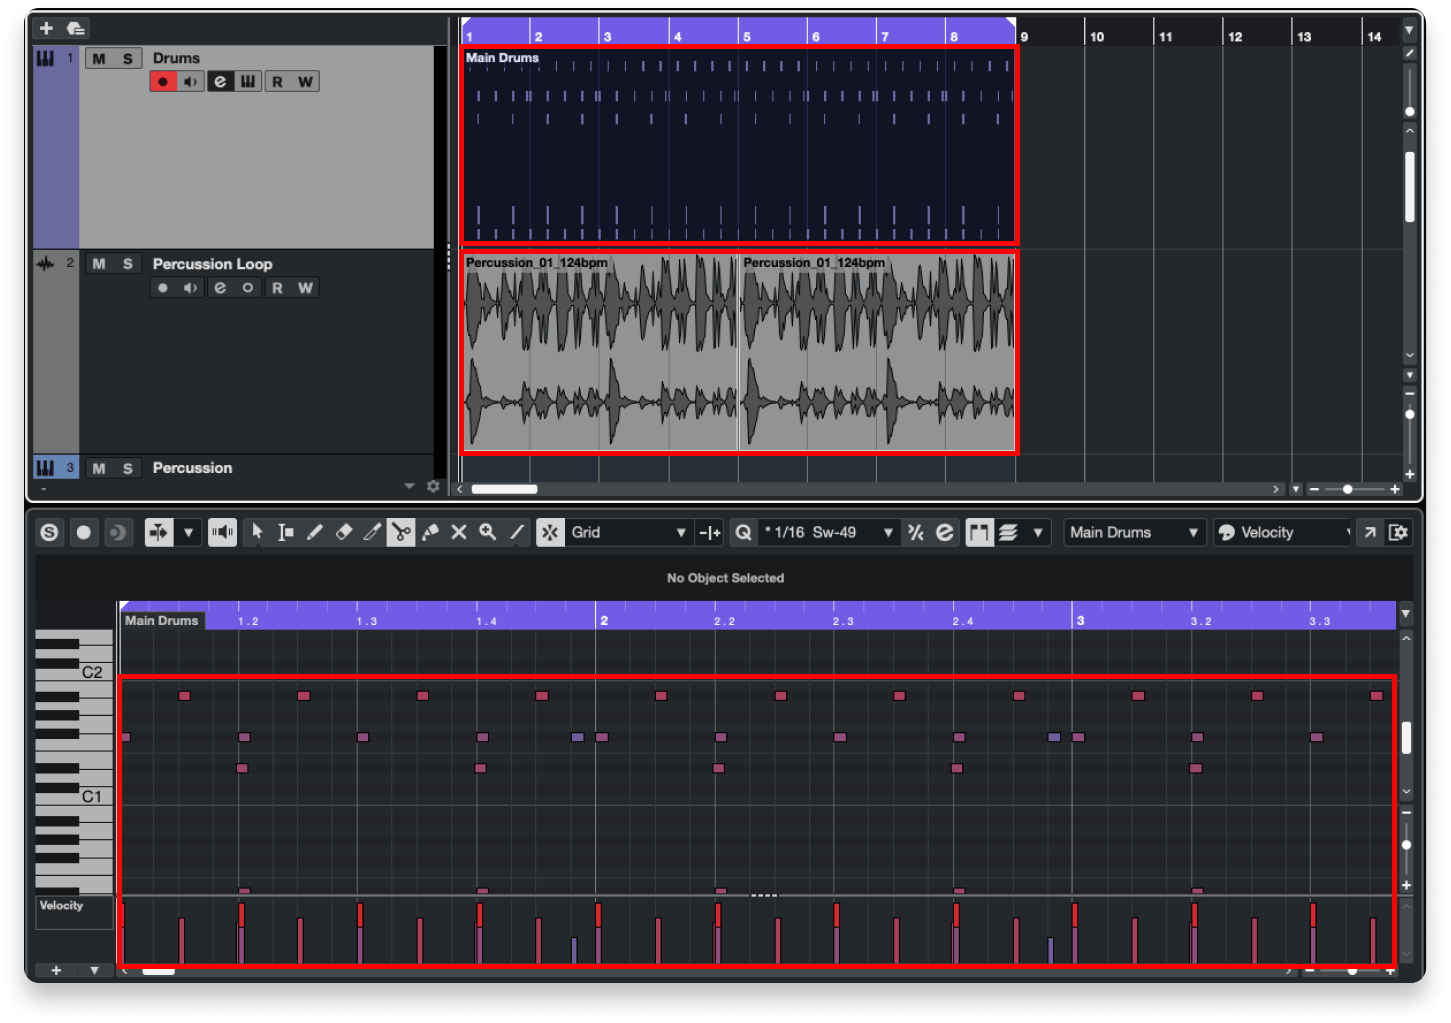
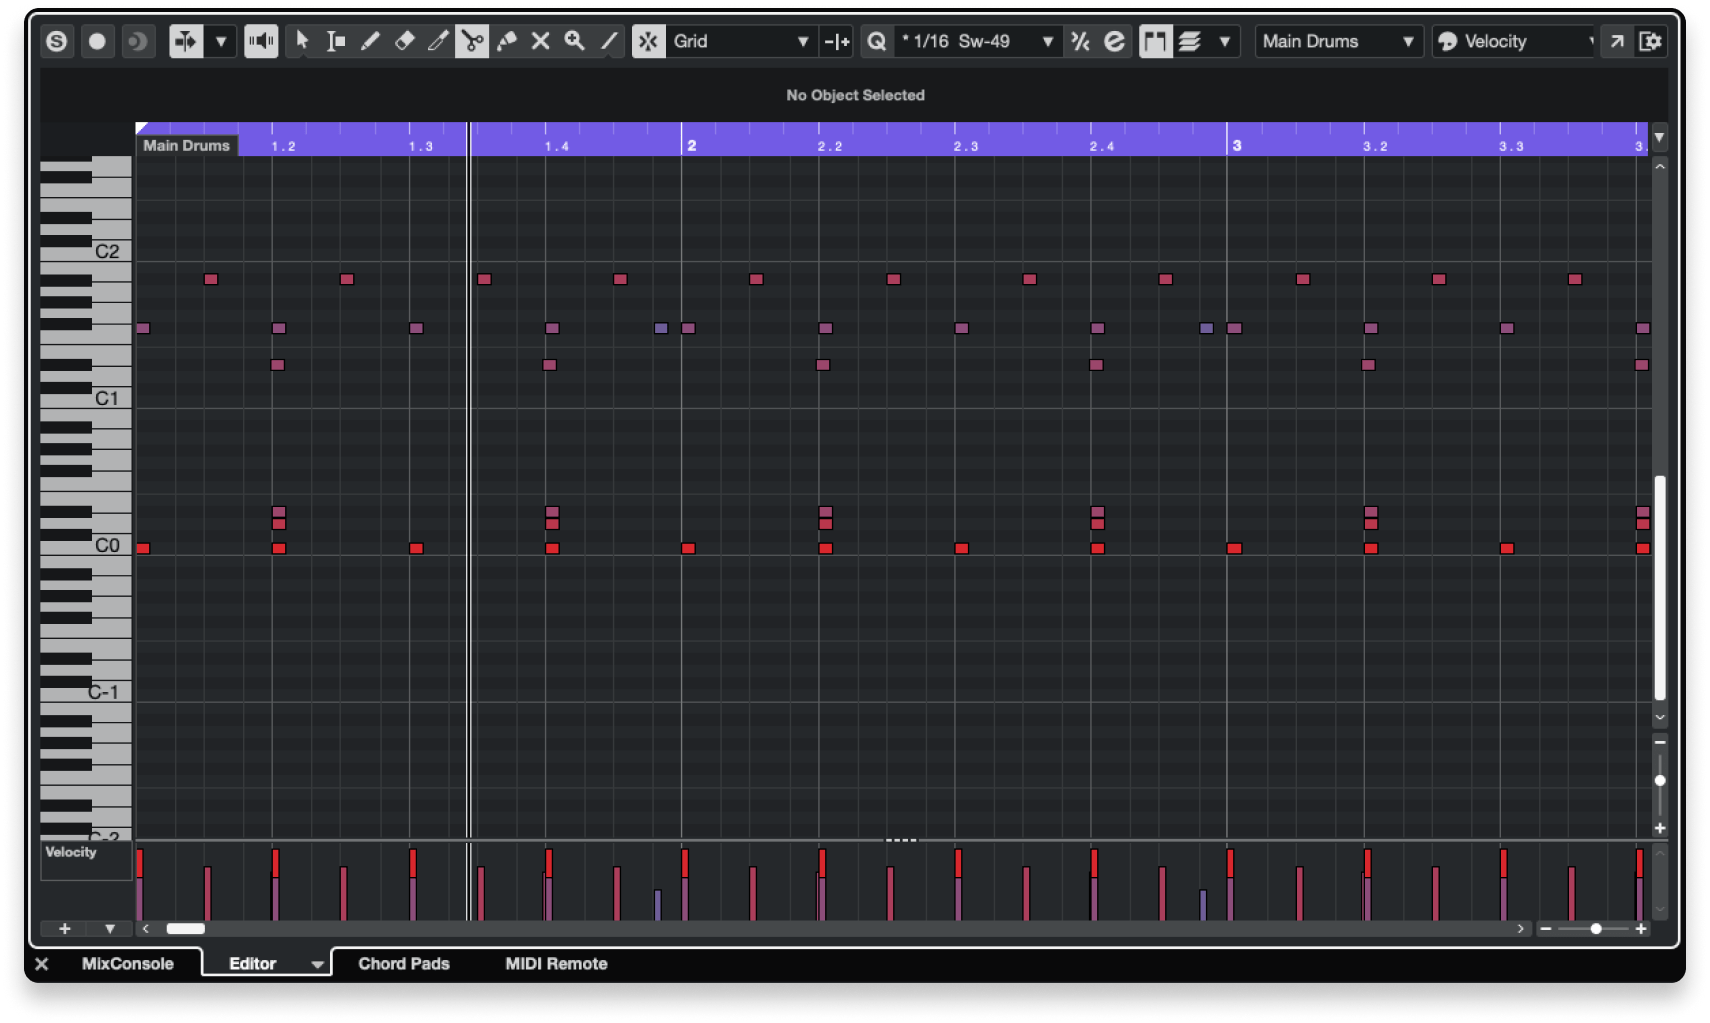
Indicated in red: An audio event (top), a MIDI event (middle) and MIDI data in the MIDI editing window (bottom).
Every DAW comes with its own set of terminology, and the sooner you learn it, the easier your overall experience will be.
We definitely don’t have space to go into every term in Cubase, but we might go in-depth with the vocabulary in a future article.
In the meantime, it’s essential to understand a key fundamental concept in Cubase — events.
Events are the basic building blocks of music in Cubase. There are audio events and MIDI events.
Audio events are the pieces of audio on the timeline. Each audio event is like a “window” into the audio file on your hard drive that it refers to.
MIDI events are basic components of MIDI information. A sequence of MIDI notes placed on your timeline is a MIDI event. Individual data like MIDI notes, CC, and velocity values are also MIDI events.
That brings us to our next tip…
Know the tools
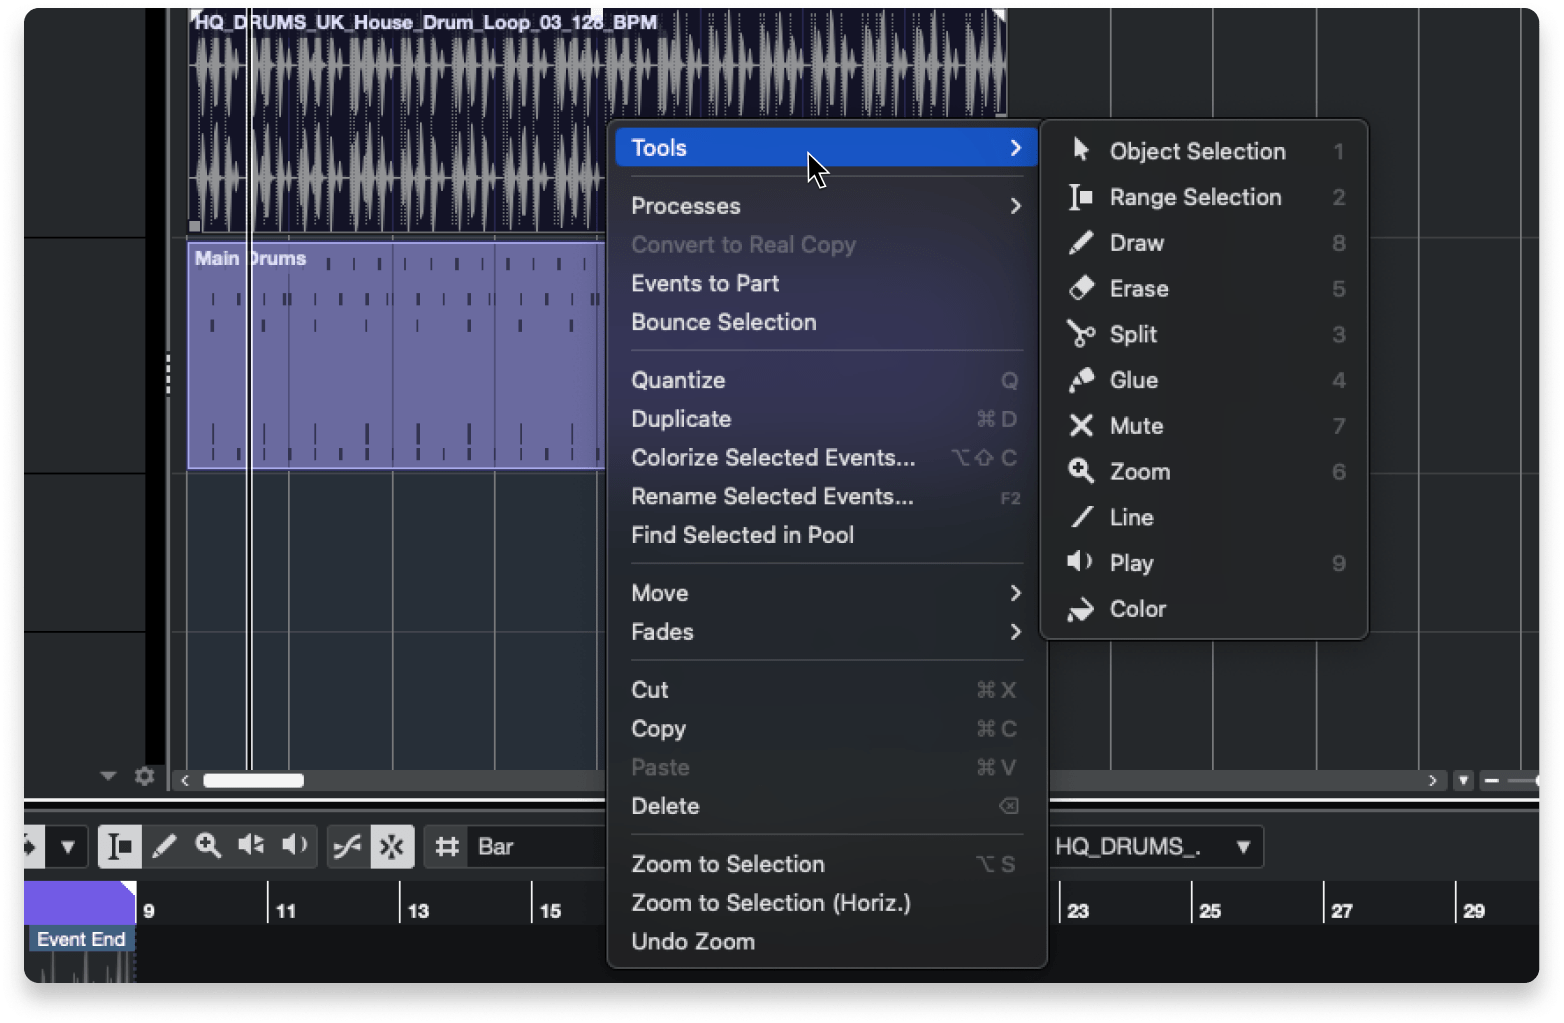
Note the corresponding key commands to the right of each tool.
Cubase allows you to easily switch between a wide range of “tools” when editing audio and MIDI events.
The draw tool, for instance allows you to create things like MIDI notes and markers, while the split tool allows you to cut events.
There are a few ways to switch between tools while editing, but the fastest way is with key commands.
The numbers 1–6 and 9 on your keyboard each correspond to a different tool.
We highly recommend both experimenting with the tools and memorizing their key commands.
Once you get to the point where you can switch between them just through muscle memory, you’ll be able to breeze through all kinds of tasks on the timeline.
And speaking of key commands…
Learn the default key commands
We highly recommend learning essential default key commands in Cubase.
They can vastly improve your experience of navigating your project, editing events, activating/deactivating certain functions, and more.
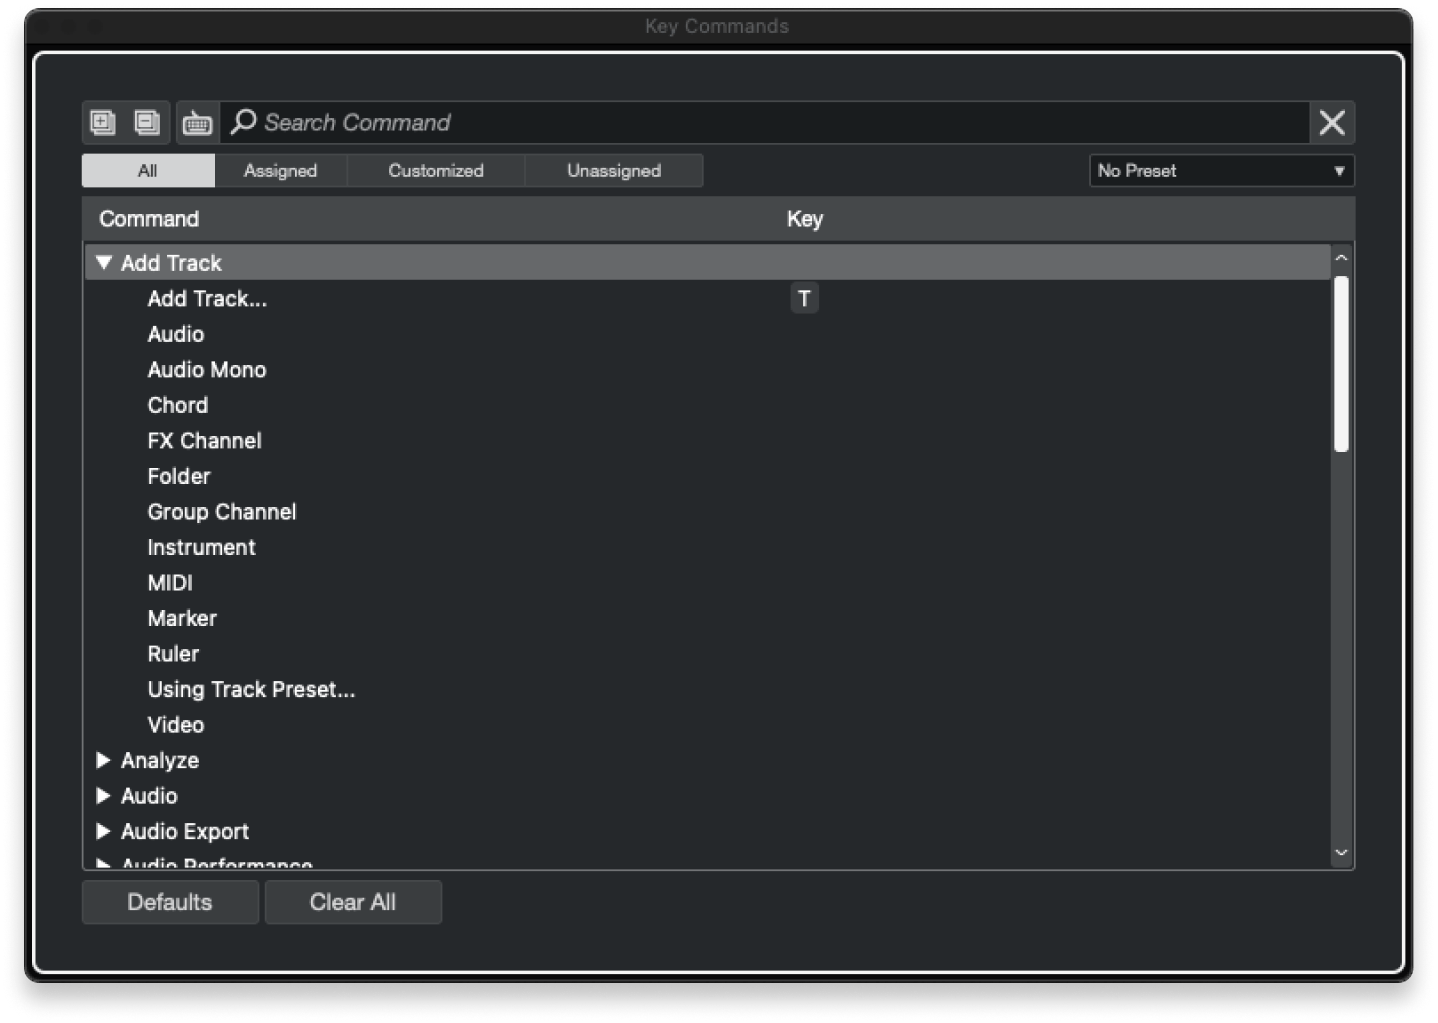
One tip to to remember is that Cubase has a very well-organized and searchable index of all default key commands within the DAW.
You can find it at Edit > Key Commands.
This window also allows you to create custom key commands, something that Cubase is particularly well known for.
You can set commands for very specific functions, which is ideal for optimizing your workflow as you begin to recognize repetitive tasks in your production process.
It’s more of an advanced feature, but it’s a great thing to keep in mind as you start to develop your workflow.
Customize the Inspector panel
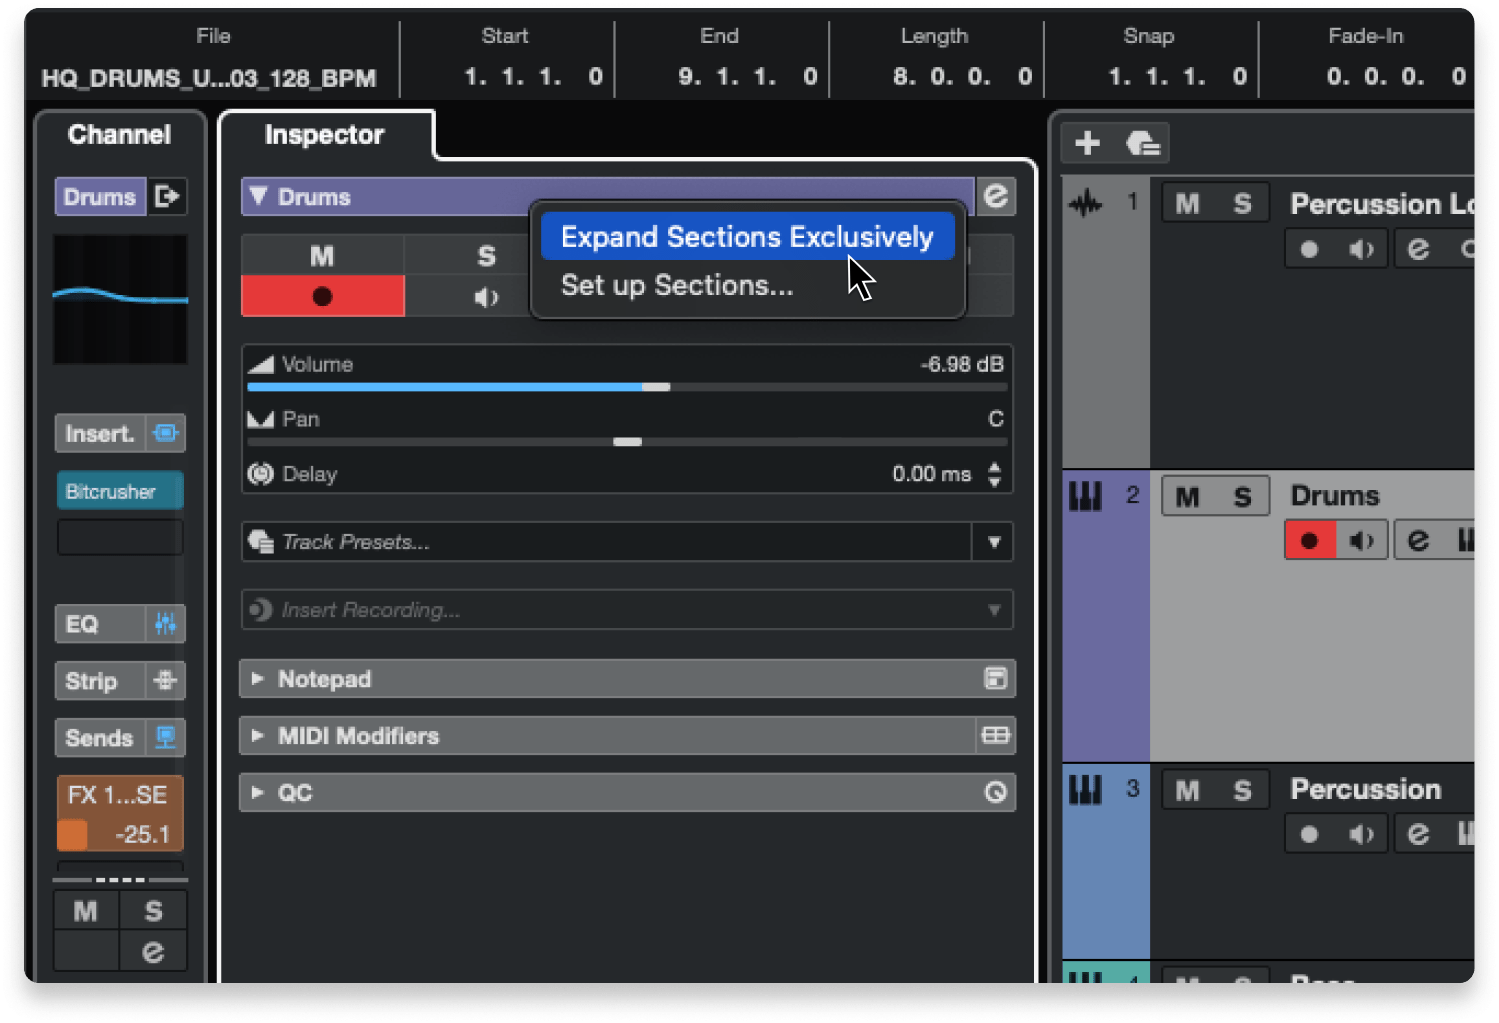
The Inspector panel summarizes the key elements of each track in your project while allowing you to navigate and control these elements.
This includes the track’s mixer settings and routing, the plugins and extensions it’s using, and more.
You might notice that each section of the panel remains open when you open another.
If you want to avoid having a bunch of sections open at the same time, right/CTRL-click the Inspector and select Expand Sections Exclusively.
This way, only one section will be open at a time.
The Set Up Sections option in the same menu allows you to customize exactly what aspects of your tracks you want to see in the Inspector.
Optimize editing with snap
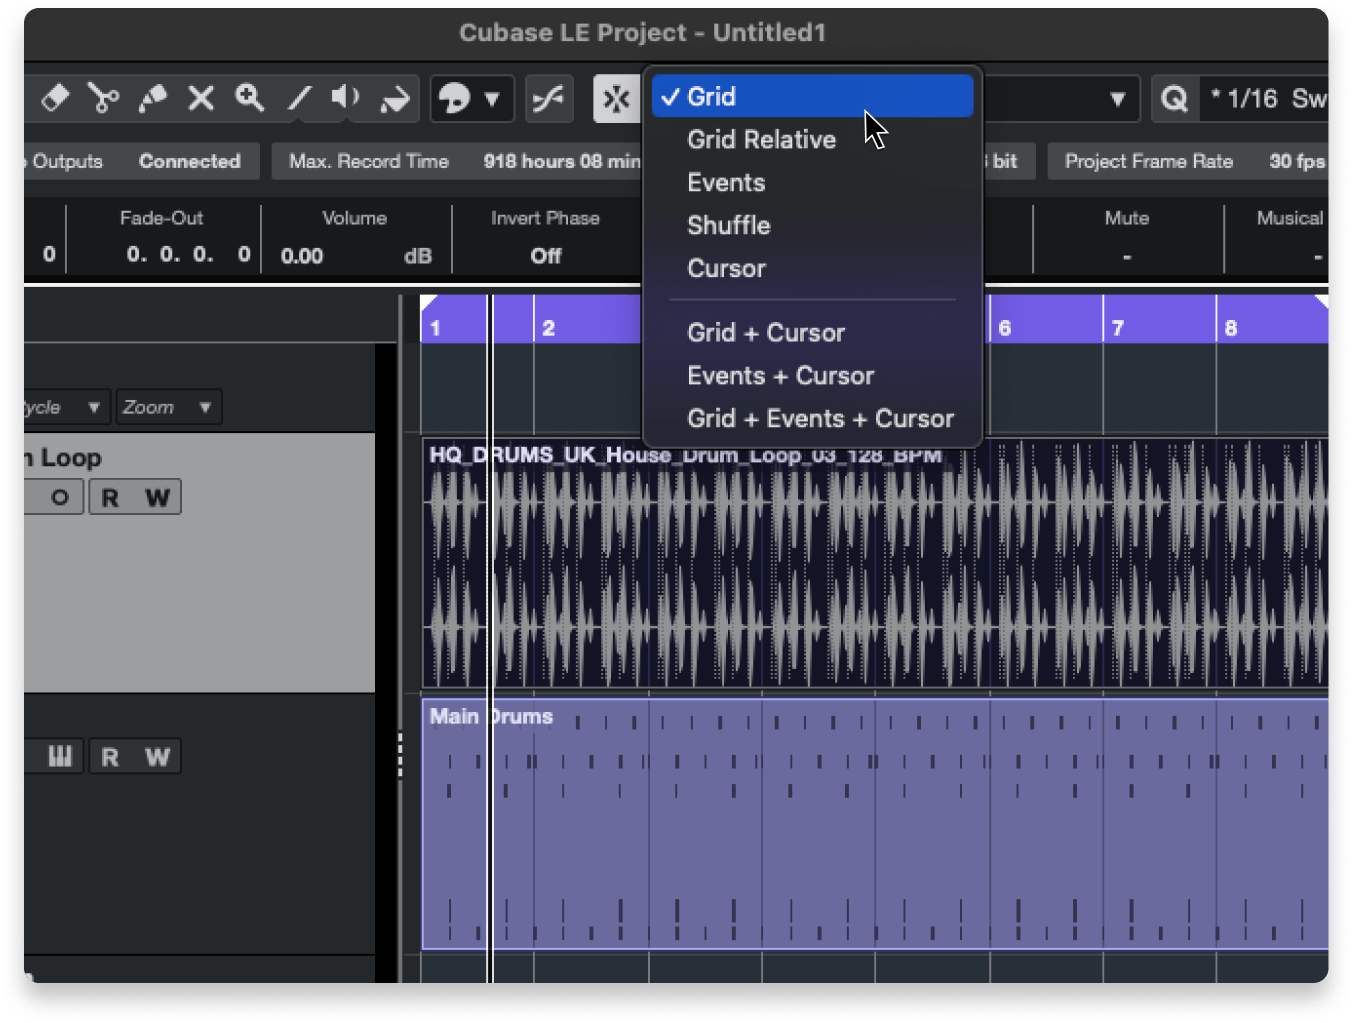
You'll find the "snap to zero crossing" icon immediately to the left of the snap icon and dropdown menu.
The snap features in Cubase ensure that events and/or the timeline cursor always snap to specific points as you edit.
Snap can be activated/deactivated by clicking the Snap icon in the top toolbar or by pressing J.
The dropdown next to the snap icon allows you to configure what exactly you want events and/or the cursor to snap to.
Here you can also enable Shuffle, which will swap the positions of events automatically when you move them relative to one another.
Snap to Zero Crossing, meanwhile, allows you to avoid sudden clicks or pops in your audio events as you cut and combine them.
Use markers to your advantage
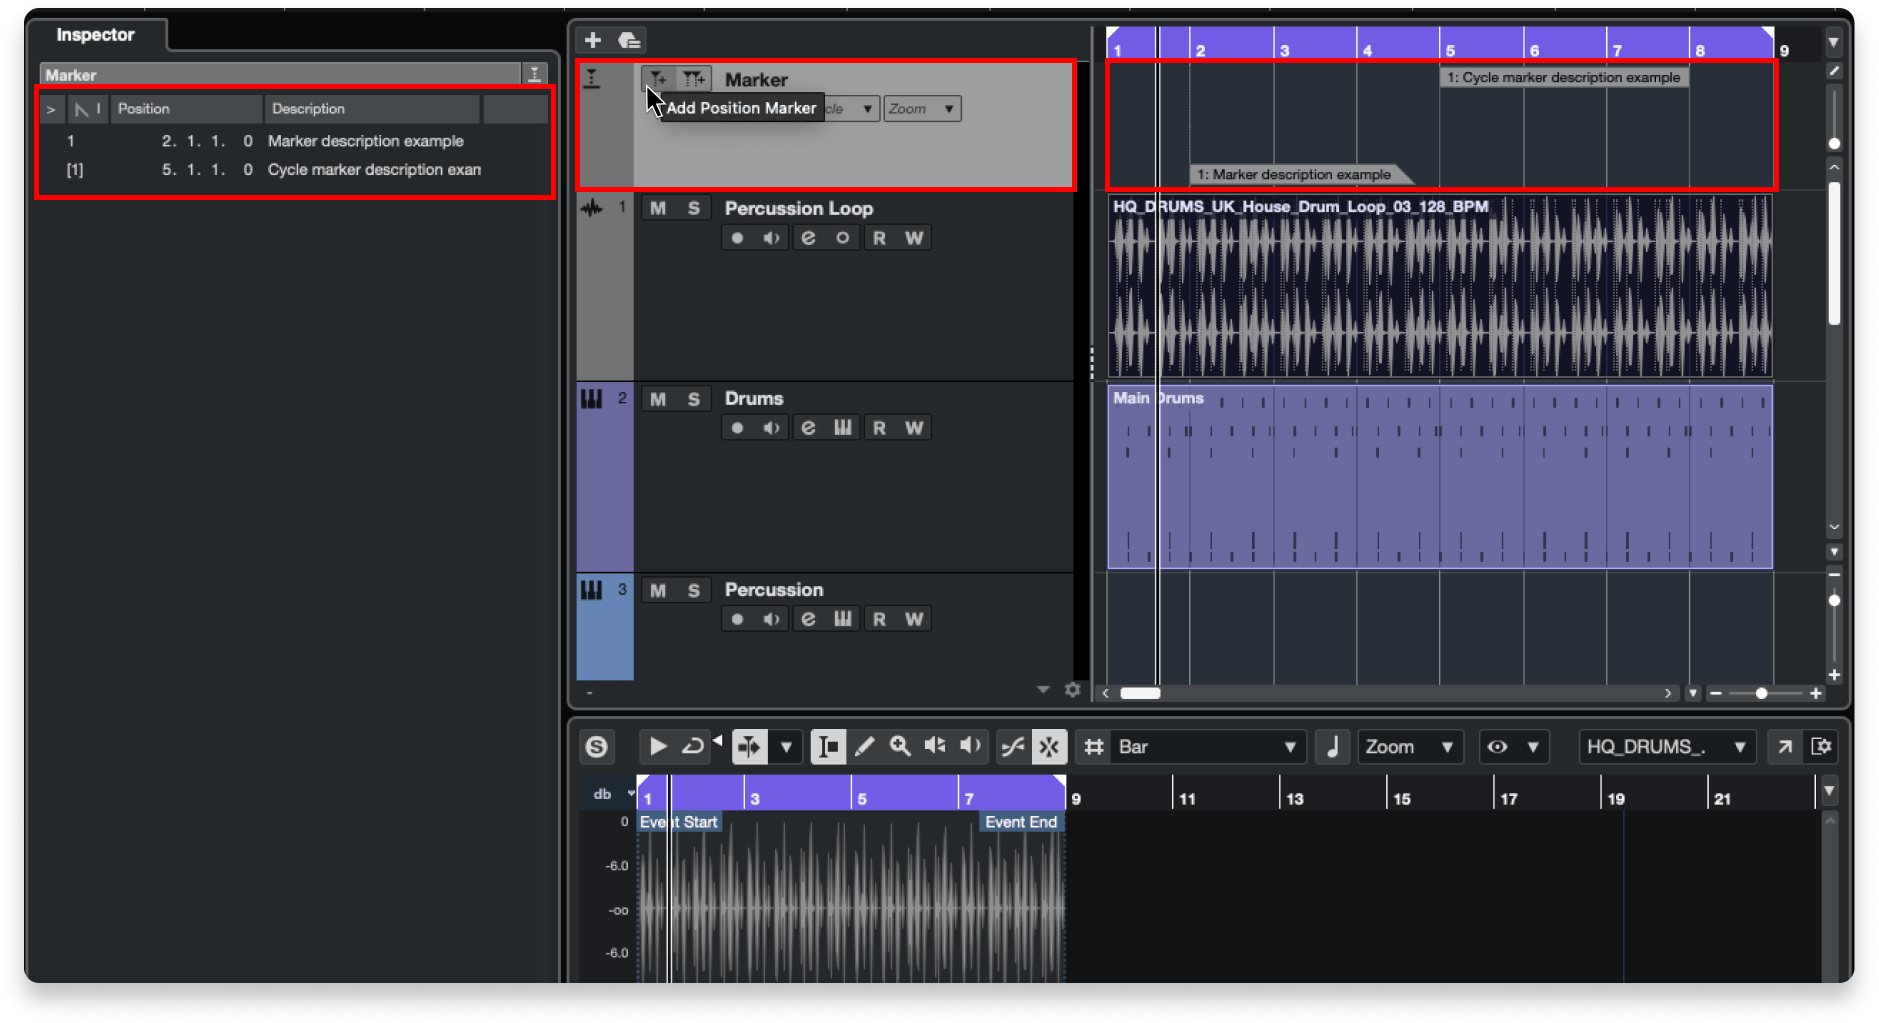
Note the marker inspector pane with marker descriptions (left), the marker track header with "add marker" buttons (middle), and the markers on the timeline (right).
Markers allow you to mark certain positions in your timeline and add written names or descriptions for them.
This is particularly handy for marking off different parts of the structure of your song.
Markers all exist on a dedicated marker track in your project.
Cycle markers allow you to mark and label sections of your timeline. A cycle can be played in a loop so that you can work on specific sections of your song more easily.
To create your marker track, right/CTRL-click on any track in the track column of your timeline, click Add Track, and click Marker.
To add markers, you can click the add marker icons on the Marker Track or switch to the Draw tool and click anywhere on the timeline within your Marker Track.
To create cycle markers, hold CTRL/command while using the draw tool within the lane for your Marker Track.
If you double-click on a cycle marker it will create a region that you can play on loop.
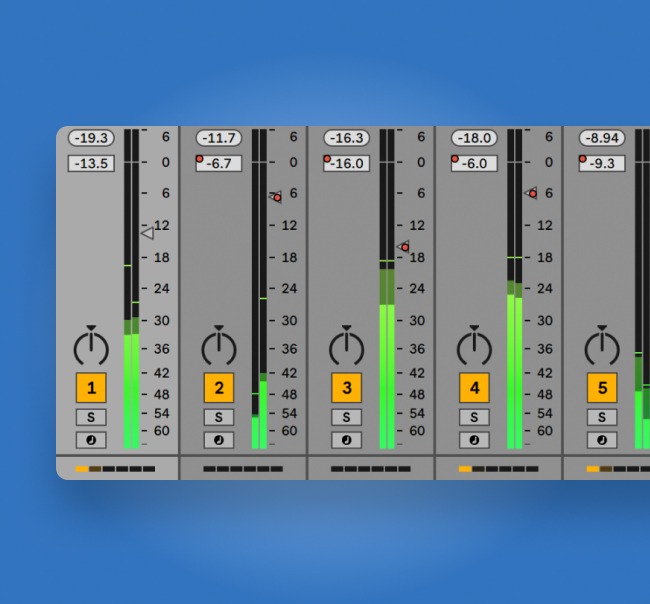
Get to know the MixConsole
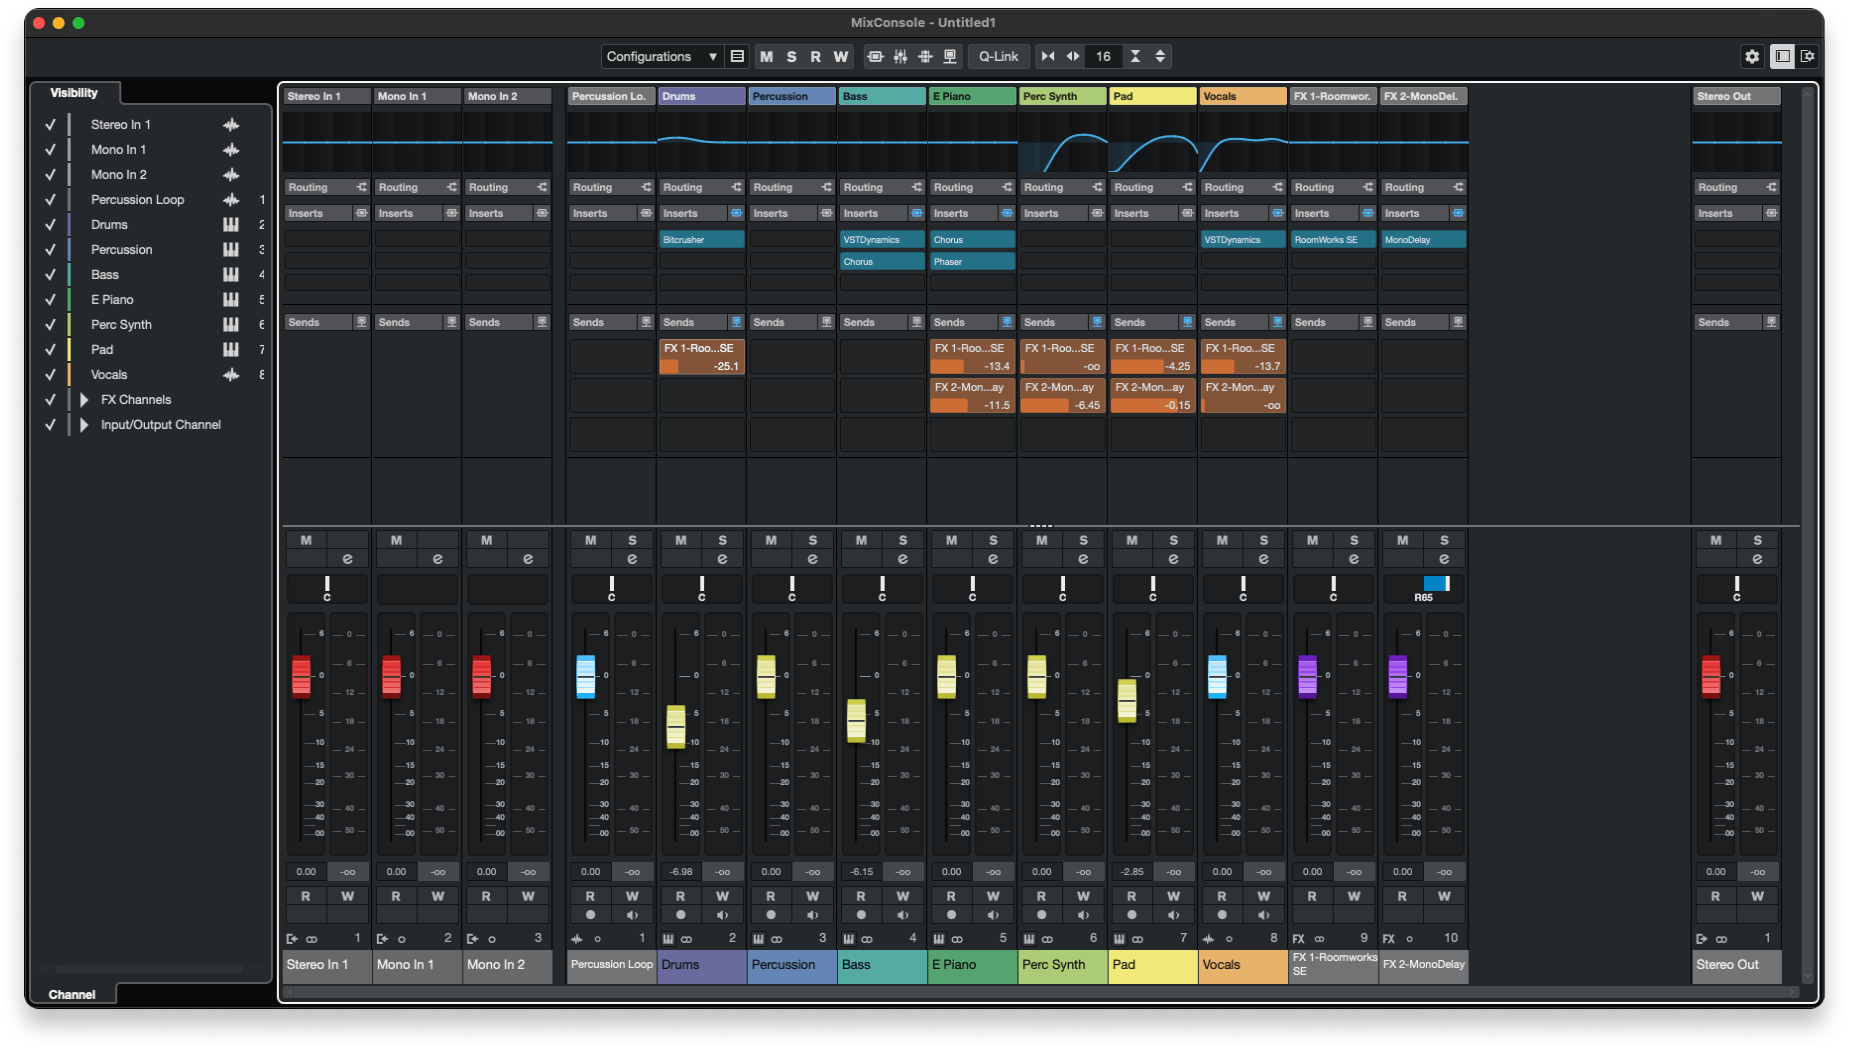
The MixConsole is one of the most important sections of Cubase, so we recommend spending some time navigating its interface to learn how it’s organized.
Hover over the icons in the top toolbar of MixConsole to learn their functionality.
As always with Cubase, it’s important to keep in mind that you can configure this window for a better workflow.
The check marks in the Visibility tab on the left allow you to customize which channels are visible.
Additionally, you can set up visibility agents to customize the visibility of channels in a more detailed way.
You can, for instance, tell MixConsole to only display the channels that have audio or MIDI events within a cycle that you’ve marked off with cycle markers.
Use the channel strip for quick processing
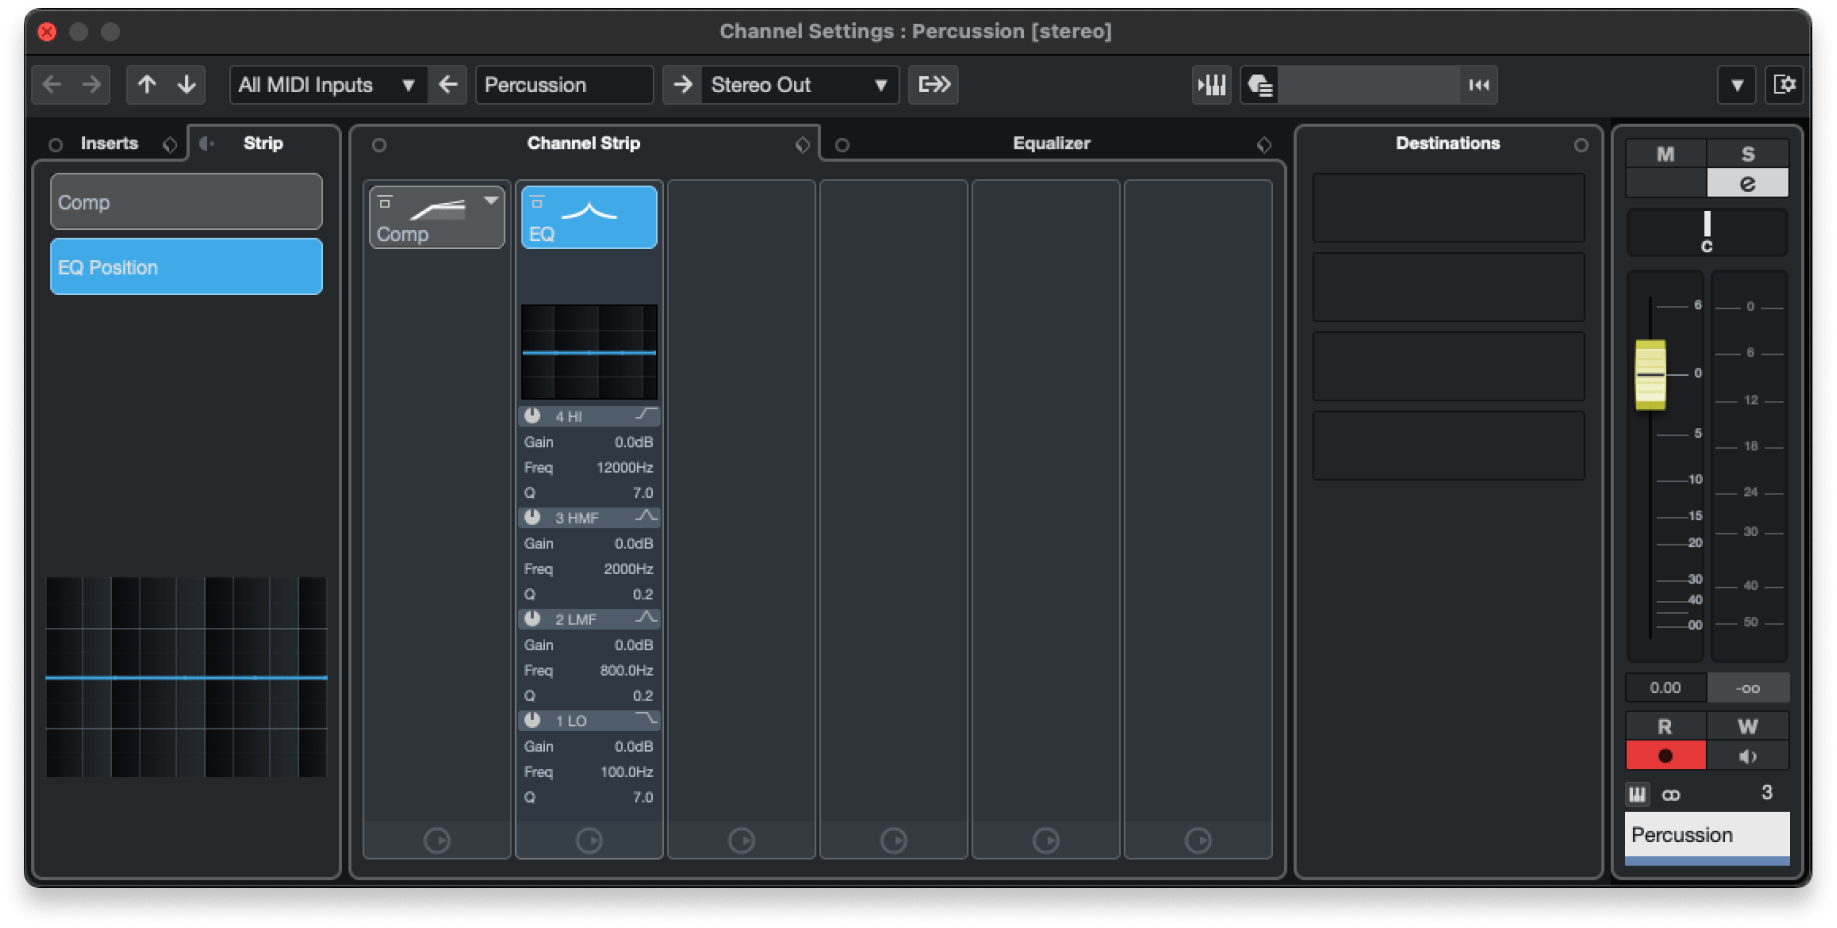
Cubase has a wide range of built-in effects processors ready to perform standard mixing duties.
This includes the effects in the channel strip, which you can access by clicking the “e” symbol near the mute and solo buttons of any channel.
The strip provides go-to processors including EQ and dynamics.
While you can of course use plugins on your tracks, sometimes you just want something simple, straightforward, and immediate.
Additionally, since some plugins can be heavier on the CPU, the channel strip is handy for taking care of certain tasks without adding unnecessary load to your processor.
Understand the MediaBay
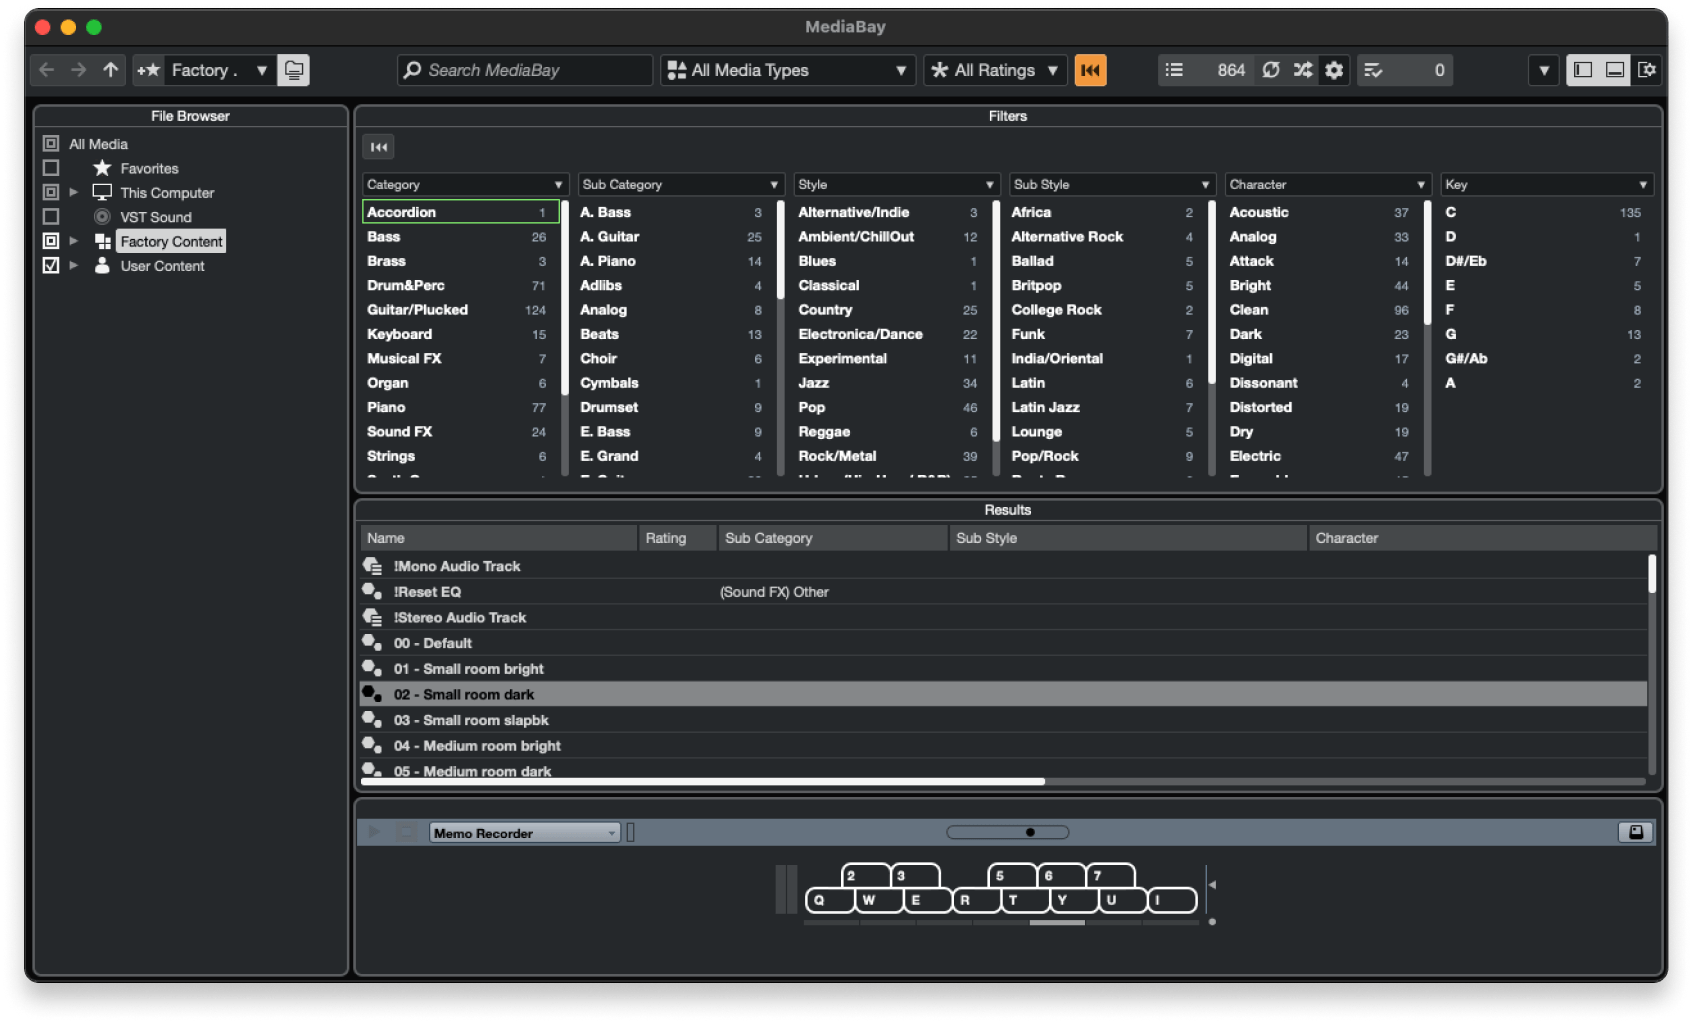
Cubase’s file browsing tool is the MediaBay, which you can access via Media > MediaBay or by pressing F5.
The MediaBay allows you to view and organize samples, loops, MIDI files, presets, and more.
It allows you to categorize media by genre, sound character, musical key, quality rating, and other factors.
A simplified browser, the media rack, is also available at all times in the right zone of Cubase’s main interface.
While file browsing is probably the least glamorous aspect of using a DAW, we definitely recommend spending some time to familiarize yourself with the MediaBay.
It can significantly improve your workflow and avoid organization headaches later on.
Utilize templates and presets
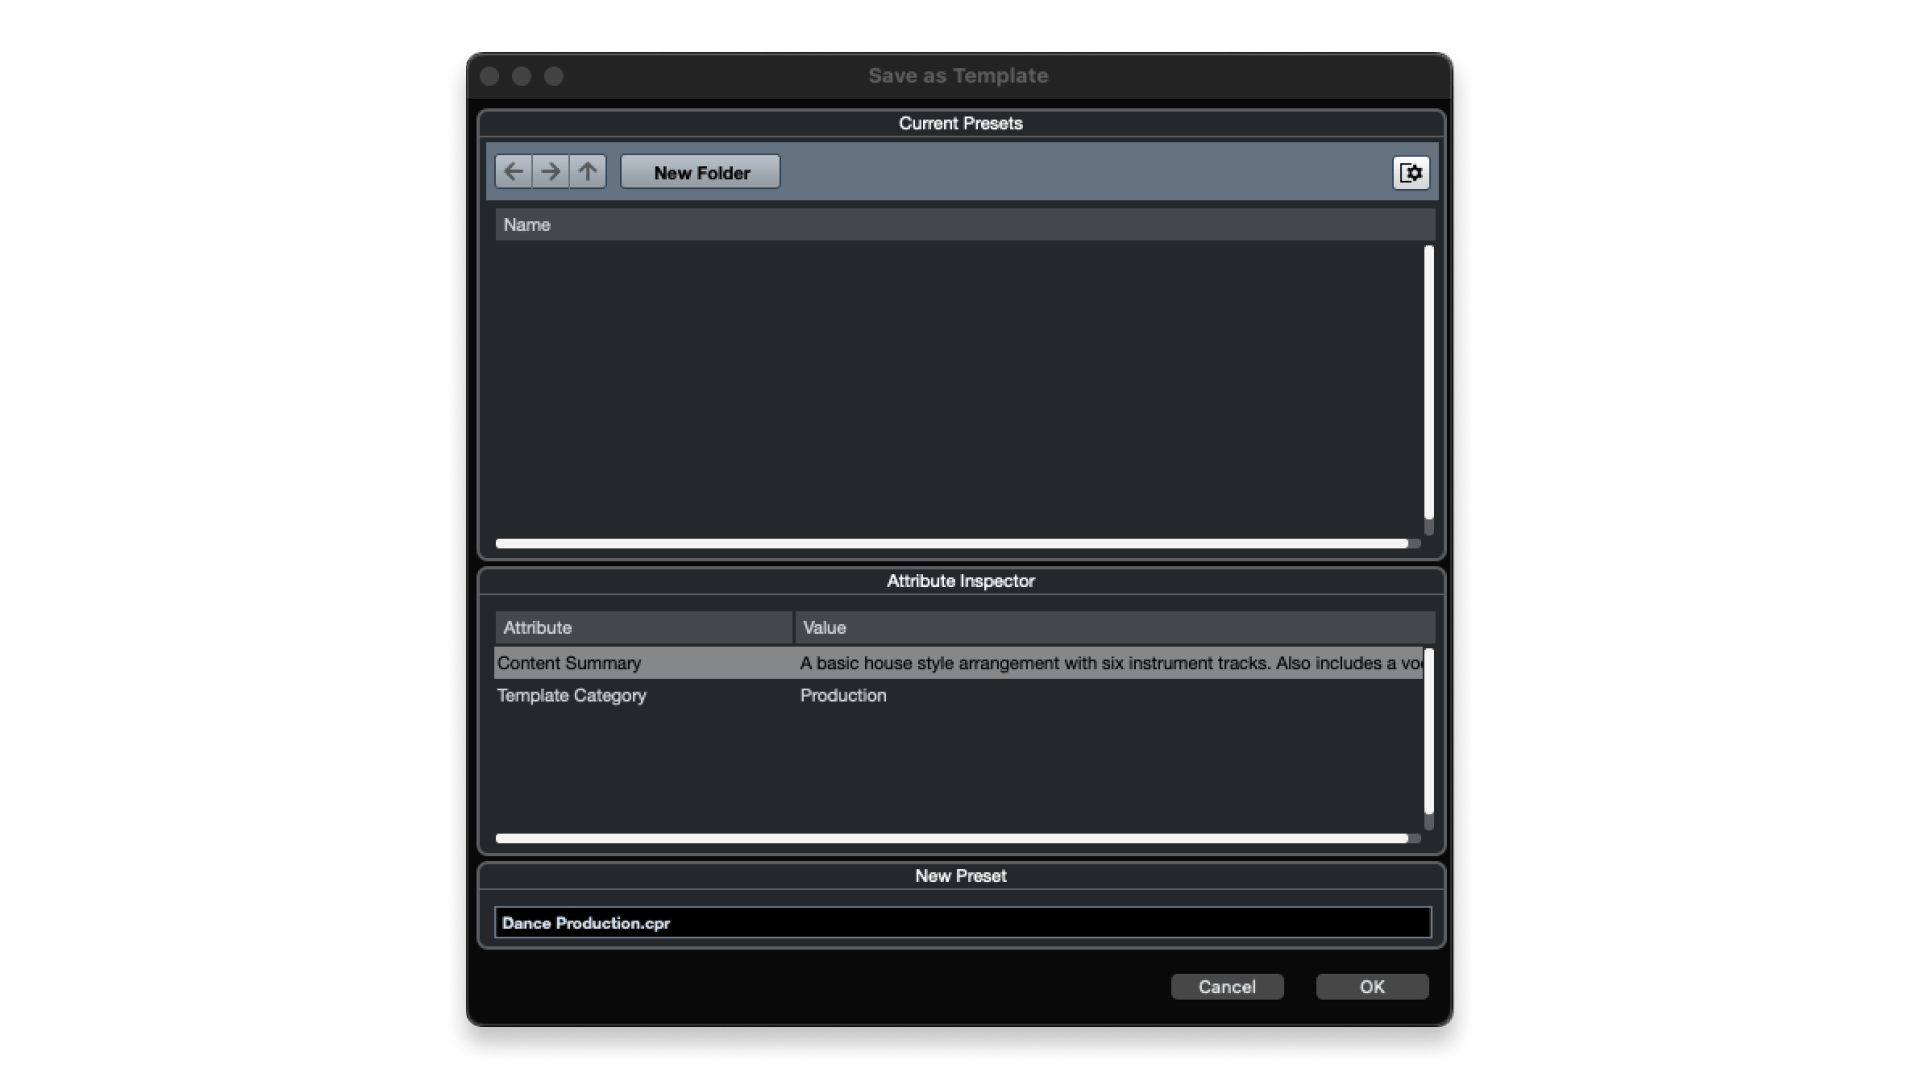
In Cubase, it’s possible to create project templates and track presets to speed up your workflow.
Any project you create can be saved as a project template (File > Save as Template), giving you a useful starting point for other projects.
This can be a huge time-saver when it comes to things like go-to plugins, track setups, and even arrangements.
Track presets allow you to save track configurations and apply them later to new tracks of the same type.
Again, this is very useful when you know how you like to set up and process certain instruments or groups.
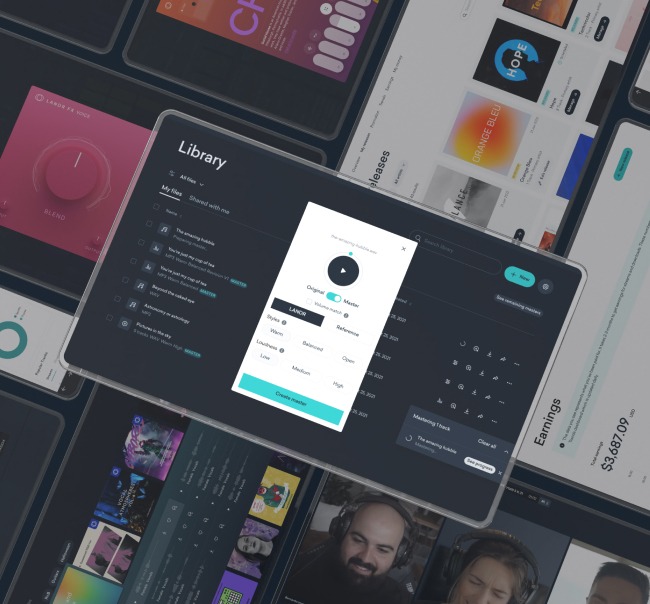
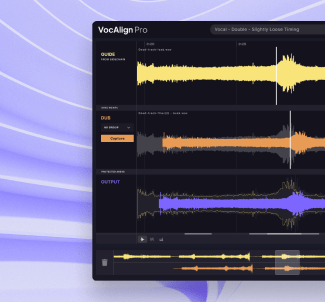
Integrate VocAlign 6 for pitch and timing
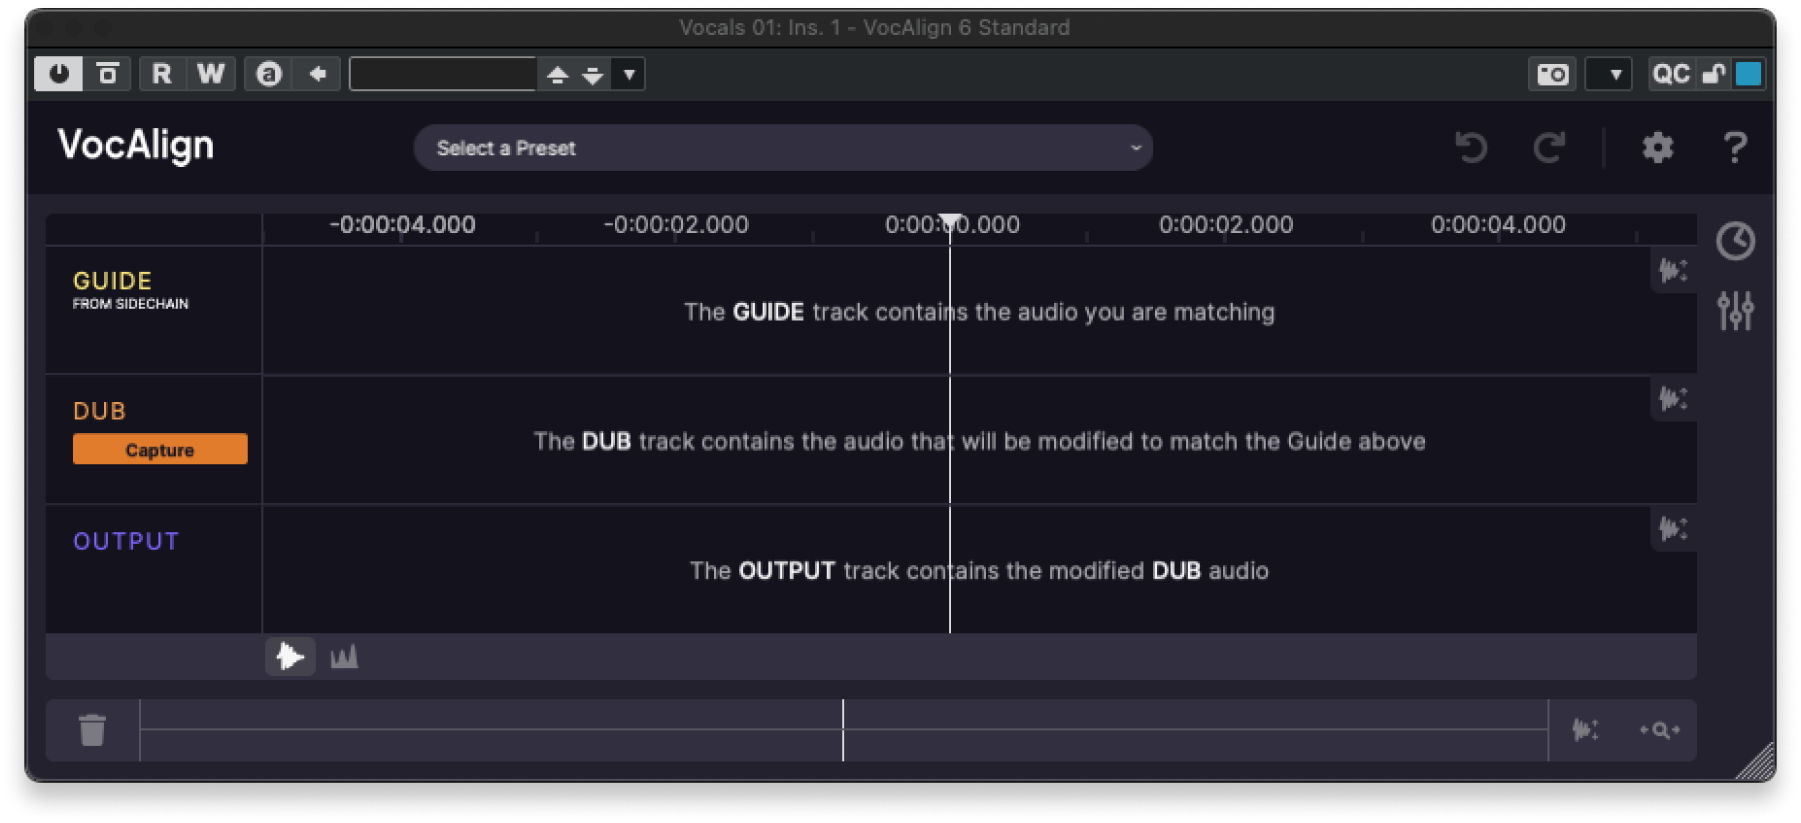
Cubase (specifically the Pro version) does have its own built-in feature for editing pitch and timing of vocals. They call it VariAudio.
However, while VariAudio is quite capable, a more fully-featured pitch and timing correction tool can offer higher accuracy and little to no artifacts.
Our very own VocAlign 6 is an industry standard tool precisely because of its balance between high usability and artifact-free results.
It can be used in Cubase either as a VST plugin or via ARA integration.
We often prefer using it as an ARA extension in Cubase, as this integrates VocAlign within Cubase’s workflow.
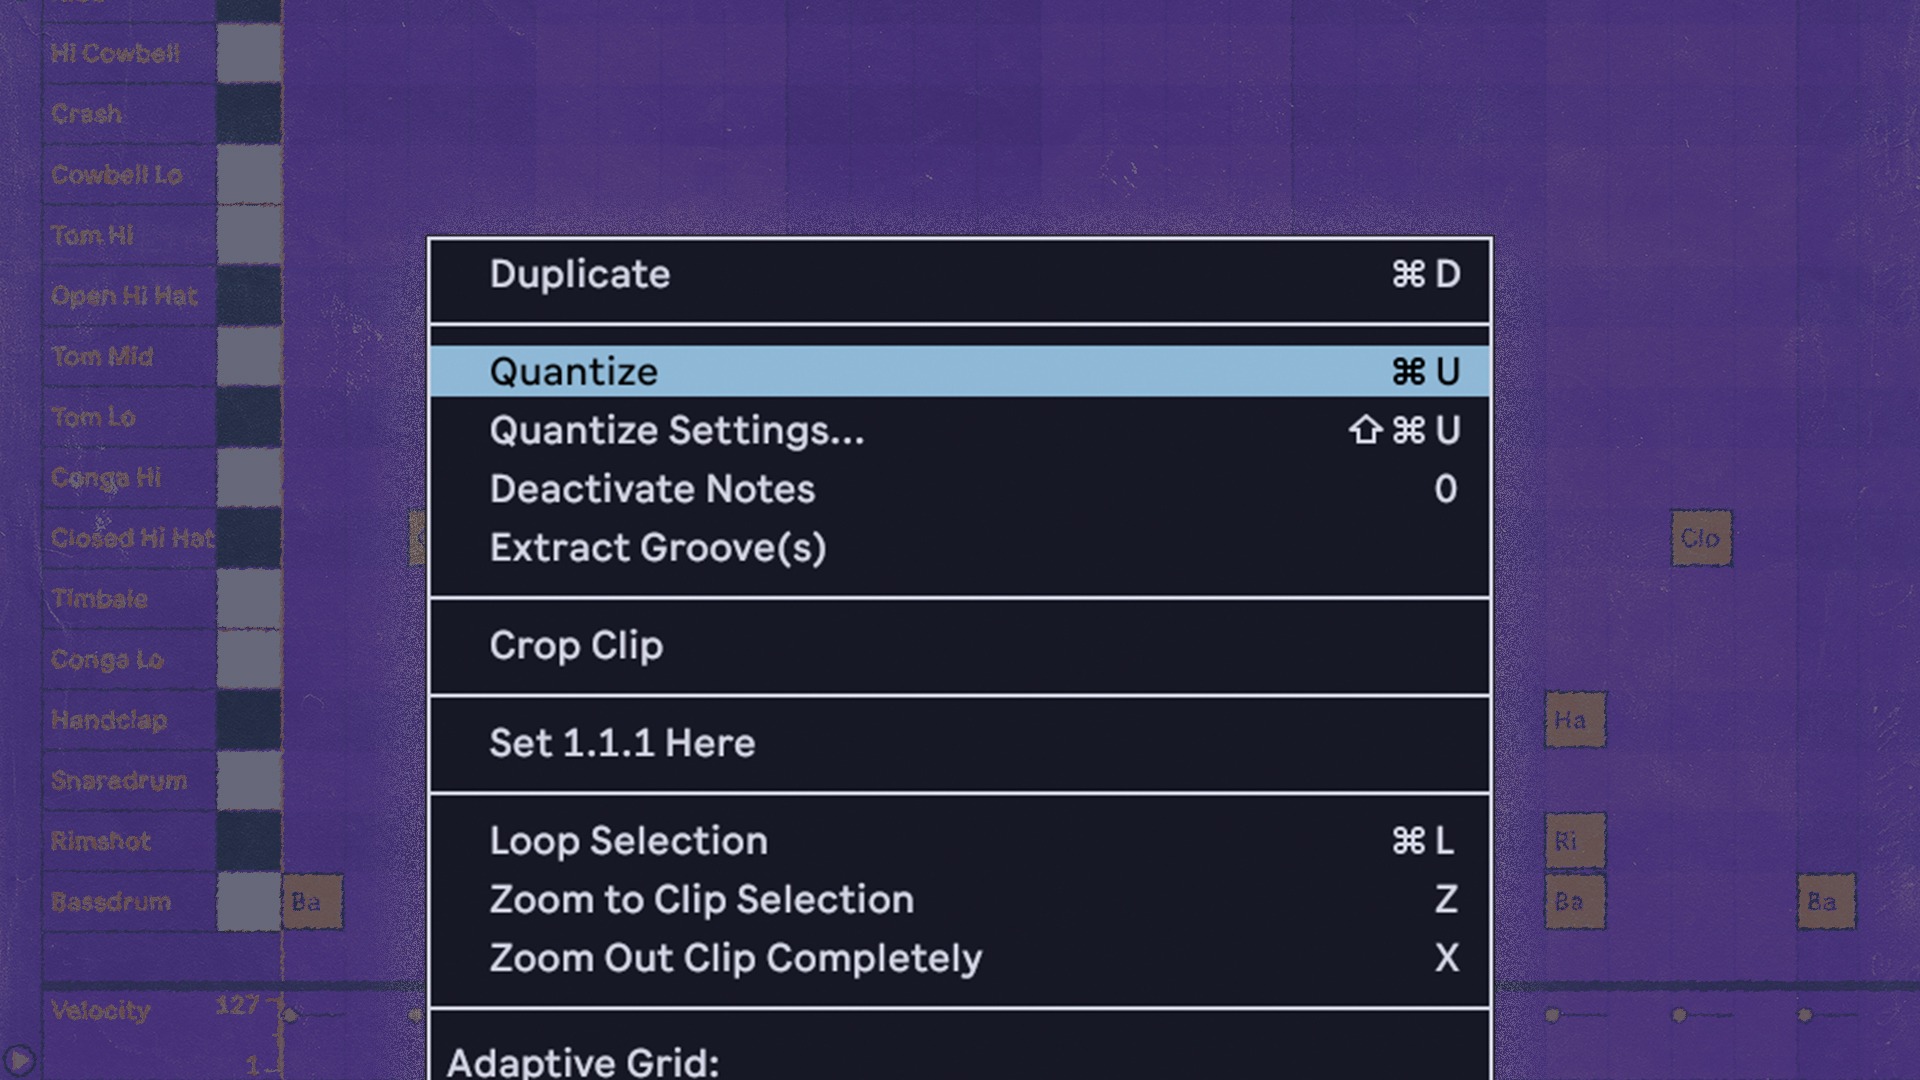
Make the most of MIDI
In addition to its extensive customizability, Cubase is also known for its robust and powerful MIDI implementation.
Its specialized MIDI editors include a MIDI note editor, a MIDI drum editor, and a score editor for music notation.
MIDI effects, automation, groove, and expression control also offer a stunning range of possibilities for both advanced programming and overall musicality.
The retrospective recording feature is particularly unique. It allows you to recover and use MIDI that happened to be played while recording was not enabled.
When it comes to workflow, the Remote Control Editor allows you to map parameters and features within the DAW to hardware control surfaces via MIDI.
We definitely recommend making the most of Cubase’s MIDI implementation as you continue to learn how everything works.
…and lots more

Want more music production tips? Here's 50 tips you need to hear.
This article is, of course, not an exhaustive introduction to Cubase.
Like any DAW, Cubase is loaded with functionality. It’s especially deep as a toolset considering how much you can configure and customize it to your needs.
Our courses on Cubase and the introduction to Cubase video on our YouTube channel are great places to gain more knowledge.
And, of course, you can’t go wrong in referring to the Cubase manual.
As with any manual, it’s a good idea to use the table of contents and search function to find specific topics or terms.
If you want a light version of Cubase that will help you get started with its powerful feature set, don’t forget that it comes with all yearly subscriptions to LANDR Studio.
Enjoy!

Devon Hansen is a producer, DJ, and writer with 20 years of experience in electronic music production. Having worked under various names and in a wide range of styles, Devon has performed several editions of MUTEK Montreal and has released music with labels in North America, the UK, and Japan. When not working on creative projects or playing tunes on Montreal’s n10.as radio, Devon can be found watching movies, cooking, and reading too much about gear.
@Devon HansenGear guides, tips, tutorials, inspiration and more—delivered weekly.
Keep up with the LANDR Blog.