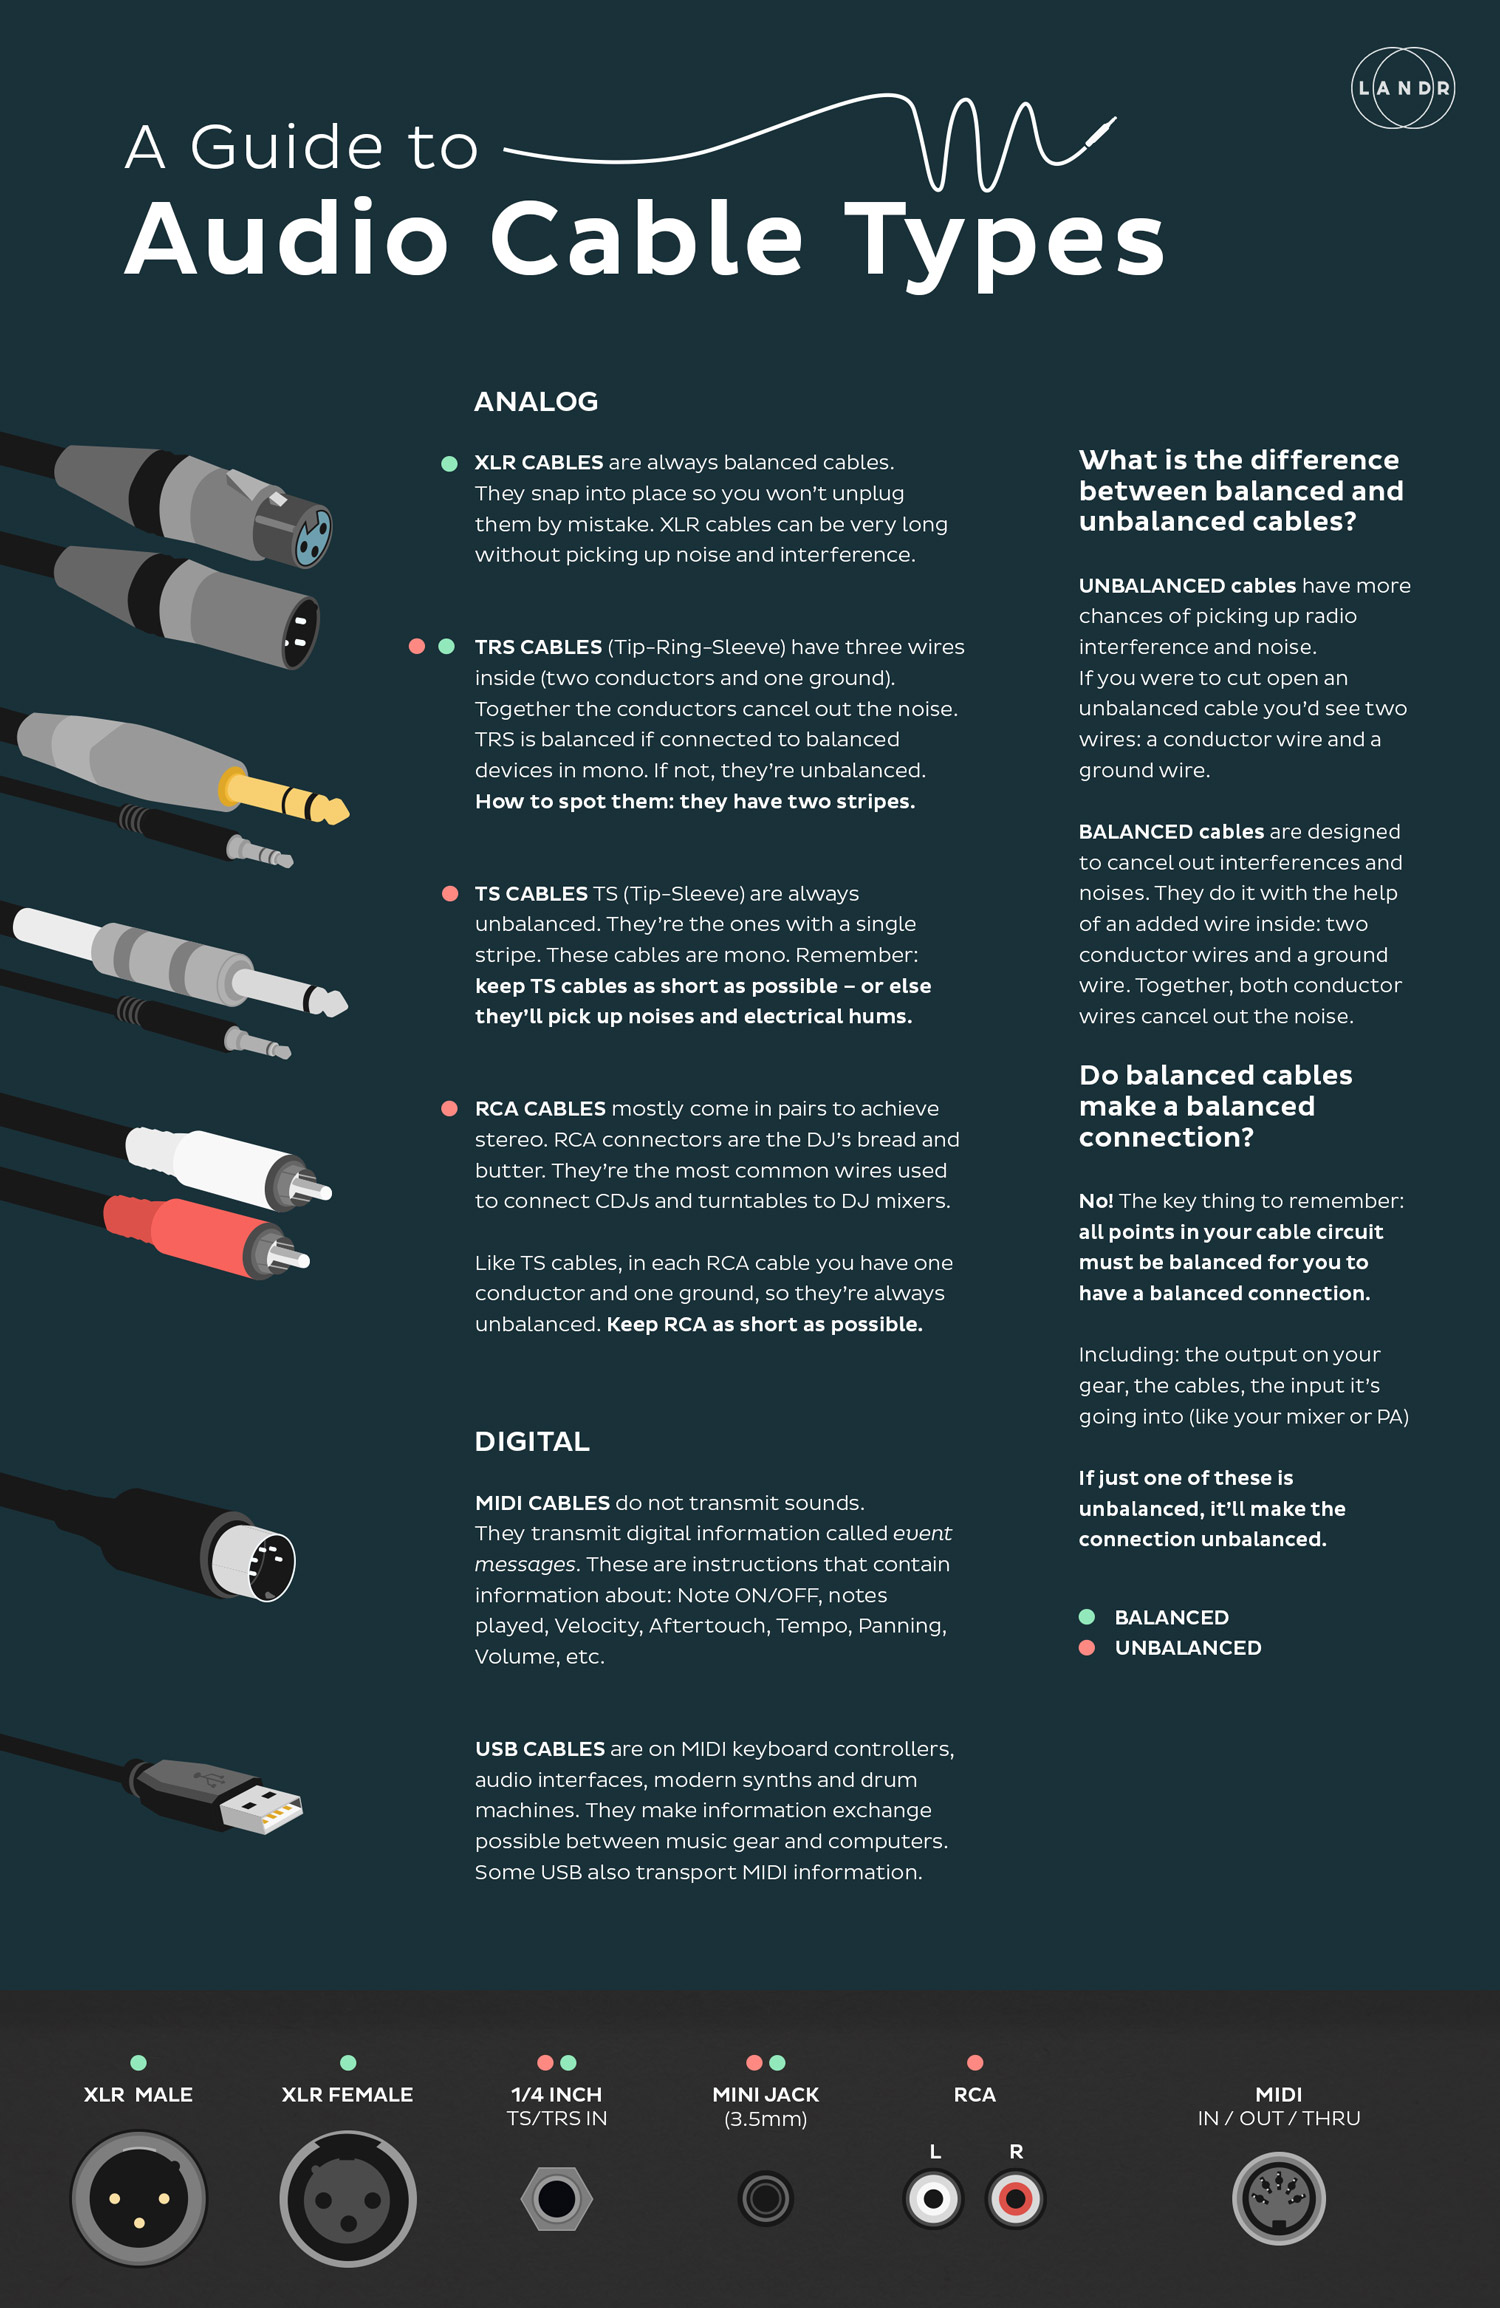
Audio Cables: Everything Musicians Need To Know About Audio Cable Types [Infographic]
![Audio Cables: Everything Musicians Need To Know About Audio Cable Types [Infographic]](https://blog-api.landr.com/wp-content/uploads/2016/09/MusicianAudioCableGuide_1200x627.jpg)
Get your audio cable knowledge together.
Cables matter.
Unfortunately wireless music studios aren’t a thing yet. In fact we’re connecting all kinds of old, new, analog and digital gear together more than ever.
Yeah I know, audio connectors might not be the most exciting part of your music studio setup…
But recording a clean and loud enough signal from guitars, synths, drum machines, and mics into your DAW has a lot to do with the audio cable types you choose.
So here’s an illustrated audio cable guide (I wish this was around when I was learning!). It’ll help you get a better sound when playing gigs, recording, or even just jamming.
The Difference between Analog and Digital Audio Cables
First things first, what’s the difference between analog and digital audio cables?
Well, they both transmit audio information. The only difference is that analog cables transmit electrical audio signals while digital cables transmit digital information in binary code (zeros and ones, the language that computers speak).
Balanced and Unbalanced Cables
Now let’s start with the most common question about analog cables…
What’s the difference between balanced and unbalanced cables?
- Unbalanced cables have a bigger chance of picking up radio interference and noise. If you were to cut open an unbalanced cable you’d see two wires: a conductor wire and a ground wire.
- Balanced cables on the other hand are designed to cancel out those interferences and electrical hums. They do it with the help of an added wire inside – so two conductor wires and a ground wire. With the help of that second wire, both wires cancel out the noise.
We’ll look at which cables are balanced and which are unbalanced in a moment. But first…
Balanced and Unbalanced Connections
Now the million dollar question: do balanced cables make a balanced connection?
The answer is no! Here’s a crucial thing to remember: all points in your cable circuit must be balanced for you to have a balanced connection. That includes the:
- Output on your gear
- Cables
- Input it’s going into (like your mixer or PA)
If just one of these is unbalanced, it’ll make your connection unbalanced. This is worth writing on a post-it and sticking it to your bathroom mirror.
I know it might be confusing for now, but keep reading!
How do you know if your gear is balanced?
Your gear is balanced if:
- It has XLR outputs or inputs
- It’s written on it or in the manual
For example: microphones, some mixers, PA systems, some pro gear and synths with XLR out (like the Roland Jupiter 8 and others).
Your gear is unbalanced if:
- It’s a guitar or bass
- It has ¼ inch mono or stereo outputs
- It has RCA inputs or outputs
A lot of gear is unbalanced if it has only ¼ inch outputs. It’s most likely unbalanced if it doesn’t say anything. Always check the manual or do some research if you’re not sure.
[adbutler zone_id=”291816″ secure=”1″ type=”asyncjs”]
Why does all of this matter?
Knowing the difference between balanced and unbalanced cables is crucial for choosing the right cables in each situation. This will prevent nasty signal loss or gross noise interference in your recordings or live sets. The wrong cable might even damage your devices.
If you have balanced gear and a balanced mixer, then by all means use balanced cables that will give you a nice balanced connection!
But if you don’t have a balanced connection, remember to keep cables as short as possible.
Hot tip: for unbalanced connections keep your cables under 6 feet (about 1.8 meters) to prevent interference.
Don’t worry, I’ll go into details below about which cables are balanced and unbalanced in a second.
Audio Cable Types
Phew, I’m glad we got all that out of the way. Now it’s time to demystify the most common types of audio connectors.
ANALOG CABLES
XLR Cables
XLR cables are always balanced cables. They snap into place – so you won’t unplug them by mistake if you pull on them (think of all the punk shows this has saved). XLR cables can be very long without noise interference.
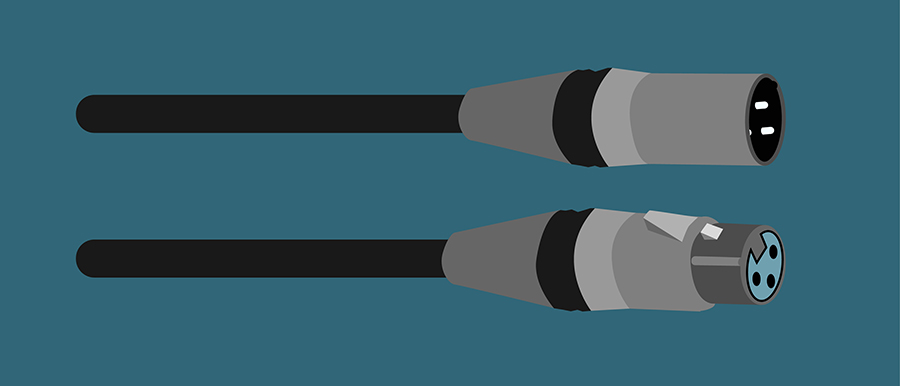
XLR cables are used to connect:
- Microphones>
- Powered speakers
- PA systems
- Instruments equipped with XLR
TRS Cables
TRS (Tip-Ring-Sleeve) are connectors that have three wires inside (two conductors and one ground), as I’ve explained with balanced cables. They’re easy to spot because of the two rubber stripes on the connector.

TRS cables can be both balanced or unbalanced depending on how you use them. They’re the chameleons of cables.
Let me explain!
TRS cables will be balanced when you use them as mono cables between balanced devices. That’s when you use a pair of them, one for the left channel and one for right. That way in each cable, one of the conductor wires will be for the signal, and the other will help cancel the noise.
When you use a single TRS cable in stereo (left and right together in the same cable), both conductor wires inside will be used for the signal. One wire will transport the left signal and the other wire the right signal. So there’s no wire left for noise cancelling. This will be an unbalanced cable.
This situation is most common in headphone cables and headphone outputs on gear.
TS Cables
TS (Tip-Sleeve) connectors are always unbalanced. Why? Because they contain two wires: one conductor and one ground. They’re the ones with one rubber stripe on the connector.

TS cables are also mono. They’re handy for gear that has a mono output: guitars, mono effects pedals, some synths and drum machines. They’re super common in any music studio.
Make sure your TS cables are as short as possible – or else they might pick up noises and electrical hums.
RCA cables
RCA connectors mostly come in pairs to achieve stereo. Most of the time the red is used for Right (Red and Right both start with the letter R!) and the white is used for the Left channel.
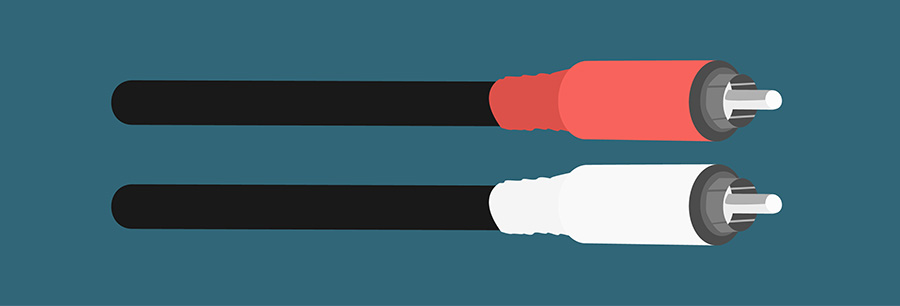
RCA cables are similar to TS cables. Each RCA cable has one conductor and one ground. That means they’re always unbalanced.
So the same tip applies: keep them as short as possible.
RCA connectors are the DJ’s bread and butter. They’re the most common wires used to connect CDJs and turntables to DJ mixers.
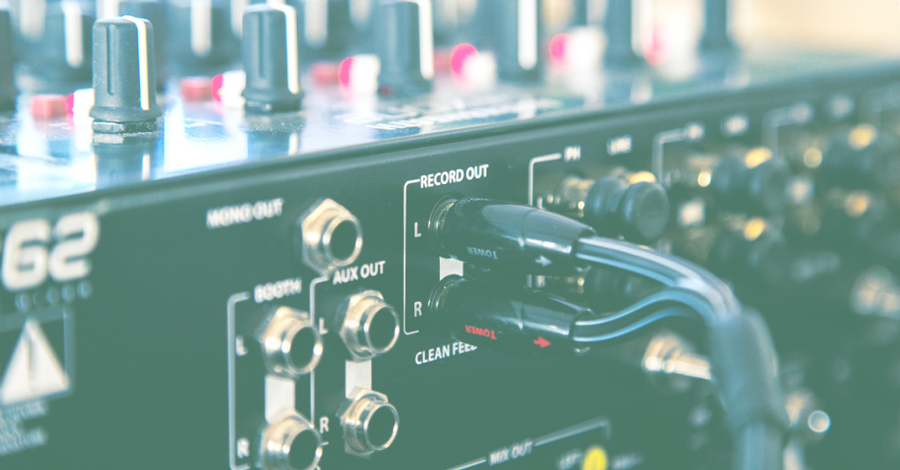
Hot tip: When you’re plugging your CDJs and turntables, there are two types of RCA inputs: Line and Phono.
Line is for CDJs and other instruments, Phono is always for turntables.
Turntables have a much lower signal, so they need a more powerful preamp to bring them to line level (more on levels below). Always use the correct input when plugging your DJ setup to avoid noise and distortion! For more on turntables, check out Turntable Lab.
DIGITAL CABLES
You’ll find more and more digital cables in today’s home studio.
But I’m not gonna go in depth about them because they’re more straightforward than analog. And yes, I’ve left out some of the less common ones – like AES/EBU, S/PDIF, etc.
Lots of people think that the length of digital cables doesn’t matter (some say it either works or it doesn’t). But from experience if you go really long with digital cables (several meters), there’s more chance of it working improperly. So keep it short!
MIDI Cables
MIDI cables are used to sync and communicate instructions between gear.

As I’ve written in another post, MIDI does not make or transport sound. It transmits event messages.
Today most modern gear has MIDI in, MIDI out and MIDI thru. So the important thing to remember is your MIDI signal flow.
When you’re asking yourself: should I plug my MIDI cable in the IN, OUT, or THRU jack? think about whether your machine is:
- Sending the information = plug the cable in the OUT
- Receiving the information = plug the cable in the IN
- Passing the information along to another machine = plug the cable in the THRU
USB Cables
USB cables have become super common in audio production. They’re on MIDI keyboard controllers, audio interfaces, modern synths and drum machines.

They make information exchange possible between music gear and computers. USB cables also transport MIDI information.
The most widespread types of USB cables for instruments are USB A-Type (the classic flat one) and USB B-Type (the ‘square USB’).
USB connectors are following an ongoing trend in electronics towards miniaturization. Most new pieces of gear come with their own USB cable, so you don’t need to worry.
The important thing to remember is that if it stops working, it’s easy to replace – just look for the corresponding shape. They also tend to be quite fragile, so avoid keeping them plugged in and wrapping them around your gear when you transport them.
[adbutler zone_id=”291816″ secure=”1″ type=”asyncjs”]
Convert Unbalanced to Balanced
This is a scenario that will happen to you at some point.
You’re playing a show, and the PA setup has XLR connectors – which are balanced.
Your gear is unbalanced because you have a guitar, bass, or synth.
Plus, the main mixer console is very far from the stage, so long unbalanced cables will attract noise and interference.
You need to convert the unbalanced connection to a balanced one. What do you do? How do you convert an unbalanced connection to a balanced one?
This is done using a DI box.
What is a DI box?
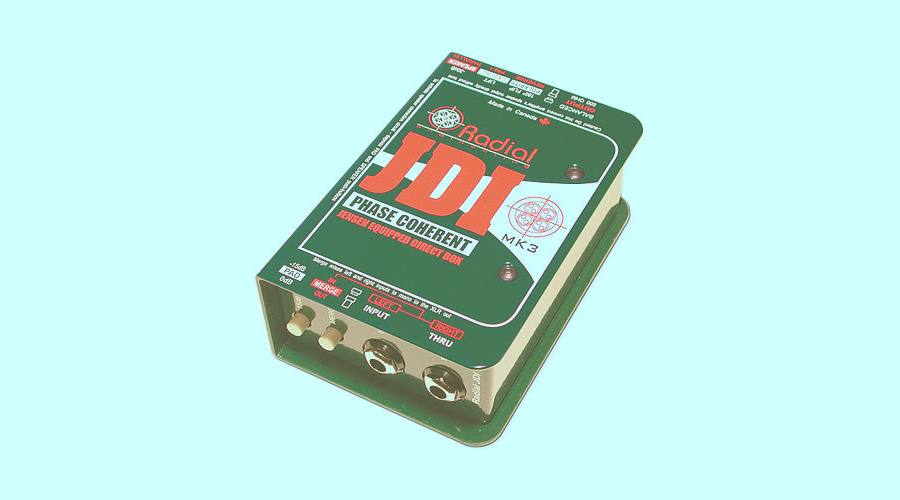
A DI box (direct injection) is device used in recording and live audio to convert signals and match audio levels (more on levels below). It allows you to plug unbalanced gear (guitar, synth, bass) to balanced inputs on mixers and PA systems – it converts it to a balanced connection. You get noise reduction, no interference and the ability to run long cables. Thanks DI box!
Plug a TS to TRS
You might be asking “can I plug an unbalanced TS plug into a balanced TRS jack?”
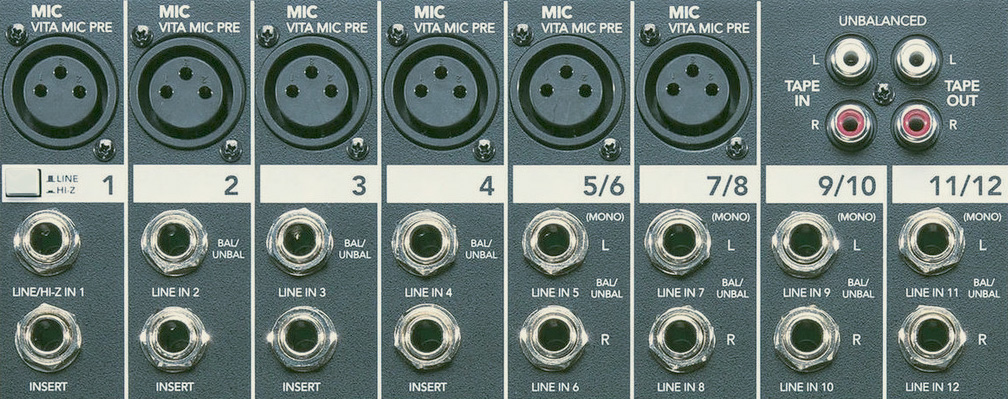
The answer is yes. Most of the time those ¼ inch (6.35 mm) inputs are both balanced and unbalanced – they’re built to switch between the two. Manufacturers often write it on the mixer itself: BAL/UNBAL.
As a general rule, read what it says on your gear and mixer! It’s as simple as that.
Audio Level 101: speaker, mic, instrument, and line level
I promised to talk about levels. This is pretty crucial when you’re plugging your devices together.
What’s the difference between Mic, Instrument, Speaker and Line level signals?
- What is Speaker level? Speaker level is the strongest signal. And it makes sense, speakers need a lot of power—as anyone who stands in front of a club sound system will know!
- What is Line level? Line level is the standard signal level (in terms of voltage). Instrument, phono and mic levels need to be boosted to match this level.
- What is Instrument level? Instrument level is somewhere in between. It’s weaker than line level but stronger than mic level. Synths, basses and guitars are usually at this level. A DI box is used to match the level of these instruments to line level.
- What is Mic level? Mic level is the weakest signal. It needs a mic preamp to be brought up to line level, otherwise you don’t hear it.
Taking Care of Your Audio Cables: Maintenance Tips and Tricks
Even the highest quality audio cables won’t last forever if they’re not treated with care.
If you follow these simple maintenance practices, you can significantly extend their lifespan and keep them in good working order.
Proper Wrapping
It’s crucial to wrap your cables correctly after each use. Avoid the common ‘wrap around the elbow’ method, as this can cause internal damage over time.
Instead, use the ‘over-under’ technique, which involves alternating the direction of your wraps to relieve internal strain on the cable.
Storage
Keep your cables in a cool, dry place when not in use.
Avoid exposure to extreme temperatures, as this can affect the insulation and conductive materials inside the cable.
Try to store each cable separately to prevent tangling and unnecessary strain.
Checking for Damage
Inspect your cables for any visible signs of wear and tear, such as frayed insulation or bent connectors, before and after each use.
If you notice a cable starting to wear down, it’s best to replace it as soon as possible to avoid any risk of injury, potential damage to your gear or loss in audio quality.
Cable Repair
Most stop working because of a problem with the jack—usually, some connection is lost or weakened between the wiring and the jack’s connection points.
If you have time, these problems can be fixed at home with a soldering iron, a new connector and some electrical tape or heat-shrink tubing.
However, if the internal wires are damaged or if the cable is not functioning correctly, it’s usually better to replace it entirely rather than attempting a repair.
Untangle Those Cables
Knowledge about audio cable types and audio levels is key when you’re recording music and playing live gigs. It’ll give you the know-how you need to plug in your setup and get your best sound.
Plus, when you’re talking to the sound person at the venue or buying something at the music store, you wanna know what you’re talking about right?
So keep this audio cable guide in your bookmarks and return to it every time you need to.
Because even though ads of gear always show instruments floating in space, the magic of music only really happens when you plug everything together.
Gear guides, tips, tutorials, inspiration and more—delivered weekly.
Keep up with the LANDR Blog.


