15 Richard Furch Mix Tips Every Producer Should Know

Learn from the best: Richard Furch shares his unique studio insights.
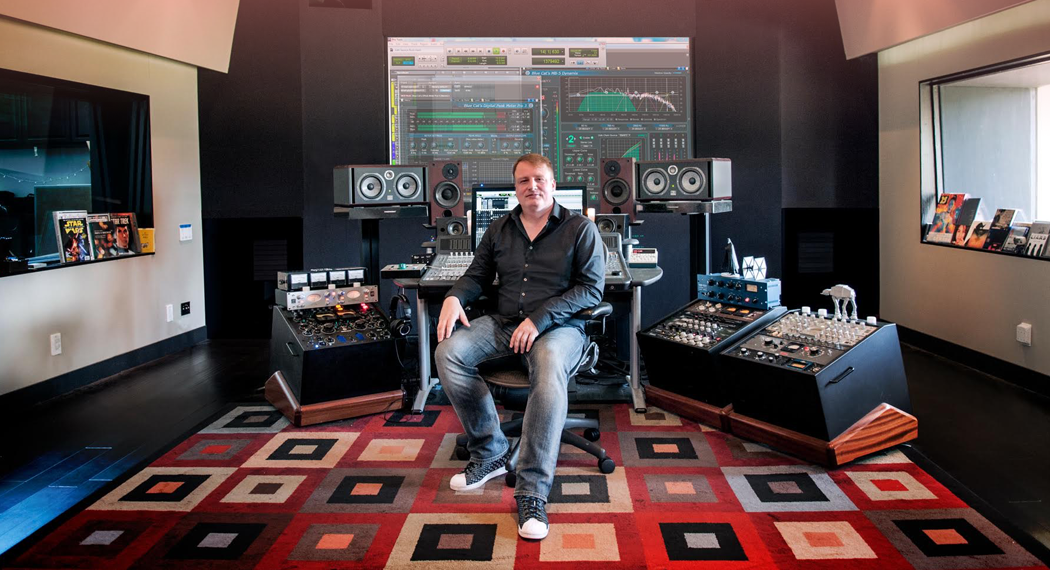
There’s a good chance you’ve heard a record mixed by Richard Furch whether you know it or not.
His Grammy-filled discography includes mixing and engineering credits for Frank Ocean, Prince, Jimmy Jam and Terry Lewis, Tyrese, Whitney Houston, Macy Gray, Usher, Outkast and many more.
It’s a career that spans more than 15 years of top-notch mix engineering. In that time, Furch has formulated a unique approach and philosophy to mixing.
Figuring out all the little things you need to think about every time you mix comes down to hours behind the board—something Furch has A TON of. Normally, you’d have to log your own long hours to figure out what all those important things are.
But in the spirit of sharing and pushing the craft of mixing forward, Furch took some time out from the studio to share some of what he’s discovered and show you how to approach certain parts your mixing process.
Ranging from mix referencing to the results of too much coffee, these 15 Richard Furch mix tips are valuable to every producer looking for a better mix—regardless of genre, DAW or skill level.
Get your pen and pad ready…
1. Find Your Anchor
It’s easy to get lost in a mix while asking yourself if the snare is too loud, the bass too low, the guitars to distant etc. You need an anchor for your mix. Define one element that stays static and mix around that.
Starting points could be the vocal (after you figured out some basic eq and compression to get it sitting in the right place), or the snare. Both are very important, forward parts of many mixes.
Mix around them. If you get lost, ask yourself how the part in question relates to your anchor.
If you feel lost, mute everything around the anchor and start adding instruments back in until you pinpoint the parts that are too loud, too soft, too distracting, too…wrong in the mix. Then fix, instead of questioning every level and every part.
2. Listen Through Imperfections
This one is major time saver if you can perfect (pun intended) this approach. If you stop mixing every time you decide an ess is too loud, a smack is too audible, or an edit is too rough, you’ll waste hours and hours.
Leave that stuff aside. Instead, listen for the broader musical relationships (the definition of mixing).
Chances are, half of the things you thought were important to fix early on disappear in the final mix. And the rest, you can Fix after you’re done with the song, outside of the creative zone.
3. Don’t Mix Drums While Listening Loud
If you listen to your mix very loud, you’ll likely think that the drums and percussion are too low. It’s part of their transient nature.
Get a feel for the impact of the drums while listening loud. Does it move your body? Are you dancing? Great.
But when it comes to mixing your drums and deciding how loud they are in the mix, listen at medium or low volumes. You will get a better blend.
[adbutler zone_id=”291816″ secure=”1″ type=”asyncjs”]
And hey, you can always check it again loud when you’re done. Still dancing? Good work!

4. Don’t Get Distracted
Try this little experiment: Play your mix from the top and at about verse 1 pick up your phone and check your snapchat or switch to your browser and scroll through some Facebook.
I guarantee by the time the chorus rolls around, you’ll admit to yourself that you have no idea about what you were listening to and what changes you might have to make. Which is the only reason to listen to the mix in progress.
Silence your phone! Put it behind you so you can’t glance at it or leave it in the kitchen and check your texts every hour or so.
Studies have shown that if you break your concentration to do something like checking your email, it can take you up to 25 minutes to get back to the concentration level you were at before. Mix fast, go home early. THEN do all the social media you think you need.
5. Get Distracted
On the other hand, once you get very close to finishing your mix, make it a point to get distracted.
Loop your mix in the background, turn it down to a level where you can easily talk over it. Turn your back to the speakers and do some emails, texts, call a friend, whatever.
Keep listening subconsciously. What sticks out to you? Did you just lose the vocal on a few words here and there?
Make small changes in the mix based on your passive listening. Try some tweaks, and keep it looping. Once nothing irks you anymore, you might just be done!
6. Reference But Don’t Compare
This is an easy and frustrating trap to fall into. You’re checking out how your mix compares to your favorite artist of a similar genre (always level match!).
After listening, you find the bass is too low in your mix and the snaps are just more crisp in the other song, the vocal is dryer and the strings are closer and blah, blah, blah…none of this matters.
The reference is not the song you’re mixing. Referencing means you take a sampling of what other records sound like and you use your findings to get your song sitting somewhere amongst these songs, while still preserving the song you’re mixing.
You will quickly figure out that every song sounds different, even in the same genre. Your song should sound different, not the same as something else. Don’t make it sound like some other song for no reason.
7. Change Your Perspective
You’ll hear a lot of mix engineers talking about the importance of checking mixes in their car.
Do you swear by the car check? Why? Does your car have the most accurate, awesome sound system ever assembled? Then why don’t you mix in your car instead?
The car check is important because the sound system is DIFFERENT. The biggest reason you should listen to your mix somewhere else is because the speakers are NOT the ones in your studio. It’s all about the change of perspective.
It will make you listen to music differently and highlight new aspects of your mix. If the car reveals something that you cannot hear in your studio, on any of your speakers, or headphones, it’s might be time for a studio tweak or upgrade.

8. EQ and Level Match
Pretty much every plugin these days has a tweakable output level. So after EQing always match your output level with the level of the bypassed signal. Ask yourself: Is it really getting better? Or were you just impressed by a louder signal after boosting bass or midrange?
You’ll find yourself EQing less and more efficiently. Which is not necessarily better, but it goes faster.
The answer to “why is this part not cutting through” is not always about adding midrange or brightness. Sometimes it’s as simple as just turning it up. Seriously… It might be just that easy.
9. EQ and Listen as a Section
Many people say you shouldn’t EQ in solo. Personally, I think that’s not necessarily right.
You might want to EQ in solo because you already know what kind of EQ you need (lower midrange, presence, etc).
EQing while soloed can help you zone in on the instrument and how the EQ will affect it. It’s a matter of marksmanship. Get as close as you can and affect only what’s necessary.
It’s a matter of marksmanship. Get as close as you can and affect only what’s necessary.
Always un-solo and listen in context to check your decisions. Level match with the bypassed signal as described above. Tweak more—in solo or not—But always check in context of the whole mix.
There’s good and bad aspects to pushing an EQ that are always related: Mud/warmth, presence/harshness, air/lightness, bass/boom. Finding the sweet spot is the art.
10. EQ From the Top Down
Try EQing from the top down (high frequencies to lows).
It’s definitely subjective, but it’s a process that works for me when defining the high end and upper midrange of a sound first—before dealing with mud or bottom frequencies.
Some of the muddiness and lack of clarity automatically goes away once you’ve defined the presence of a sound, because you’re changing the relationship between present frequencies and murky frequencies when you boost upper midrange (level matching definitely helps as described above).
I find that if you work from the bottom up you might make sounds too skinny, as you fixed the lower midrange first and then later possibly added high end when it was really not necessary. As always. Listening helps. Duh
11. Don’t Look, Listen
Here’s another experiment to try: Position your cursor at top of song, start playing your song, now turn off your monitor. Keep listening. Are you perceiving your reverbs differently? Can you focus more on the vocal detail?
A lot of people hear better when the monitor is dark or with the lights low or off. My theory is that darkness creates less brain activity and sensory input which heightens our ability to listen.
Dammit, I’m a record mixer, not a doctor. But it makes sense to me and it works! Try it.
My theory is that darkness creates less brain activity and sensory input which heightens our ability to listen.
12. Know How Beverages Affect You
Sounds funny, but it’s a real issue…
If you’re four coffees deep by 3pm, I can almost guarantee that come 5 or 6pm your hearing will be changed by the way caffeine affects your capillaries.
Try to put a finger on how different beverages affect you. Is everything starting to sound thin and harsh? Maybe it’s time to ease off the caffeine.
Or use it to your advantage. Need more vibe and caution-to-the-wind attitude? Maybe it’s Margarita time. But don’t blame me if you have to fix the mix the next day…

13. Know Your Margins
Throw up some drums, bass and a (decently compressed) vocal in a session.
Can you get the vocal sitting within 3dB of where it should be in a minute or so? How about 2dB or 1dB? Maybe even .5db?
Finding, and knowing your margins will help you stop guessing how much ‘too loud’ the vocal is.
Need more vibe and caution-to-the-wind attitude? Maybe it’s Margarita time.
To figure it out, set the vocal to where you think it might work. Now turn it up until you go “This is definitely too loud”. What is that number? 2db?
Now do the opposite: Turn the vocal down until it’s definitely too low. How many dB is that?
Now you have a window of where the vocal might sit in the final mix which will help you confidently mix around it. Hopefully that range will get smaller the more you do this. This means you’re getting better at instinctively mixing. See “find an anchor” as well.
14. Mix Without the Bass for a Long Time
I like starting my mixes with the drums. Most of the time, the drums define the whole frequency spectrum of the record from the kick to the cymbals.
Drums will often need considerably more work to sound right than a lot of the other instruments, so I like to get that done right away. I follow that with the keys, guitars, strings and vocals, and leave the bass out for a long time. It helps me really hone in on where the low-mids and low-end in the instruments sit in the mix.
I like starting my mixes with the drums. Most of the time, the drums define the whole frequency spectrum of the record from the kick to the cymbals.
Once I feel that spectrum feeling natural, I add the bass and work it in. I find that leveling a bass while only listening to drums is very hard as there is little harmonic content to put the bass in perspective. So leave it out until you have something to work around.
15. Find a Safe Place in the Mix:
150+ tracks on one project can get confusing VERY fast. There are only a few songs that actually need that many tracks. Musical intention can normally be described with much fewer musical events.
Musical intention can normally be described with much fewer musical events.
The solution? Find the center of the record. The instruments and vocal that play through the whole song that COULD be the whole song if nobody added the other bells and whistles.
Focus on making those elements sound good and remember what they are. Now. If you get lost when adding the rest of the music, mute instruments until you get back to the safe place, the place where the music feels good but the record is not finished.
Add the other elements until the song starts to feel bad. That’s the culprit, fix it. But never lose that safe place feeling and you’ll be fine.
Visit Richard’s site for more on his discography and studio. Follow Richard via his Facebook, Twitter and Instagram.
Gear guides, tips, tutorials, inspiration and more—delivered weekly.
Keep up with the LANDR Blog.


