


How to Mix for Beginners: 11 Steps to Your First Mixdown

Every music producer should know the fundamentals of mixing, and they're easier to learn than you might think.
The tips in this guide will set you up with the core principles and give you a general framework for your own mixing process.
However, keep in mind that the exact way you mix your own music should also be a product of your creative vision, the genre you work in, and other individual factors.
With that in mind, let’s start the mixdown process at the beginning.
How to mix for beginners
- Choose a DAW and some loops
- Set up your audio tracks
- Create a four-bar section
- Experiment with level adjustments
- Understand gain and headroom
- Use equalizers to create balance or emphasis
- Experiment with panning
- Understand stereo imaging
- Shape the dynamics of your sounds
- Create a strong arrangement
- Export and master your mixdown
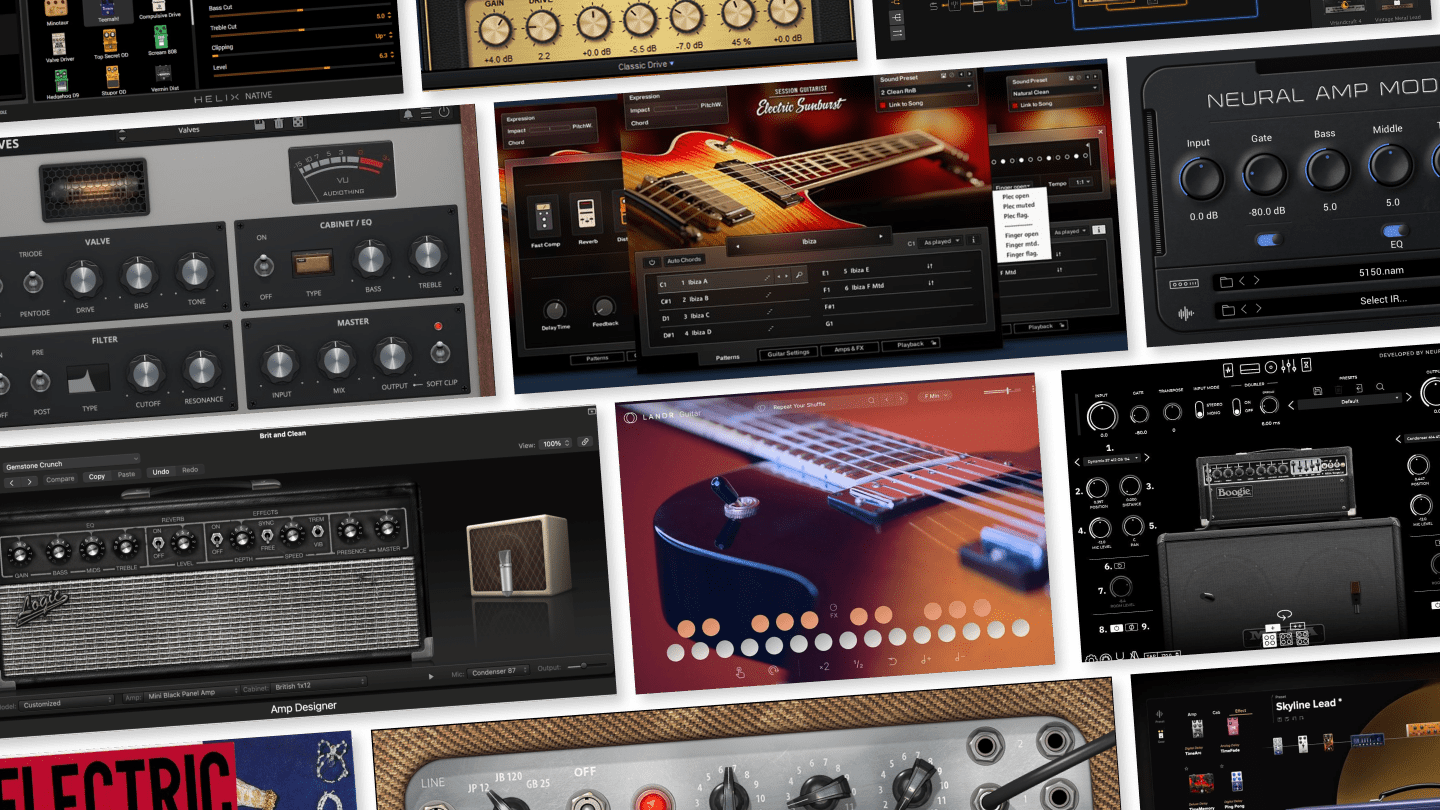
1. Choose a DAW and some loops
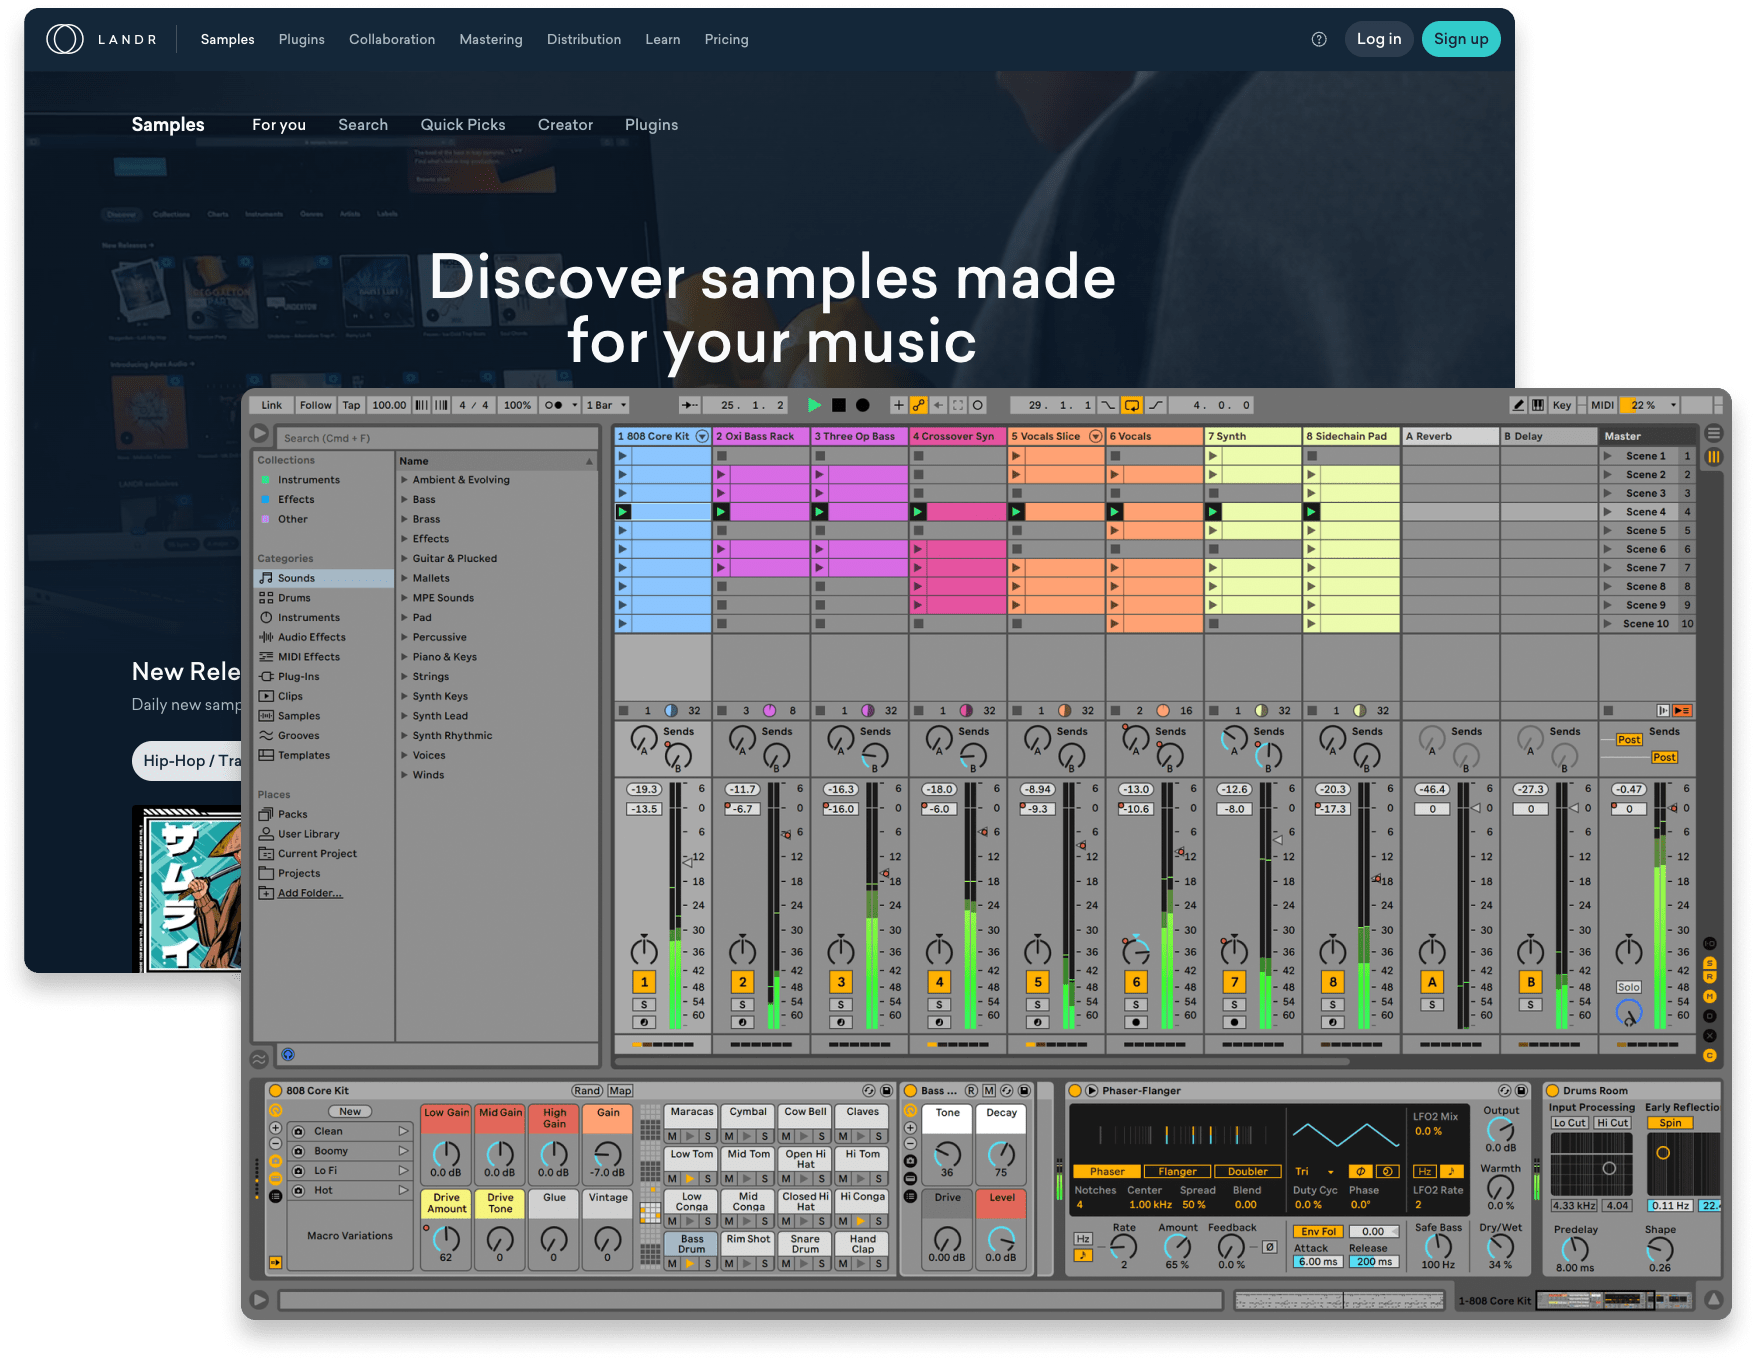
Your DAW (digital audio workstation) is the software brain of your music setup that allows you to record, arrange, and mix your music. It’s where pretty much the entire mixing process will take place.
Examples of DAWs include Ableton Live, Steinberg Cubase, Apple Pro Tools, and Image Line FL Studio.
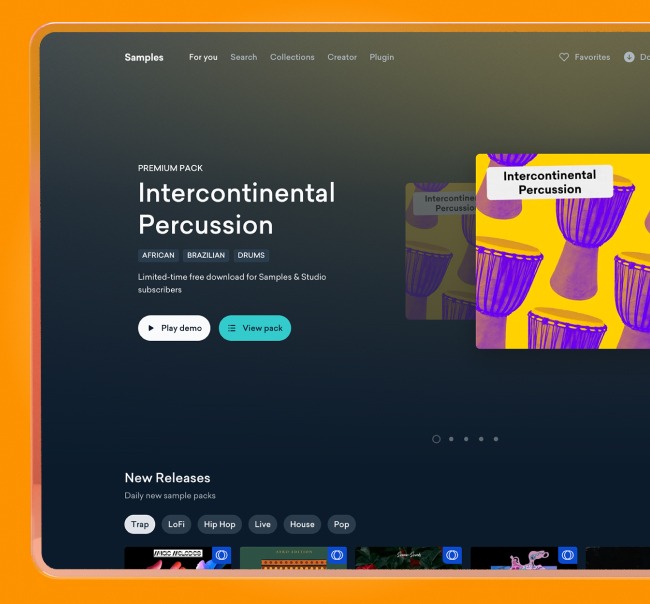
Meanwhile, one of the most effective ways to develop your core mixing skills in a DAW is to use premade loops.
This will give you access to recordings of good vocals, drum kits, and a wide range of instrumentation without having to record them yourself.
In fact, some loop and sample libraries provide what are called construction packs, which give you a set of loops that are designed to work well together musically.
You can find tons of these at LANDR Samples.
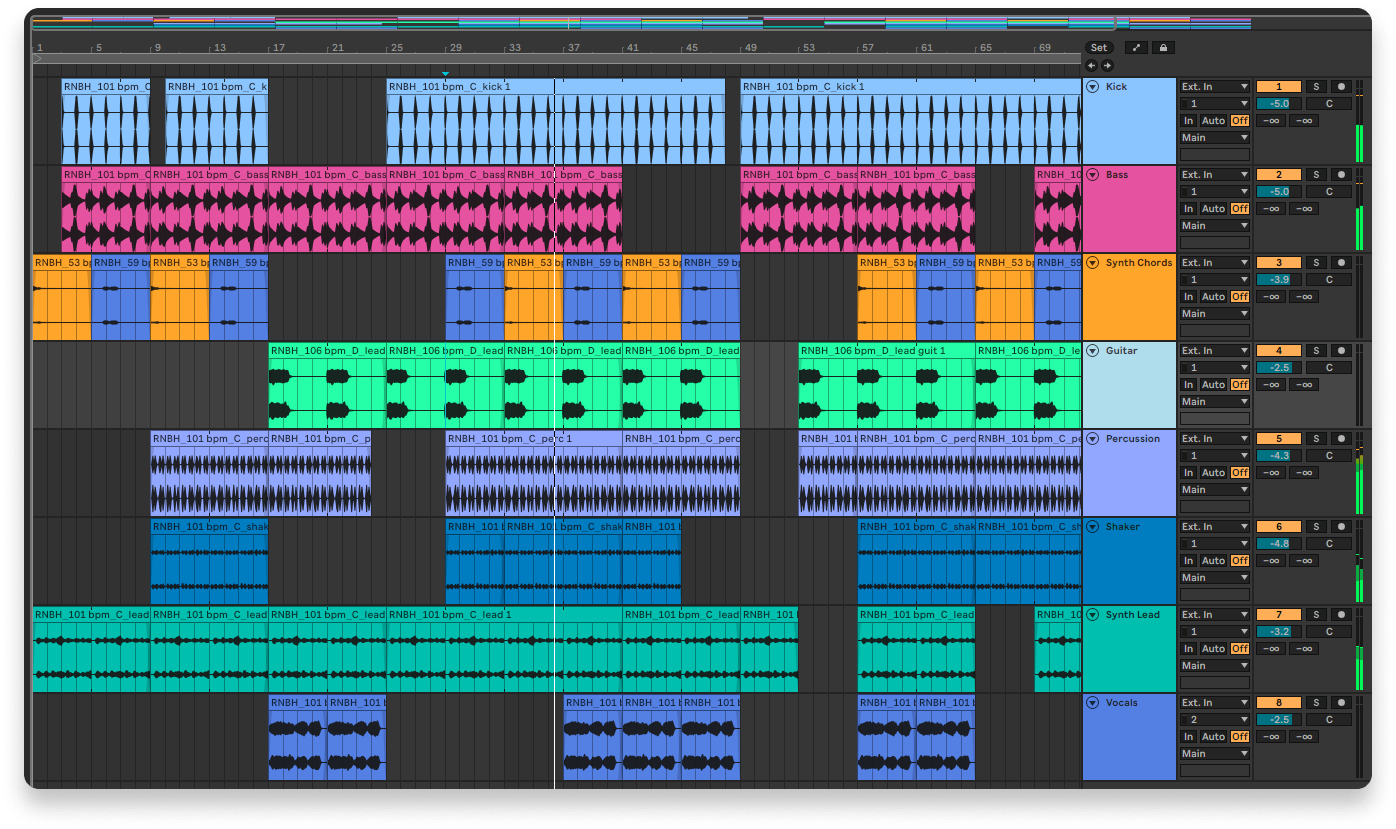
2. Set up your audio tracks
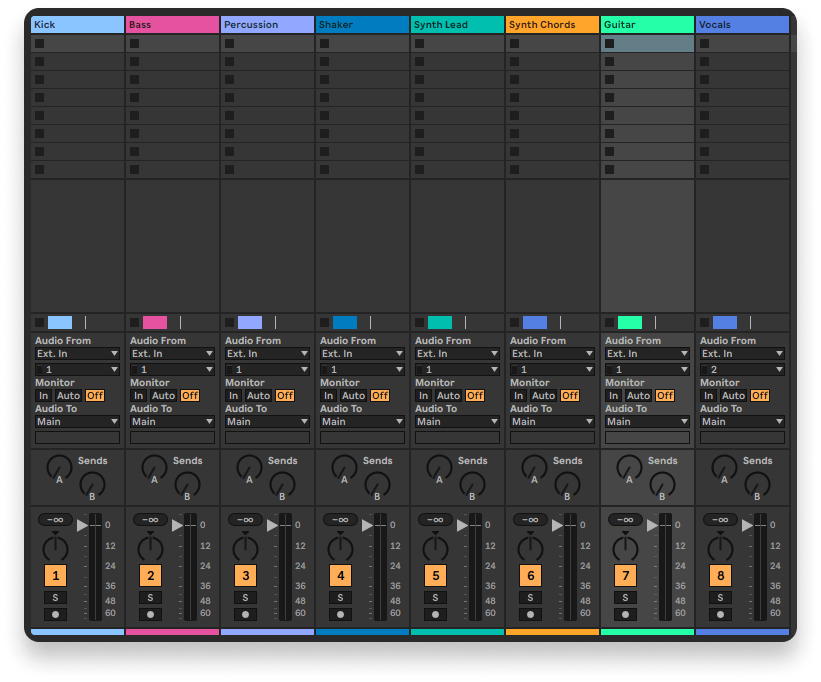
Most DAWs allow you to color-code your tracks for easier workflow and organization. We recommend using this to your advantage.
Once you’ve installed your DAW, set up your session with eight to twelve audio tracks (also called channels).
You should have dedicated tracks for your bass, lead instrument (like a guitar, piano, or synth), backing instrument(s), drum kit, and vocals.
The exact distribution of your instruments and sounds between tracks will vary depending on what sounds you’ve collected.
The most important part is that each instrument or sound type has its own track — and be sure to name the tracks accordingly.
Ideally, you’ll have each part of your drum kit on a dedicated track, but this isn’t 100% essential when learning the basics.
If you find a drum loop you like that is a fully-mixed kit, that’s okay — you can move on to more advanced drum kit mixing once you have a better handle on things.
3. Create a looping section
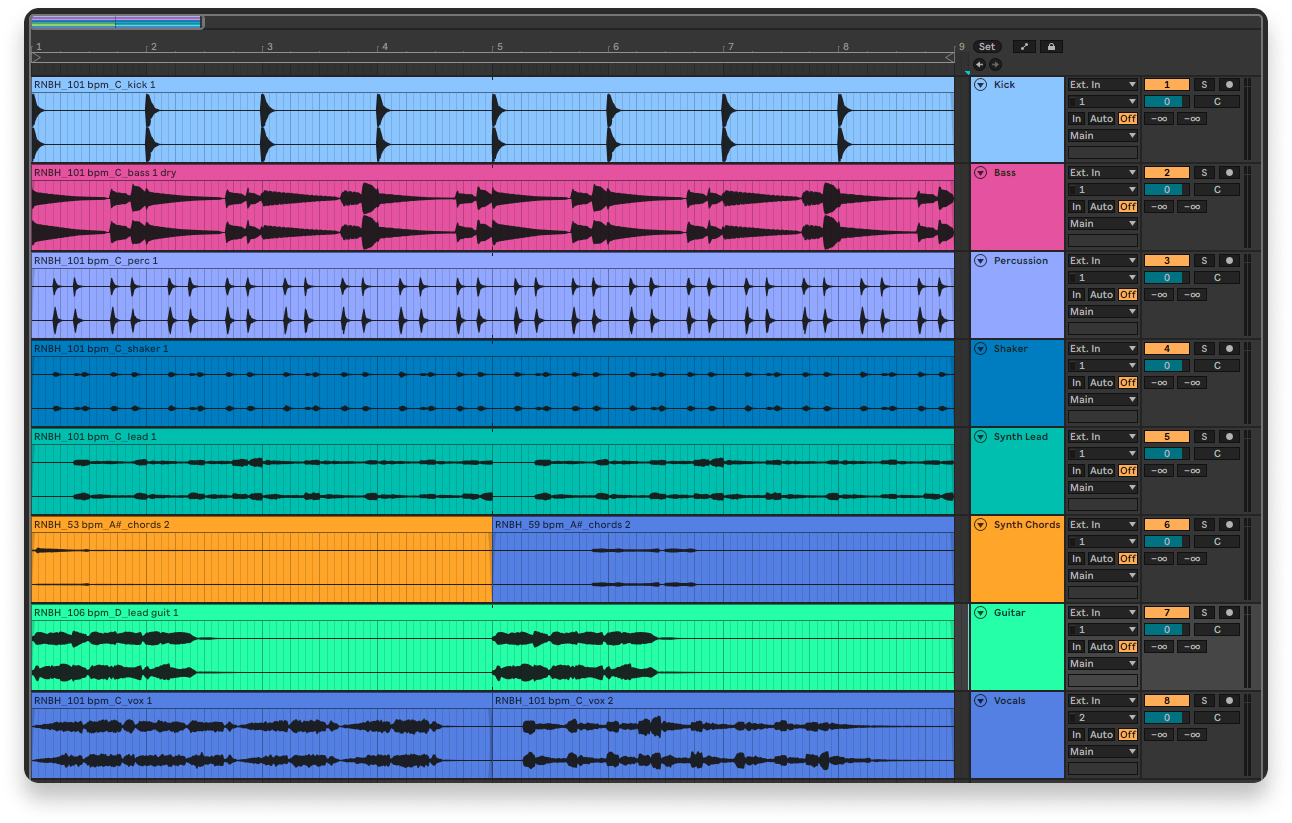
We've created an 8-bar looping section that is complete enough for us to explore mixing with all major instrument types.
Your arrangement (which refers to the structure of your song and how it changes over time) is crucial to your mixdown.
This is because the choices you make regarding which instruments are playing at the same time will significantly define their sonic relationships with one another.
However, because we want to quickly establish the essentials of mixing, we’re going to start by creating a single looping section. You can imagine that it’s the chorus of a song you haven’t fully developed yet.
Once you have the basics down, you can develop your arrangement skills and observe how they relate to your mixing skills.
For now, place your loops onto the timeline of your DAW in their respective tracks and layer them together so that they all play simultaneously for a set period of time.
You can set loop start and end points on your timeline so that the DAW will endlessly repeat the section you’ve created.
This section could be as short as four to eight bars, or it could be longer, depending on the loops you’re using.
Just make sure that you like the flow and feel of it, because you’ll be listening to it quite a lot.
When you’ve made a section that you like, spend some time listening to it and getting familiar with how the layers interact with each other sonically.
4. Experiment with level adjustments
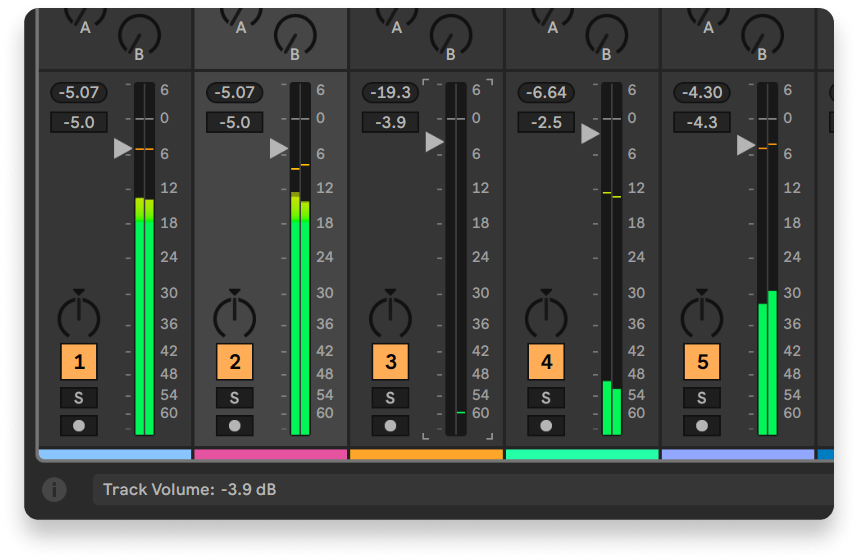
Lower frequencies tend to take up more amplitude in a mix, so we've brought down the kick and the bass to make sure they don't overpower the other instruments.
If you could boil down the entire music mixing process to a single factor, it would be amplitude. This is also often referred to as loudness or volume.
Even small, subtle adjustments to the relative amplitude of sounds in a mix can make a big difference in the listener’s experience of the song.
So, in the mixing panel of your DAW, start with all of the level faders of your tracks at 0 dB (meaning decibels, a measurement of sound level). All loops should be at their original volume.
Choose one to three tracks, experiment with adjusting their level faders, and pay close attention to how it affects the feel of the overall mix.
What happens when you bring the vocals up a bit, and bring the lead instrument down by the same amount? What happens when you make your drum kit louder than your bassline?
The right level adjustments can help you highlight particularly important sounds or even emphasize the groove of the song.
If a sound is loud enough, it will clip. This means that the sound has been distorted due to an overdriven audio path.
However, generally speaking, a major goal of audio mixing is to attain a desirable level of perceived loudness without introducing unwanted digital clipping in your DAW.
This is usually indicated when the level meter of a channel (including the master channel) reaches a red color.
5. Understand gain and headroom
All audio devices like preamps and effects can change the amplitude of a signal.
For this reason, it’s important to understand how to manage gain and gain staging, or in other words, the degree to which the amplitudes of sounds add up over the production process.
If, for example, your decisions add up to a mixdown that is too loud, you’re likely to lose detail, definition, and even groove in your song.
You’ll also lack headroom, which (in this particular context) is the amount of “space” you have for further changes in amplitude at the mastering stage before clipping occurs.
There are different schools of thought when it comes to how much headroom a final mixdown should have before the mastering stage.
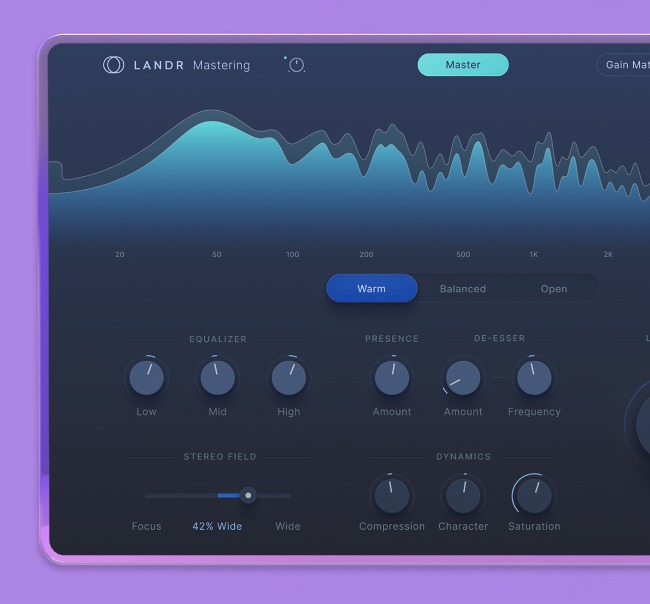
As an example, we often recommend leaving a generous amount of -6 dB when preparing mixdowns for LANDR Mastering.
6. Use equalizers to create balance or emphasis
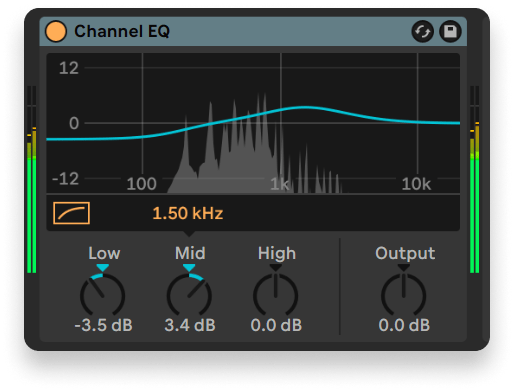
We wanted our lead keys to shine a bit more in the higher mids, and we rolled off the lower mids a little to avoid competing with our chord sounds.
Sound exists in a spectrum of frequencies, and different groups of frequencies in that spectrum are often referred to as frequency bands.
Equalization (usually known as EQ) is the process of boosting or attenuating (reducing) the amplitudes of specific frequencies and frequency bands.
Just like with the amplitudes of instruments, changing the amplitudes of frequency bands allows us to emphasize certain elements of a sound or reduce them to create balance.
This is useful if, for example, there is a particularly loud frequency band (often called a peak or resonant peak) that makes a sound or instrument feel unpleasant in a mix.
It’s also useful if, instead of turning down an instrument’s overall amplitude in the mix, you can attenuate certain frequencies that are interfering with the clarity of another instrument.
Experiment with EQ by:
- Reducing harsh or resonant frequencies
- Balancing different instruments with similar frequency content
- Removing unnecessary low frequencies
A good visual representation of the frequency spectrum is very useful for getting acquainted with how EQs work.
Once you get the hang of it, however, we recommend avoiding too much reliance on visuals so that you can continue to develop your listening skills.
7. Experiment with panning and stereo effects
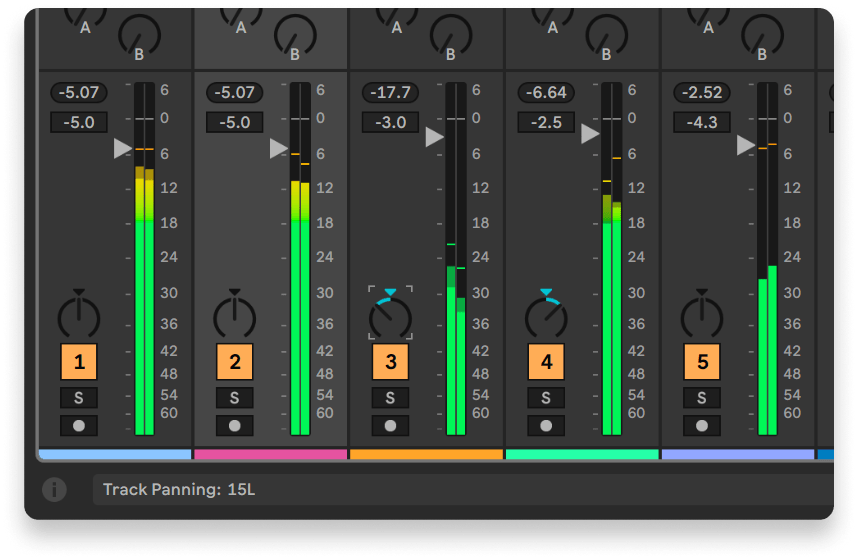
Panning our lead keys slightly to the right and our chords slightly to the left helped to create more dimension and definition between them.
Some sounds in your construction pack may be in mono while some may be in stereo.
Either way, you can modify a sound’s position in the stereo field using panning controls on the mixer or with stereo effects.
These allow you to change the location or spread of sounds in the left-to-right stereo field, also called the stereo image.
What happens when you slightly shift your hi-hats to the left and your cymbals to the right, while keeping your snare and kick drum in the center?
The right panning adjustments can infuse your song with a sense of dimension that is more immersive for the listener.
It can also help to emphasize sounds that you want to be the focus of attention (such as vocals or a lead instrument), while spreading out sounds that are meant to provide background material (such as arpeggios and pads).
Reverb, chorus, flanger, phaser, and stereo wideners are all example of effects that can change or enhance the stereo image.
Delays can also be used to change or enhance stereo image, as well as enhance rhythm and groove.
It’s important to keep in mind that accomplishing depth and dimension without creating problems in your mixdown is a common challenge in music production.
8. Understand stereo imaging
Modifying the stereo field can sometimes lead to issues with what’s called phase, and this can negatively impact the clarity, impact, or general texture of sounds.
Producers and engineers often try to ensure that a mixdown sounds good when it’s reduced to a mono master signal, which can be determined with plugins or built-in utilities in a DAW.
If certain crucial details (such as the clarity of percussion, vocals, or bass) are compromised when a mixdown is referenced in mono, changes to the mixdown might be necessary.
While this aspect of mixing might seem intimidating, it simply takes time to learn and understand, and you will eventually use tools that make it easier.
And although it’s important to be aware of phase and stereo image as factors, it’s wise to focus your skill-building on levels, gain, equalization, and basic panning first.
In the meantime, we recommend that you avoid going too crazy with tons of reverb, chorus, or stereo enhancement effects.
It’s also wise to avoid using these effects on low-frequency sounds like kick drums and bass (don’t worry, like most rules you will eventually learn how to break these ones in the right way).
9. Shape the dynamics of your sounds
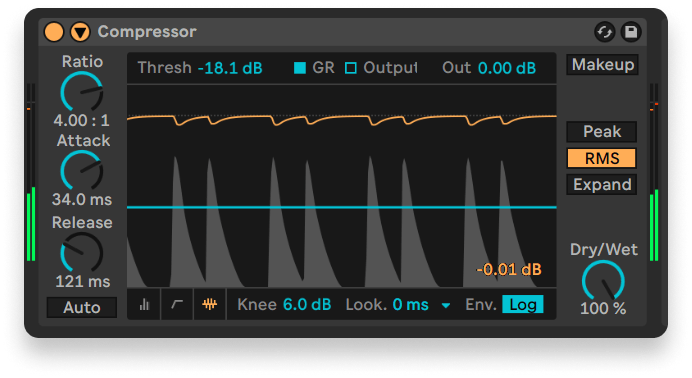
Our percussion hits were a little too sharp for our liking, so we tamed them a bit with the help of a compressor.
The fluctuations and relationships between the louder and quieter aspects of a sound are referred to as dynamics.
The overall spectrum of amplitude that a sound or song possesses (from its quietest element to its loudest) is called its dynamic range.
To modify the dynamics of sound, we use dynamics processors like compressors and limiters.
Compressors are useful for softening or enhancing the impact of drums and percussion, adjusting the presence and definition of vocals, and many other tasks.
They typically offer parameters for attack (which shapes the amplitude increases of a sound) and release (which shapes the amplitude decreases of a sound).
You’ll also see parameters for threshold (the minimum level at which the compressor will make its amplitude changes) and ratio (the amount of compression applied to the sound).
Place a compressor on your drum track and experiment with these parameters. Listen carefully to how they affect both the dynamics of the drum sounds and the groove they convey.
Limiters, meanwhile, are useful for keeping overall peak amplitude below a certain level, sometimes for the purpose of increasing perceived loudness without unwanted clipping.
These effects can both be great for making a song feel powerful and impactful, but they’re also easy to overuse.
Excessively pushing compressors and limiters for more loudness can lead to a loss in dynamic range, which ultimately means less definition, contrast, and clarity in your mix.
10. Create a strong arrangement
Arrangement is an artform all on its own, and it can take time to develop your songwriting skills to get results that really stand out.
Now that you’ve used a four-bar section to familiarize yourself with the fundamentals of mixing music, take some time to build an arrangement with your loops.
How you do this depends entirely on the sounds you’re using, the genre you’re working in, and your creative approach.
There are, of course, common music conventions you can follow, such as having an intro, verses, a bridge, and a chorus.
But how closely you follow these conventions comes down to personal preference.
No matter how you arrange your loops into your final song, pay close attention to how the sounds relate to each other sonically when used in different combinations.
If you’re having trouble coming up with an arrangement that you like, we recommend finding a song by an artist you like in the same genre and using it as a template or reference point.
You can even drag it onto your timeline and visually mark the durations of its instruments to create a map of its structure. Your DAW should have features that allow for this.
If you’re looking to seriously improve your workflow, mixing, and production skills, check out the Hyperbits Masterclass — a genre-agnostic course designed to help producers finish release-ready tracks faster.
11. Export and master your mixdown
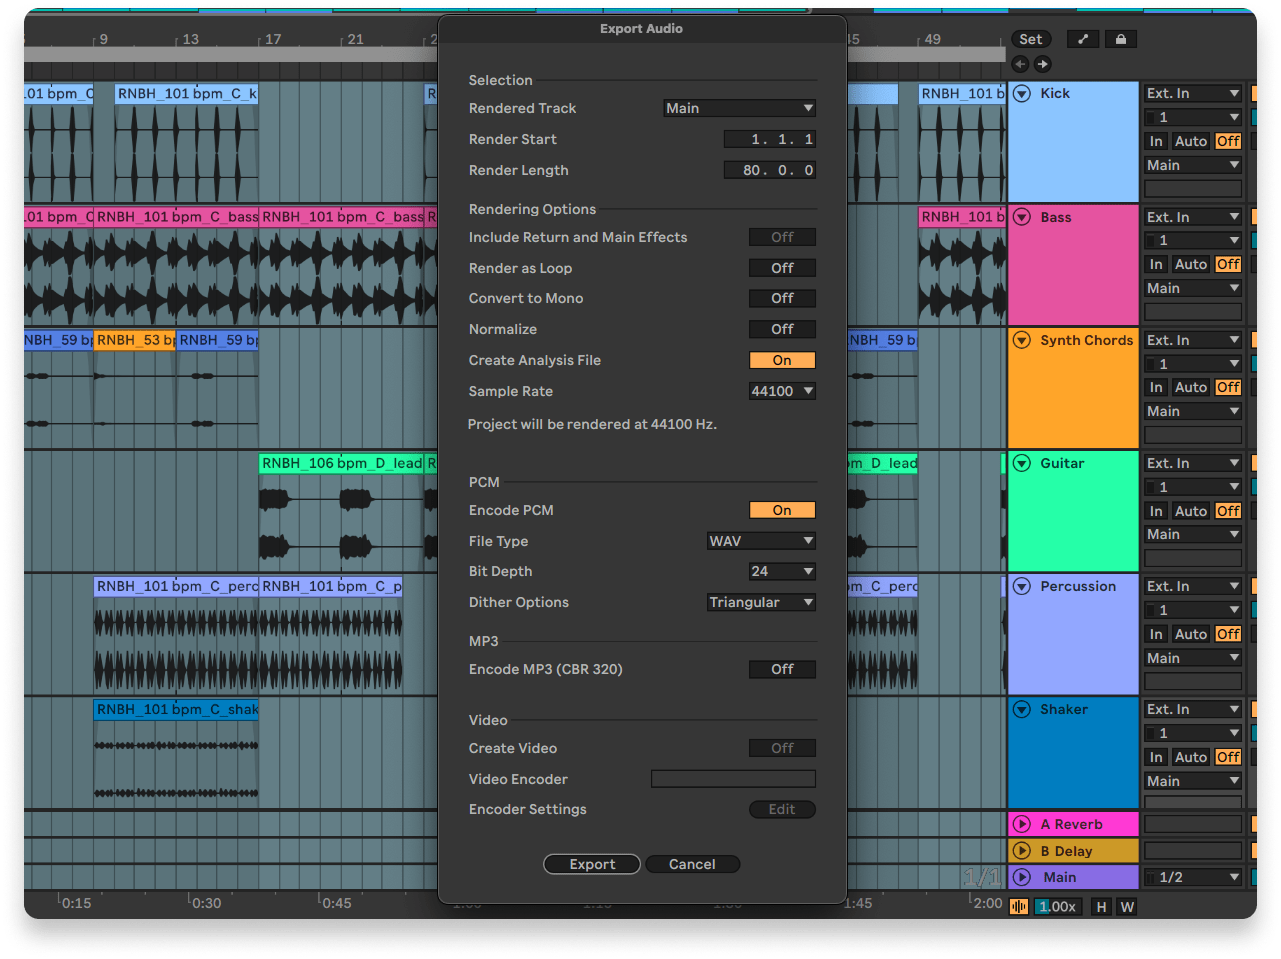
We're going with the export settings that we often recommend for LANDR Mastering, which is what we'll use to master our track.
Mastering is the post-mixing stage that is meant to finalize a song for release. It’s a separate process that treats the exported mixdown rather than individual tracks in the project.
Because of this, you should avoid trying to “master” your song during the mixing stage by applying excessive EQ, compression, and limiting to your whole session.
And as we mentioned earlier, your mixdown should leave 3-6 dB of headroom to allow for the increases in loudness that are important to the mastering process.
So, once you’re happy with your arrangement and everything sounds good, export your mixdown.
Your DAW will provide various options for export settings, and certain aspects of this can vary depending on the situation.
If you’re exporting for LANDR Mastering, for example, we recommend:
- WAV format
- 24bit
- 44.1kHz or 48kHz sampling rate (same rate as your session)
- Dithering on (select “Triangular” if using Ableton Live)
Take some time to listen to your exported song and ensure that you’re happy with the result. After that, it’s on to the mastering stage.
Congrats on completing your first mixdown!
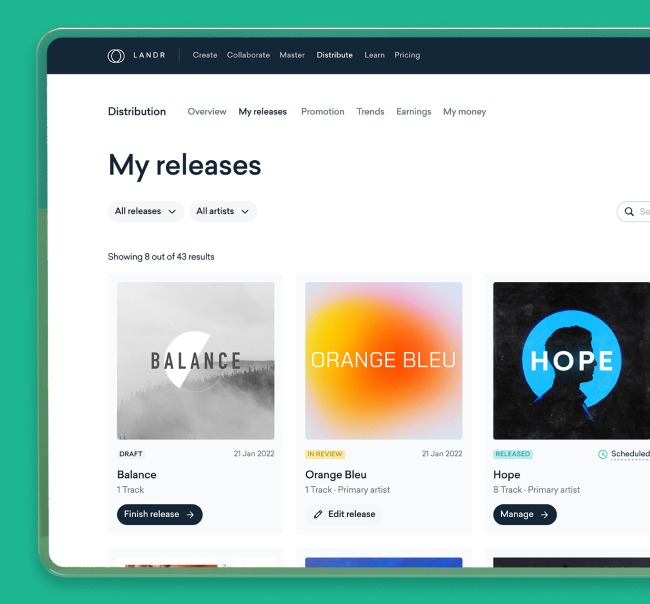
If you feel it’s ready for release, we recommend putting out through a good distributor, promoting it on social media, and creating a strong Spotify for Artists profile if you haven’t already.
Various contributors from the LANDR team of music mentors.
@LANDRGear guides, tips, tutorials, inspiration and more—delivered weekly.
Keep up with the LANDR Blog.