Drum Compression: One Simple Technique for Punchier Drums

You can’t have fatness and punch right? Wrong.
I’ll admit it, my drums were flat. I was happy with my patterns, but the sound always came out thin and quiet.
So I did what I normally do—compress the crap out of them.
They’d be louder, but they’d sound lifeless. All the dynamics were gone.
Sound familiar? No worries, getting robust drums—or vocals, synths or any other instrument— in your DAW software isn’t tough.

Get the tools to shape your sound with 30+ synths, instruments, effects and utilities plugins from industry leaders like Arturia, UJAM and more. Try LANDR Plugins.
Follow this simple guide and you’ll be able to get punch and keep the important dynamics intact.
Parallel It
If you know how to mix music, you already know what compression is. But there are all kinds of different ways to use it.
To get fatter sound on a specific track the kind of compression you need is parallel compression.
You can apply this technique to any track if you want to beef it up a bit. But in this example, I’m going to apply it to a simple drum loop:
I’m using the Bitwig DAW, but the same concepts apply in most music production software.
Step 1: Duplicate the Track you want to work with
This one’s easy. Just copy the track you want to fatten up, and duplicate it. You can see here that I now have the same drum loop in 2 different tracks.
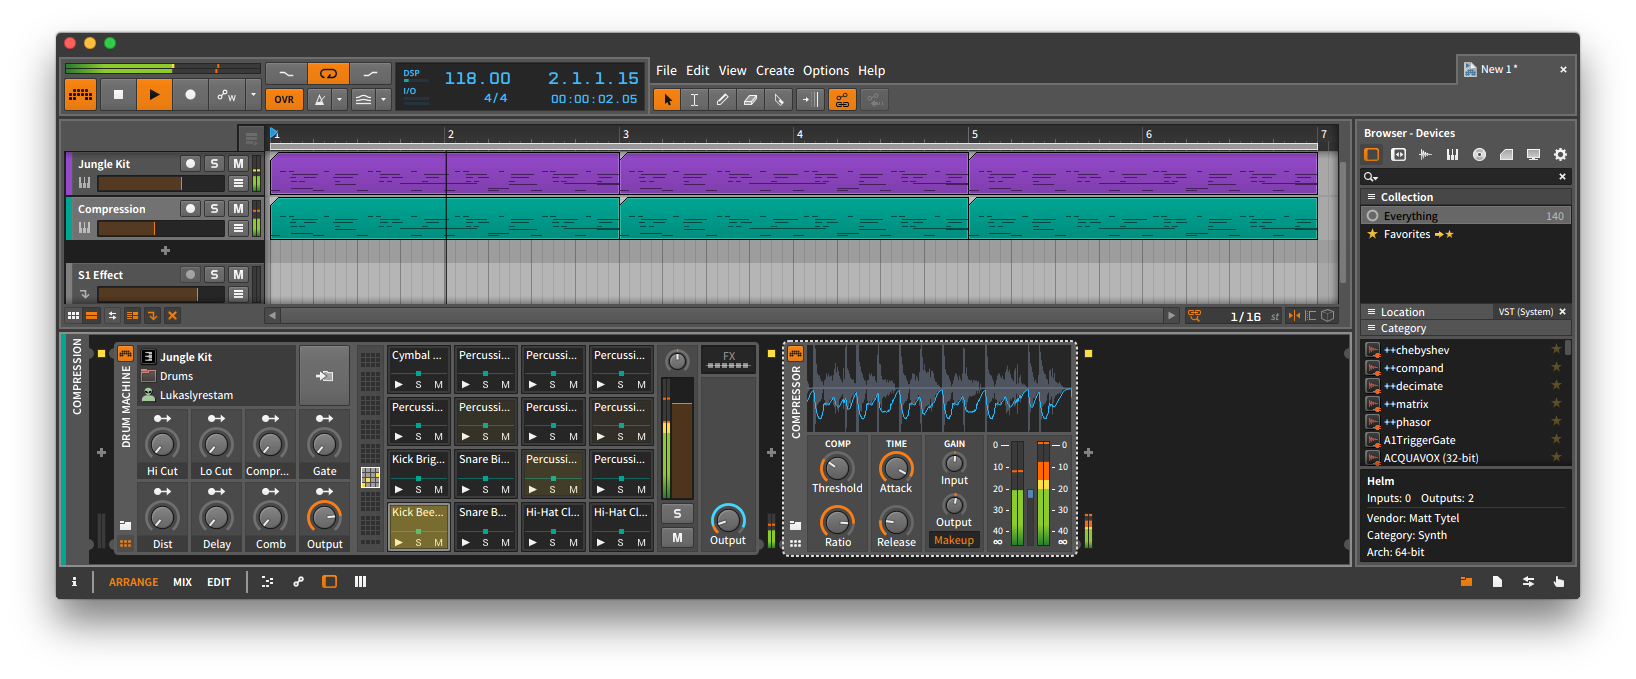
Step 2: Compress the Duplicate
Now it’s time to apply some compression to your duplicate track. Open your favourite compressor.

Step 3: Change the Attack and Release
To get your punch proper you want a slower attack and a quicker release. Adjust your attack and release until you hear the effect that you’re looking for.
In this example I really slammed the duplicate so the the parallel compression is obvious.
Here’s the duplicate compressed drum track after I found the attack and release that I wanted to get the punch I want in my final mix:
Step 4: Mix the original and the duplicate together
Now it’s time to blend the original with the duplicate. To keep your sound dynamic, you don’t want your duplicate to be too loud in your mix.
My mixes usually end up with the compressed track lower in volume than the original. How much lower is up to you. But the quieter it is, the more subtle the effect.
Here’s what they sound like when they’re mixed together:
Compared to the original, the tracks that are parallel compressed have that nice compressed punch with the body of the original still intact. Just the good stuff!
Always think of the entire mix
Remember that you want your drum track to fit in your overall mix. So make sure that your parallel compressed track is sitting well with the rest of your sounds.
It should compliment the rest of your mix, not stand out.
So use parallel compression in your next mix and get the best of both worlds—punch and body.

Rory Seydel is a musician, writer and father who takes pleasure in touring the world and making records. Creative Director at LANDR.
@Rory SeydelGear guides, tips, tutorials, inspiration and more—delivered weekly.
Keep up with the LANDR Blog.