
How to Use Compression to Solve 5 Common Mixing Mistakes
Compressors are great problem-solvers when you’re mixing. They’re a key part of your audio effects toolkit.
But if used wrong, compression can significantly color (and even mess up) your sound—which is no good, especially when it’s time to master your music.
So you need to know what you’re doing to make it work for you—and actually solve your issue.
In this article you’ll learn 5 common mixing problems and how to solve them using compression.
Get to know them and start experimenting with your own sound… You’ll be a compression expert in no time!
Compressors lower the volume of loud peaks–they even out the notes that stick out in the mix. That’s good because it allows you to bring up the gain of the whole signal without clipping.
What is a compressor?
First let’s dig into the basics!
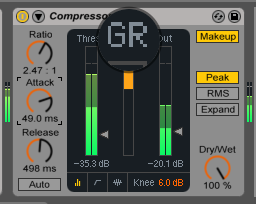
Compressors are funny creatures. They reduce the gain of your signal (‘GR’ stands for Gain Reduction on your DAW compressor). But they also reduce the dynamic range of a signal.
Dynamic range is the difference between the loudest and the quietest parts of a signal. When someone says a signal is very dynamic, it means that it varies a lot between quiet and loud parts–vocals are a good example of a sound with a wide dynamic range… like Mariah Carey!
You might be thinking: but isn’t reducing the dynamic range a bad thing?
Well, compressors lower the volume of loud peaks–they even out the notes that stick out in the mix. That’s good because it allows you to bring up the gain of the whole signal without clipping. So overall using compressors right gives you a more polished and punchier sound without going in the red. Amazing, right?
How to use compressor settings
To get the most out of your compressors you need to know how to use the settings right. Alway keep a clear intention in mind with your settings. And always remember to use your ears too!
The main compressor settings are: threshold, ratio, attack and release.
The main compressor settings are: threshold, ratio, attack and release.
Here’s what they do:
Threshold
The threshold is the level (in dB aka decibels) at which your compressor starts to work. When your signal hits the threshold that’s when the compressor starts working.
Drag down your threshold until you see the compressor working. You know it’s working when there’s activity in your GR meter.
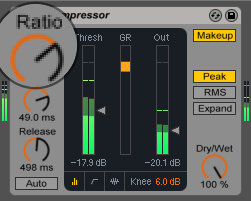
Ratio
The ratio is how much your compressor will compress.
[adbutler zone_id=”291816″ secure=”1″ type=”asyncjs”]
Higher ratios give thump and punch, but can distort or add a pumping effect. Keep the ratios in the low to medium range when you’re looking for a more natural effect.
At 1:1 there isn’t any compression happening.
Lower ratios (like 2:1 or 4:1) mean you’re applying low to medium amounts of compression.
Between 8:1 and 20:1 you’re applying heavier compression. When’re close to ∞:1 (infinity to one) your compressor is basically a limiter– that means the parts of your signal that go beyond the threshold will not go further (in terms of amplitude).
Attack
The attack is how fast the compressor starts to work. It controls how much of the initial impact and transients of the sound get through.
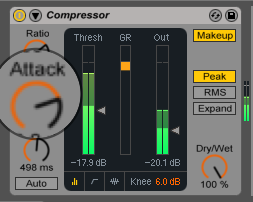
Slow attack is between 25 and 100 milliseconds (ms). It lets through a lot of initial impact so it gives you a punchier sound. But if your drummer played unevenly, that’ll be accentuated.
A medium attack is between 8 and 25 ms. It’s a good middle ground.
A fast attack (8 ms or less) makes your sound tighter and more even. It gives smoothness to the front end of the sound. But it also risks shaving off the initial impact (the transients) making it more dull and lifeless. So adjust the attack to suit your sound.
Release
The release is how quickly the compressor lets go–in other words, the time it takes for the compression to stop working.
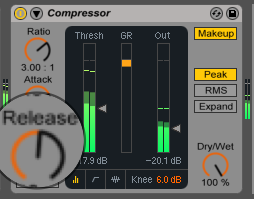
A fast release (100 ms or less) means the compressor stops compressing quickly after it started. It’s a more aggressive, gritty sound. Overdoing it makes sometimes produces ‘pumping’ artifacts.
Medium release is between 100 and 400 ms.
A slow release (greater than 400 ms) gives you more dynamics and smoothness. But overdoing it can suck the life and impact out of the next sound. It can also mess up the groove and feel of your track.
Keep in mind that all compressors are different, there’s no single formula.
Keep in mind that all compressors are different, there’s no single formula. So Listen and adjust to suit your tastes!
Hot Tip: Look at the GR (Gain Reduction) meter. Set the release so it goes back to zero (the top) before the next hit. Otherwise you’re most likely over-compressing.
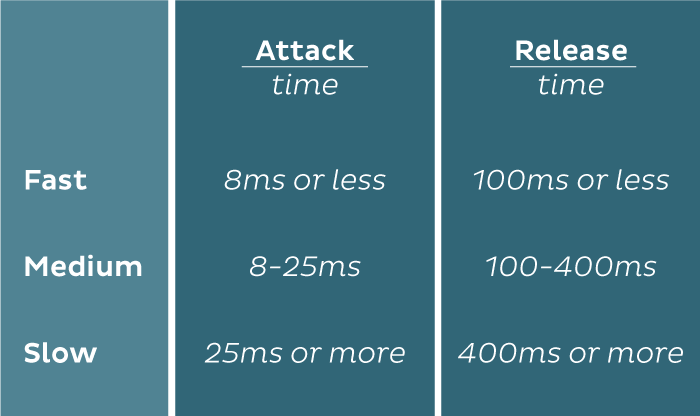
Here’s a little cheat sheet on attack and release times (in milliseconds):
5 Common Production Problems and How to Fix Them
Knowing why you’re using a compressor is key for getting the most out of it.
Before you slap that compressor on your track ask yourself: what am I trying to achieve or solve?
Here are 5 common problems producers have and how to solve them with compression:
Problem 1: I want to bring up the level of my drums but they start clipping.
Solution: Use a compressor to smooth out the peaks
How to do it: Drag and drop your favorite compressor on your drum track.
- Start with the ratio at infinity to 1 (inf:1) and your threshold at minus infinity (-inf). It’ll sound horrible but this will help you find the right attack setting.
- Set the attack all the way down (close to 0 milliseconds) then play your drum track.
- Slowly bring the attack time up until you start hearing a clear click–– the attack of your drums.
- Now dial the ratio and thresholds back until your drums sounds natural again. What sounds best to me is a ratio at 5:1 and threshold at -16 dB. But your results will vary depending on your drum sound.
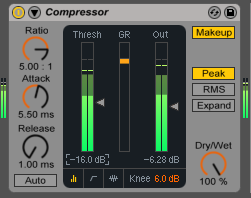
To tame the peaks on your drums, set your compressor to:
- Medium-High Ratio
- Fast Attack
- Fast Release
Why it works: The compressor reduces the gain of the peaks and lets you bring the level of your whole drum track higher. You get a more even and tight drum sound.
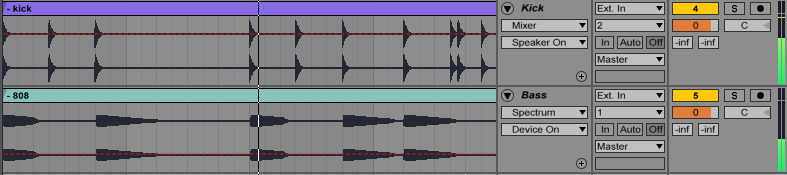
Problem 2: My kick doesn’t cut through because it’s interfering with the bassline.
Solution: Use sidechain compression
How to do it: We’ve done a step-by-step sidechain compression guide–take a look to revisit the basics.
To start, feed the kick into your bassline’s sidechain compressor.
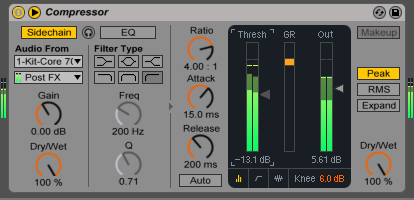
Set your compressor to:
- Medium Ratio
- Medium Attack
- Medium-Fast Release — tune it to the feel/groove of the song by ear
Why it works: Sidechain compression lowers the bassline when the kick comes through. That leaves space for the kick to get heard. Set the ratio to medium (say 5:1) to duck some of the bassline when the kick hits. Set the ratio to high (like 10:1) to cut out the bassline almost completely when the kick hits—this creates that noticeable pumping effect
Problem 3: My vocals are too quiet in some parts and way louder in others.
Solution: Stack two compressors
How to do it: Drag two compressors one your vocal track one after the other.
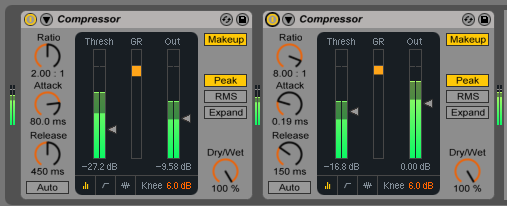
Here’s how to set your two compressors:
First Compressor:
- Low Ratio
- Slow Attack
- Slow Release
Second Compressor:
- Higher Ratio
- Fast Attack
- Medium Release
Why it works: The first compressor will be slow and natural-sounding. It’ll smooth out the dynamics and make the loudness more even overall. The second one is a faster compressor that’ll keep the punch of the sound.
Hot Tip: Sometimes having several (2-3) compressors doing a little bit of compression (much less gain reduction) sounds more natural than one doing a bunch of gain reduction.
Problem 4: I recorded a drummer playing but it sounds wimpier on the recording.
Solution: Compress the room mic recording.
How to do it: Record your drum kit using both direct mics and a room mic. Place the direct mics in front of each piece of kit. Place the room mic overhead. (more on mic’ing drums). Once you’ve got all the recordings in your DAW, apply a compressor on your room mic track.

Set your compressor to:
- High Ratio
- Medium Attack
- Fast Release
Why it works: A compressor lets you make your instruments sound more lively. This will give the impression that they were played with more intensity. You’re not looking for a perfectly clean sound here–think rock drums. You’re after a punchier sound. Compressing the room mic gives you a cool aesthetic effect.
A compressor lets you make your instruments sound more lively. This will give the impression that they were played with more intensity.
Problem 5: I used a compressor but now I actually have less punch.
Solution: Use parallel compression.
How to do it: To use parallel compression, duplicate your signal. The first signal will be your drier signal. The second signal will be your compressed signal. And because you have two signals, go extreme on the second one—lots of compression. Then mix the dry one in with just a bit of the compressed signal until it sounds right.

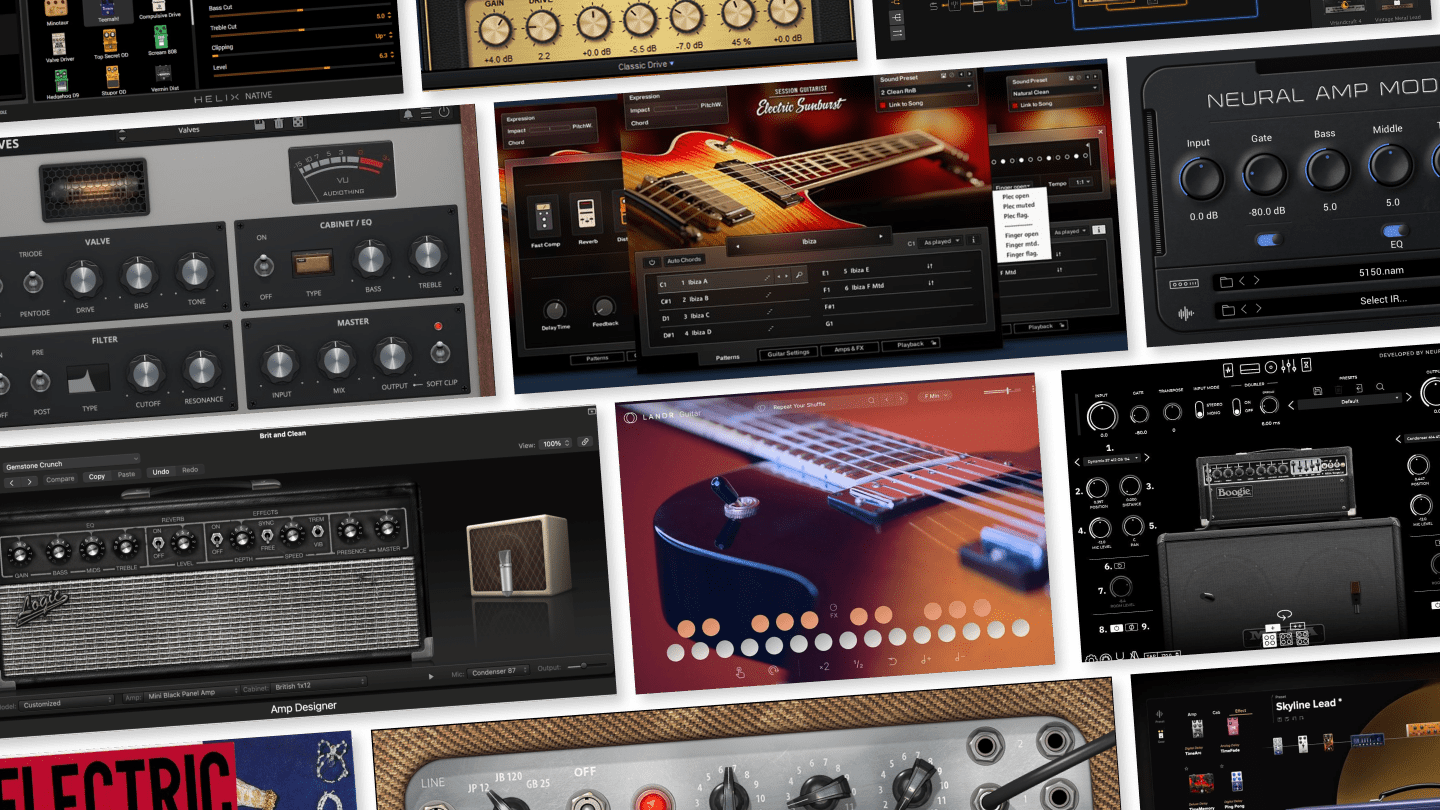
Get the tools to shape your sound with 30+ synths, instruments, effects and utilities plugins from industry leaders like Arturia, UJAM and more. Try LANDR Plugins.
Here’s how to set the compressor on your second signal:
- High Ratio
- Slow Attack
- Fast Release
Why it works: You don’t have to worry about losing your dynamic range because the drier signal retains all the body and dynamics. The compressed signal with a slower attack will add the missing punch and energy. Apply some light compression on your dry signal if you need to.
Hot Tip: EQ the compressed signal. Try putting a High-Pass Filter on it. This lets your dry signal be the main source of low end.
Compress to Impress
Remember, compressors have personalities. Some compressors are more colorful than others. Some are more transparent. Get intimate with your compressors and know what each does best.
Try this: put your favorite track in your DAW and put a compressor on it. Play with the settings–try drastic changes. Do some active listening to identify what they do.
Compressors shape your sound and even the sense of space in your mix. So develop your compression skills. They’ll take your mixes and masters to the next level.

Leticia is a lover of acid basslines and hypnotic techno. She DJs and produces under the name softcoresoft. Writer at LANDR.
@Leticia TrandafirGear guides, tips, tutorials, inspiration and more—delivered weekly.
Keep up with the LANDR Blog.